Our next stop in our Raft Walkthrough and Story Guide is Balboa Island, a large island with massive cliffs and a lot to discover. Follow this Raft Balboa Island walkthrough, and we'll help you reactivate the relay stations, and get the code to the next area!
< Previous: Raft Vasagatan Walkthrough | Raft Balboa Island Walkthrough | Next: Raft Caravan Town Walkthrough >
Preparing for Balboa Island
Balboa Island has some dangerous enemies, including one of the toughest bosses in the game -- the Mama Bear.
Here's what I recommend you bring with you:
- At least 1 Axe
- Basic Bow
- 60 Stone Arrows
- At least 1 Metal Spear
- Food
- Water
- 1 Head Light
It will take you several days to explore Balboa Island. I recommend that you travel to no more than one Relay Station or point of interest at a time -- you should aim to go back home when it gets dark.
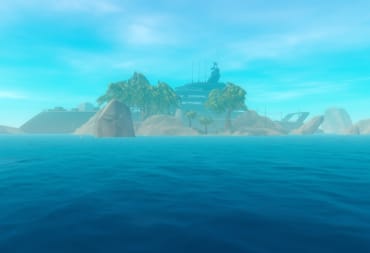
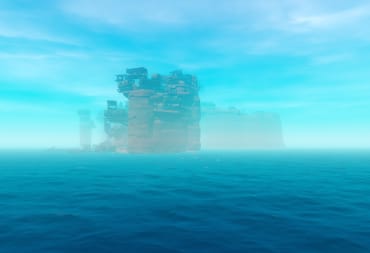
Approaching Balboa Island
As always, we'll start our journey with entering the Radio Code into the Receiver. As you get close to the island, you may discover massive cliffs in front of you despite the beacon being several hundred meters away.
Unfortunately, it seems possible to approach Balboa Island from the "wrong" side where you have no access for your Raft. In those cases, you'll have to go around the island until you reach the entrance.

Landing on Balboa Island
The beach you land on is pretty safe, but you may encounter your first creature very quickly -- a Llama. If you've managed to make a Net Gun, you can and should capture a Llama. You may as well get some Animals for your Raft while you can. Just beware of Bears!
A little further uphill is a sign pointing toward four locations. To the left is Relay Station 4 and Relay Station 6. To the right is Relay Station 2 and the Ranger Station. The Ranger Station requires some tools which you'll find elsewhere on Balboa Island. That means we're going to be going left first, starting with Relay Station 4.
Relay Station 4
Make a left at the first four-post sign you find. Go straight until you hit the canyon wall, then make a right.

Do NOT go left. The Mama Bear is there, and that will only result in horrible, horrible death if you're not prepared for a fight. We're going to the right first.
Keep walking and following the signs until you reach this point:

You'll find one or two regular Bears on your left; kill the Bears and loot them. You will also find two Wild Berry bushes outside of the cave. Collect them both; we'll need them to deal with the Mama Bear later. You can also find Dirt and Cave Mushrooms inside the cave.
Exit the cave and head back to the sign where you made a left. This time, go to the right. You'll see a locker with "Shhh! Bear Stash!" painted on the front. Open it up and you'll get Bruno's Saw.
Continue uphill -- you'll see a sign at the top of the hill that indicates Relay Station 4 is to the right. Follow that sign.
A short distance later, you'll encounter a raised drawbridge with some rocks on the ground.

The Relay Station 4 Bridge
If you brought a Basic Bow with you, you can shoot the lever on the other side of the gap with an Arrow. If not, you can pick up a Stone, put it on your hotbar, and throw it. Aim a little above the lever and you should be able to hit it in a few tries at most.
The drawbridge will suddenly slam down. While you don't take any damage from the drawbridge, it's probably a good idea to stay back anyway just in case something changes in an update.
Cross the drawbridge. You'll soon come upon Relay Station 4, but don't go into it just yet -- keep walking past it. You can find a grove with 2 Natural Beehives, your first chance to get Honeycomb. You'll also find three more Wild Berry Bushes, give you 5 Wild Berries in total. This brings you up to a total of 5, more than enough to deal with the Mama Bear.
Exploring Relay Station 4
Now it's time to actually enter Relay Station 4. There are five items of note to pick up here.
To the left of the entrance is a lever. Pull it and a nearby screen will display the message "1/3 Relay Stations Active." Near this lever is a bulletin board with a hand-drawn map note and the Blueprint for Fuel Pipes.

On the other side of the room is a note on a chair from Bruno that describes kids fighting. To the right of the workstation is Bruno's Hammer. Pick it up.
Avoiding (or Confronting) Mama Bear
Next, we're going to go back the way we came. Go over the drawbridge and follow the signs back towards the Ranger Station. Remember when I told you earlier not to go this way because the angry, angry Mama Bear is there? Guess what? We're going to see the Mama Bear.
Continue straight ahead and you'll see the sea beyond the cliff and a sign to your left warning about Bears. Whatever your approach, your ultimate goal is to approach the blue bin outside of Mama Bear's Cave:

Interact with the bin and you'll load it up with Wild Berries. Mama Bear will immediately run over and start eating. Stay a fair distance away from her and you can go into her cave.
Mama Bear's Cave features two important items: a Machete and the Blueprint for the Machete:

An Opportunity to Rest - or Fight Mama Bear
Exit the cave and take a right. Then, take a left and keep turning left as you work your way uphill -- you'll find a bunch of dolls here and five notes. Interacting with one of the dolls will give you a lightbulb that you can use for an achievement later.

Head back down the hill you came and take a left at the path where Mama Bear's Cave is -- you'll see the back of a sign warning about Bears. This path will take you back to your Raft if you've pulled in at the beach I told you to.
You also may hear a bell ringing in the area. There's a bicycle hidden away in the woods. Listen for the sound, get closer to it, and you can ring the bell for an achievement. Then, return back to the path you were on.
This is a good time to go back to your Raft if you need to. This would allow you to drop off your loot, water your Grass Plots if you have Animals, and resupply. This short break is also your best opportunity to fight and kill Mama Bear if you want to. It's not strictly necessary, but it can be done if you wish.
Whether you decide to fight Mama Bear or not, it's time to follow the signs towards Relay Station 6.
Relay Station 6
The road to Relay Station 6 will likely have Bees along the way, so this is where we'll put the Sweep Net to use. Remember, you can't get the Bees around a Natural Beehive, but you can get the swarms that are flying around in the air.
Take out your Sweep Net and approach the Bees. Take a swing with the Sweep Net as soon as they're close enough and you'll get 4 Bee Jars for each Swarm. Each Bee Jar allows you to build 1 Beehive.

Continue along the path until you see the sign for Relay Station 6. Follow the sign to the left as indicated and keep moving. You'll see a cave on you right with some vines in front of it:
You can cut away the vines with your Machete. Continue into the cave, cutting vines as you need to. Put on your Head Light when it gets too dark to see. You'll also be able to find Cave Mushrooms Dirt in this tunnel. At the end of the tunnel, you'll find another note from Bruno on the ground.
Eventually, you'll come out the other side and see Relay Station 6. Start heading up the stairs. Make sure you're looking down as you climb up -- you'll find another Note on the staircase towards the bottom.
Go inside the building when you get to the top. You'll see Bruno's Wrench on the left and some plastic on the ground. Pick this stuff up and then head into the room. There are three interesting things here:

First and foremost, this is where you'll unlock Johnny, another playable character. Next, the Fuel Tank blueprint is on the desk to the left. Finally, the switch to activate the Receiver is at the back of the room. Pull the lever to turn it on.
Once you've activated Relay Station 6, head back the way you came and start making your way towards Relay Sation 2 by following the signs.
The Toxic Pit
You'll know you're almost at Relay Station 2 when you see a pit of toxic goop surrounded by wooden spikes. It probably goes without saying, but don't fall into the toxic goop. It hurts you.
You're going to have to jump along the boxes to cross the pit:

Once you get to the other side, you'll see Relay Station 2 on the left and the Ranger Station on the right. Start by going to Relay Station 2.
Relay Station 2
Exploring Relay Station 2 is pretty easy. First, go into the door by passing through the deck. You'll find the switch to turn on the Relay Station on the wall. Activating this station will give you the code you need for the next area, Caravan Town.
Next, grab a note from the locker to the left. Bruno talks about how he and his sister Astrid were put in charge of the Relay Stations. There's not much else up here aside from a ton of Plastic. Head back down the tower and move over to the Ranger Station.

Ranger Station
Enter the Ranger Station. On the right you'll see a tool rack; place all three of Bruno's Tools and the rack will fall on the ground, revealing a Note. A mattress in the back has another note featuring a schedule. This should be the last note you need for the Balboa Historian! achievement. Finally, you can find the blueprint for the Biofuel Refiner on the desk. Pick it up.
Optional Hunting and Gathering
With Balboa Island conquered, you can opt to leave. However, this is a good opportunity to get Goats, Llamas, and Bee Jars. Bears respawn and you can fight them for Leather, too.
There's also a fair amount of junk that you can find in the waters surrounding Balboa Island, just like any other island. You may want to dive in to get it -- though, as always, you should be mindful of the Shark.
Once you're ready to leave, pull out from the island, enter the code for your next destination, and get moving.
< Previous: Raft Vasagatan Walkthrough | Raft Balboa Island Walkthrough | Next: Raft Caravan Town Walkthrough >
Have a tip, or want to point out something we missed? Leave a Comment or e-mail us at tips@techraptor.net
One of my earliest memories is playing Super Mario Bros. on the Nintendo Entertainment System. I've had a controller in my hand since I was 4 and I… More about Robert N