The next part of our Raft Walkthrough will tackle Vasagtan, a beached cruise ship that has a mystery to unravel, some good loot, and deadly enemies. Here's a walkthrough of how to complete Vasagatan.
< Previous: Raft Radio Tower Walkthrough | Raft Vasagatan Walkthrough | Next: Raft Balboa Island Walkthrough >
Preparing to Board the Vasagatan
First and foremost, Vasagatan will be much more challenging than the Radio Tower. You're going to want to bring some supplies on board the ship with you. You'll also want some weapons to fight the enemies inside of the ship.
I recommend that you bring the following:
- 1 Metal Spear
- or 3 Wooden Spears
- 1 Basic Bow (optional)
- 4+ Head Lights
- Food
- 2+ Bottle of Fresh Water
I strongly recommend that you max out your food, water, and health before you leave, too. You're going to spend at least an hour running around the ship and you don't want to run low on food or water in the middle of a fight!
Boarding the Vasagatan and the First Floor
Anchor your Raft near the rear of the Vasagatan. Go to the rear of the ship and walk through a door that says "Authorized Personnel Only." Head down the tunnel and pull the lever on the right wall to turn a light on above a table. You'll find a note from Hanne talking about the captain's plan to head towards a city down south.

There's various loot in the room, so collect it all. Then, grab the Crowbar on the table with the red lamp and use it to open the closed door with an "Authorized Personnel Only" placard.
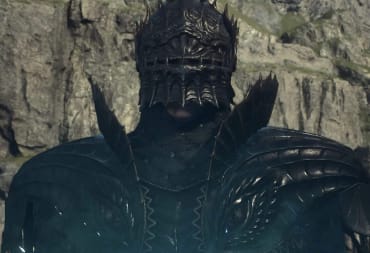
Once you enter the hallway, you'll hear noises coming from a door on the left. A giant rat called a "Lurker" is on the other side of the door, so have your Spear or Bow at the ready. Open the door and get ready to kill it.

How to Kill a Lurker in Raft
You can kill a Lurker by staying a short distance away and waiting for it to jump at you. When it jumps at you, move forward and poke it with your Spear. Then, back away until it jumps again. Repeat this process until it's dead.
Continuing to Explore the First Floor
This room also has a red locker with a padlock on it to the left of the door when you walk in. You'll need Bolt Cutters to open it, but you won't find them in this room. Go back into the hall for now -- we'll come back here later.
The next door down the hall leads to the stairs and requires a Blue Key, but we don't have that yet. Keep heading down the hall and you'll see a bathroom door on the right side. The bathroom has a Red Key and a few pieces of junk. Collect the Red Key and the junk. Then, head outside of the bathroom and make a right.
Continue down the hallway and you'll reach a dead end with two doors. The door at the end of the hallway requires the Red Key, but don't go in there just yet -- first, go into the door on the left.
This next room is the kitchen. It has some various loot, a second note from Hanne, and a Gas Canister. Pick up the Gas Canister, then head back out into the hallway and go through the door that requires the Red Key.
First, go to the opposite end of the room -- you'll find a Bolt Cutter and another Note from Hanne. This time, Hanne is talking about giant rats that the rest of the crew doesn't believe are real. You know, the giant rat you just killed a couple of rooms ago.

You'll see two workbenches at the back left of the room. The left workbench says that you need the following items:
- 1 Electrical Wires
- 1 Lighter
- 1 Gas Tank
- 1 Bullet
The right workbench says you need the following:
- 5 Mechanical Part
If you turn around, you'll see one of those Mechanical Parts sitting on a shelf in an open cabinet. Pick it up, grab the rest of the loot in the room, then exit and head back the way you came.
Continue down the hallway until you see the locked door you came through; you can most easily recognize this door because the Crowbar has been left on the floor. Go into the room on the right where you first encountered the Lurkers. You can now open up the locker with the Bolt Cutters. You'll find the Blue Key inside and a note from Olof that tells a story of the crew complaining about the route the ship is taking.
The Second Floor
Now that you have the Blue Key, exit this room and go to the left. You can now open up the door to the Stairs. Walk up the stairs and you'll find yourself in a much nicer area with pool tables. You'll also clearly hear the sound of Lurkers crawling around.
This staircase opens up access to the upper levels of the ship. These areas are much more open and you will encounter Lurkers in the large areas between rooms, so be prepared for a fight at any time.
Go up to the second floor. Turn left and go towards the door with a green exit sign above it; the sign shows a person, a down arrow, and a door. This leads to a bar; enter the room.

Head over to the bar. Grab the Bullet. There's also a note right next to the Bullet where Olof talks about the Lurker problem.
Turn around and head to the DJ booth on the stage. You'll find a Mechanical Part on the ground.
Take off your Head Light (If you're wearing one) and head outside -- take care not to fall off of the ship! You'll see an empty pool on the deck -- head in and you can find the third Mechanical Part at the bottom of the empty pool.

Go back inside the bar, put your Head Light back on, and head back to second floor staircase in the room with the pool tables. You can find a single piece of Plastic behind the bar, but there isn't much else here otherwise.
Head down the hallway and go into the room marked with a "1" sign -- you'll find a piece of Plastic in the bathroom and not much else.
Exit the room and turn left, heading towards the end of the hallway. Turn left at the end of the hallway and then turn left again; you'll see a partially-open door with a Lucky Cat statue. Unfortunately, this statue is only decorative and there's no way to get it, so proceed into the room marked "2."
There are two items you can get in Room 2. First, open the door to the bathroom on your left and grab another piece of Plastic if you'd like to. Then, grab the cassette tape on the desk to get another note where Hanne and Olof have a conversation.

Exit Room 2, head to the left, and open Room 3 -- the Captain's Quarters. You'll have to fight a Lurker inside. Kill it and you'll also see a safe that requires a Four Digit Code, but you don't have that yet; for now, turn around and exit the room. Turn left and go to the door at the end of this hallway.
This final room on the second floor has a bunch of crates, a fair amount of junk (mainly Plastic and Scrap), a bit of food in a cooler, and the fourth Mechanical Part. Loot the room.

Exit the room with the crates.
Head towards the Supply Closet, make a left, and then head back to the staircase where you entered the second floor.
The Third Floor
At this point, you're probably carrying a lot of stuff. It may be a good idea to go back to your Raft, store your loot, and resupply as needed. You're going to have some more fights ahead and you don't want to lose your inventory if you die. If you do go back to your Raft, drop off your loot and then return to the top of the second floor staircase. You can find the third floor staircase right next to it.
Go upstairs to the third floor. Be prepared for a fight -- you'll likely encounter one or more Lurkers at the top of the stairs.
Once you've killed the Lurkers, you'll see doors with green exit signs on either side of the room. Open these, but you don't have to go outside -- there's nothing to get on this level. Instead, head down the hallway behind the stairs.
There's an exit door on the left. Open it, but do not go outside. On the right is a locked room that requires a Key Card; we'll have to open this later. Continue down the hallway and you'll enter a dining room. You'll find a Crate on the metal serving tables with food. To the left of this table is a Supply Closet that's blocked off; you can find the fifth and final Mechanical Part on the floor.

Turn away from the serving table and you'll see a round table with a piece of Plastic, the Four Digit Code you need to open the safe in the Captain's Quarters, and a note. The note talks about Olof wanting to train the Lurkers into an army -- probably not the best sign that the guy has kept his sanity.
Open the other exit door on the opposite side of the room. Then, take off your Head Light again and head outside to the helipad. You'll find various loot out there, so grab whatever you like. Then, come back inside and put your Head Light back on.
Head down the hallway, make a left, and make another left -- this is the staircase to the fourth floor. Don't worry about the Four Digit Code just yet -- we'll open the Captain's safe on the way back down. For now, head upstairs to the next floor.
The Fourth Floor
You'll likely find at least one Lurker on the fourth floor. Kill any Lurkers, and then return to the top of the stairs.
Look to your right and you'll see a room with a raised dance platform. You can find the Key Card on the dance platform and a piece of Scrap on a serving table to the left.

There are several exit doors that will take you outside, but there's nothing useful on the outer decks on this level; simply open them and keep moving indoors.
Turn around, face the stairs, and take the left-hand hallway. You'll see a door with a black refrigerator blocking the path. This requires a Car Jack to move, so we'll have to come back here later.
Back to the Third Floor
Go back down to the third floor and be ready for a fight -- this is where you're going to learn that Lurkers can respawn. Kill the Lurker, then turn right and right again to the Key Card door. You can now open this door since you found the Key Card on the fourth floor, so go ahead and open it.
The Fifth Floor
The Key Card Room is some kind of office. It has the Green Key on a desk. Pick up the Green Key. Exit the Key Card room, turn left, and then turn left again. Head back up the stairs to the fourth floor. Turn left at the stairs, walk down the hallway, and turn left again to find the stairs up to the fifth floor. Take these stairs up one level.
Turn left on the fifth floor and you'll find a Crate with some supplies. Go to the opposite side and you'll find a door that requires the Green Key. Have your Spear or Bow at the ready before you open this door -- there's a Lurker in this room. Open the door and kill the Lurker.

There are exit doors on the left and right of this room, but there's nothing on the deck on this level, so don't worry about going outside.
Walk towards the bookcases and go past them. You'll see a bed with a Lighter and a Cassette Tape on it and a Crate on the floor. Collect all of these items. The Cassette Tape tells the story of what happened when the boat was beached on the island you're currently on.
Exit this room and work your way back down to the second floor.
Back to the Second Floor
Turn right when you reach the bottom of the stairs and head towards the Captain's Quarters. The Lurker in here has probably respawned; if so, kill it. Then, open the safe. You'll find Electrical Wires and a note. The note strongly implies that Olof has sicced his Lurkers on the crew and passengers.
Exit the Captain's Quarters, turn right, and walk into the room with the pool tables where you first entered the second floor. Head down the stairs to the first floor.
Crafting What You Need on the First Floor
Make a right at the bottom of the first floor stairs. Walk all the way to the end of the hallway and enter the room with the crafting tables. Interact with the table on the right and you'll make a Car Jack. Interact with the table on the left and you'll make a Bomb.
Back to the Fourth Floor and the Car Jack Room
Make your way back up to the fourth floor, watching out for any Lurkers as you go. Return to the door blocked by a refrigerator. You can now move it aside thanks to the Car Jack, so open up this doorway.

Enter the room that was blocked by the refrigerator. You'll see a desk at the far side of the room with a Crate underneath it and a note on top. Pick up the Crate to get some supplies. The note is a magazine article titled "Cities in the Blue" that talks about building floating cities to deal with the rising ocean levels.
Turn around and head left into the Bathroom. You can find a Crate of food in there. Then, exit the Refrigerator room. Turn left, turn left again, and head all the way up the staircase to the Bridge.
The Sixth Floor, the Bridge, and the Bomb
Once you're at the sixth floor, you'll be ready to open the Bridge with the Bomb. Do not open the door with the Bomb just yet.
This is probably common sense, but I'm going to say it explicitly anyway -- do not stand next to the Bomb when you place it. Run down the stairs and stand on the far side of the staircase. If you're too close to the bomb, you'll lose half your health (and you might even die if you're below half health).

Head inside the Bridge. There are exit doors on either side that lead to the outer deck; once again, there is nothing of value to get there, so you can safely ignore these doors.
Head towards the ship controls and you'll find your three delicious pieces of loot.

On the left is the Blueprint for the Steering Wheel. In the middle is the Blueprint for the Engine. And finally, the Steering Wheel itself has a sticky note with "Balboa?!" written on it -- this gives you the Radio Code for the next Story Island. Collecting this last note will get you the "Vasagatan Historian!" achievement. There is also a food Crate, a supply Crate, and various other junk in the room. Collect it all.
Leaving the Vasagatan - or Not
You can now safely leave the Vasgatan. Before we end this part of the Raft Walkthrough and Story Guide, though, consider sticking around on the ship and doing a little Lurker hunting. Lurkers are easy to fight and they're a good source of Raw Meat -- why not take the opportunity to stock up on some extra food?
Whatever you decide, it's time to return to your Raft. Work your way back downstairs and take your Head Light off so you don't waste any more of it. You'll want to dive into the water under the boat -- you can find a sixth Mechanical Part (which you don't need any longer) and other items like Copper and Seaweed in the shallow waters, just like any other island.
Renovating Your Raft after Vasagatan
Before you move on to the next area, consider taking the time to renovate your Raft a little. This is a good opportunity to add an Engine and a Steering Wheel.

Renovating your Raft with these two new items will make navigation a lot easier. I strongly recommend keeping a Sail as a backup propulsion option -- you can only use Planks to fuel the Engine for now and you don't want to be stuck drifting if you run low on Planks.
Moving on to Balboa Island
Once you're done renovating, open your Journal, enter the Radio Code for Balboa Island (located in your Journal -- press T to open it), and get moving to your next destination.
< Previous: Raft Radio Tower Walkthrough | Raft Vasagatan Walkthrough | Next: Raft Balboa Island Walkthrough >
Have a tip, or want to point out something we missed? Leave a Comment or e-mail us at tips@techraptor.net
One of my earliest memories is playing Super Mario Bros. on the Nintendo Entertainment System. I've had a controller in my hand since I was 4 and I… More about Robert N