This Icarus Waterfall: Expedition Prospect Mission Walkthrough & Guide will help you make an epic journey across three biomes and unlock the Riverlands biome.
What You Need For the Icarus Waterfall: Expedition Prospect Mission
You're going to travel a minimum of 8 kilometers each way for the Icarus Waterfall: Expedition Prospect mission -- that's at least 16 km if you want to make it a round trip and walk back to the Dropship.
Here's what you're going to need for this Prospect:
- Stone Pickaxe
- Stone Axe
- Campfire
- Bedroll
- Stone Knife
- Wood Bow
- Stone Arrows
- Bone Arrows
- Wood Spear
- Bone Spear
- All Wood building pieces
- Wood Ladder
- All Cloth armor pieces
- Bandages
- Splints
- Wood Repair Hammer
- Crafting Bench
- Waterskin
- Firewhacker
- Rain Reservoir
How to Unlock the Icarus Waterfall: Expedition Prospect Mission
You can unlock the Icarus Waterfall: Expedition Prospect mission by completing either the Death Ray: Scan Prospect mission or the Searchlight: Scan Prospect mission.

Icarus Waterfall: Expedition Prospect Mission Walkthrough & Guide
Strap in for the long haul -- there's a lot to do in the Icarus Waterfall: Prospect Expedition mission.
Setting Up
You'll be landing smack dab in the middle of the desert, though you won't be staying there for long. Start by gathering materials and crafting the usual suspects:
- Stone Pickaxe
- Stone Axe
- Wood Spear
- Wood Bow
- 20 Stone Arrows
- Stone Knife
Start heading West. Kill any Hyenas or Cougars in your path and skin them -- you're going to need a fair amount of Leather, Fur, and Meat for the coming days.
Craft a Bedroll with your spoils. Use the leftovers to upgrade to a Bone Spear and Bone Arrows as soon as you reasonably can.
Make sure to collect at least 400 Fiber as you move -- remember, Fiber is more difficult to find in the Desert biome. Progress West towards Base Camp 1.
Build Base Camp 1
Your first base camp will be roughly halfway between the spawn point and your first major objective. Build at least a 2x2 building and equip it with a Crafting Bench, Campfire, and Bedroll at the minimum.
Craft the following items:
- 1 Longbow
- 2 Waterskins
Make sure to set your spawn point at this Bedroll! Don't plan to stay overnight -- if you've been keeping a good pace, it should be roughly around 12:00-14:00 and you should have plenty of time to move to the site for Base Camp 2.
Craft the items you need to craft, cook 2-4 pieces of Meat, and make sure to fill up your Waterskins in the river -- this will be the last easy source of Water for some time.
Find a Route to the Riverlands Boundry
Continue head roughly northwest until you approach a canyon. This canyon will turn southwest and transition into a Forest biome.
The usual threats are here -- watch out for Wolves and Bears. Make your way to the map marker and you'll get prompted to collect a Beacon. Don't go get it just yet -- it's time to set up another building.
Build Base Camp 2
Build Base Camp 2 roughly near the cliff face. Make sure to chop down trees -- you don't want a wind storm crashing one of these through your roof. (Besides, you're going to need a lot of Wood in short order). Craft another Bedroll, Campfire, and Crafting Bench, then set your spawn point to this new Bedroll.
Before you leave, you're also going to want to build a Rain Reservoir. The nearest sources of water are on the other side of a mountain and several kilometers east back in the desert, so you're going to need to depend on an alternative for now: rain and ice.
Throw some Wood and all of your Meat onto the Campfire. It's probably after 18:00 or close to it; now's a good time to sleep and start a new day.
Collect Beacon from Dropship
Once you're settled in at Base Camp 2, start moving towards the Beacon on the map. This will occupy your Back/G slot, so make sure not to pick up any animal carcasses while you're carrying it or it might bug out.
When you reach the Beacon, you'll notice that you're right on the border of an Arctic biome -- this is an excellent source of water for now. Grab a bunch of Ice (at least 20 or so pieces) and head back to Base Camp 2. Chuck the ice into the Rain Reservoir so it can start melting. Now, it's time to get to work.

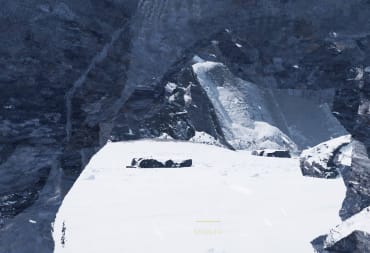
Construct Your Way Over the Rock Barrier
Now we come to what is perhaps the most challenging part of the mission. You're not going to be fighting some super-tough enemies or braving a deadly storm (at least not yet) -- you're going to have to make your way up to the top of a cliff. There's just one small problem: there's no way to get up there other than building.
This is the point where there are several options available to you. You could, for example, build ramps/stairs along the way and parkour your way up. I prefer the safe, reliable option myself and I went with some scaffolding.

Keep in mind that Icarus has a structural integrity building system similar to Valheim -- you can't just build a tower straight up into the sky. I chose to build several platforms, moving them forward onto the rocks as I went. It took over a hundred Wood Beams alone, nevermind all of the Wood Floors and Ladders. It's probably a good idea to build railings, too, to prevent any risk of falling off.
Once you've built up all of the scaffolding, you'll be treated to a beautiful view and a voiceline talking about the aforementioned beautiful view. Congratulations, you've made it to the top of the cliff!
Now you have to make it down the other side.

Descending the Cliff
Now that you're at the top, it's time to drop down to the other side. If it's close to nighttime, head back to Base Camp 2 and sleep -- you definitely don't want to try to descend the cliff when it's dark no matter how well you're equipped.
It may be a good idea to craft a couple of Splints, too, since there's a good chance that you're about to take some fall damage (and possibly break a bone or two).
Once you make your way down, turn around and you'll see the way back home. Surprise, surprise -- you have even more building to do!

Build Base Camp 3
Once you're back on the ground, it's time to build Base Camp 3. This is where you must make a decision because you have two options:
- Option A - Build scaffolding to make it back up the cliff, climb down the other side, and walk several kilometers back to the Dropship.
- Option B - Pick up your Bedroll once you've completed the objective and die, respawning at the Dropship and saving yourself a trip.
If you're carrying any Workshop gear, Option B is no good -- you'd lose all of the gear you brought in with you. You'll also get that nasty XP Debt penalty that effectively erases your progress on your current level. Fortunately, there is an abundant supply of Wood and Fiber nearby and the cliff on this side is much shorter.
If you do decide to walk back home when you're done, you should know that the trip can be done in about 4-8 in-game hours depending on whether or not you encounter any Storms or other setbacks. It's honestly not that long.
Either way, you're still going to need to build Base Camp 3. Craft 2 Bedrolls and 2 Campfires, placing one of each down inside of Base Camp 3. Craft a Firewhacker, too -- you may very well need it soon. Once you're set up, you're going to have a few kilometers more of walking. It's probably close to night again, so sleep and get moving in the morning.
Build Base Camp 4
Your next move is to head West towards your final objective. You're going to be building Base Camp 4 about halfway there -- it's always good to have a place to respawn in case you die.
Bear in mind, this may be the first time you're encountering a new hazard: Lightning. As you might expect, Lightning and Wood buildings tend not to mix well:

The Firewhacker is a stopgap solution that can put out fires, but you still run the risk of being overwhelmed. The next best solution is to build a Lightning Rod... but honestly, that's a lot of effort for an area that you're going to be in for probably no more than an hour. It's just not worth it.
Set up Base Camp 4 near where I've indicated it on the map and then hurry along towards your final objective. Pay special attention to the cliff -- you may have to fight one or more Bears and/or multiple Wolves and there isn't much room to run. Snipe them from afar with your bow.
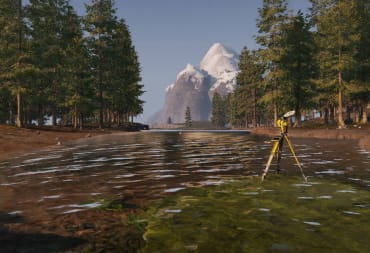
Reach the Transmission Zone
Once Base Camp 4 is built, you only have a little more distance to go. Before you know it, you'll be at your objective. Unfortunately, there is no clear marker for the Beacon -- and the best place to build it is in the middle of a river.
It's easiest to grab some Wood, swim out to the rock, and build a small platform and ramp. Place the Beacon on top and that's it -- you've completed your objective.
Returning Home
And now we come to the close of the Icarus Waterfall: Expedition Prospect Mission Walkthrough & Guide. There's one final objective to take care of: returning home.
If you don't care about losing XP and your Workshop gear (or you haven't brought any), find a creative way to kill yourself in-game and respawn near your Dropship.
If you want to walk back, it's not all that difficult. The scaffolding you've built should still be in place on both sides of the cliff unless you've taken a very long time with this mission.
You'll have to go to your Base camps in reverse order; here's how to get back, step by step:
- Proceed to Base Camp 3. Set your spawn point at this Bedroll.
- Climb over the cliff and descend to the other side.
- Set your spawn point at Base Camp 2.
- Head through the Desert and make it to Base Camp 1. Set your spawn point here.
- Return to the Dropship.
The entire return trip can be done in 4-8 in-game hours. In total, you'll have been on the planet for at least 3-5 in-game days. With this done, you've opened up a brand new section of the map -- and a new Prospect, too.
Have a tip, or want to point out something we missed? Leave a Comment or e-mail us at tips@techraptor.net
One of my earliest memories is playing Super Mario Bros. on the Nintendo Entertainment System. I've had a controller in my hand since I was 4 and I… More about Robert N