In this guide, we'll tell you how to open the Atomic Heart Scientific Testing Ground 1, how to solve the puzzles, and what loot you can find inside.
Quicklinks: Scientific Testing Ground 1 Location | How to Open Scientific Testing Ground 1
Bronze Challenge | Silver Challenge | Gold Challenge | Loot
Where is the Atomic Heart Scientific Testing Ground 1?
You can find the Atomic Heart Scientific Testing Ground 1 not too far away from the Monorail Station after the train crashes. Head Southwest towards a windmill, a balloon, and some parked military trucks next to crates. Scientific Testing Ground 1 is inside a round, blue bunker.

How to Open Scientific Testing Ground 1 in Atomic Heart
You can open Scientific Testing Ground 1 in Atomic Heart by making your way to this tower near the bunker:

Once you find this tower, climb up top and you'll find a "Volan" which allows you to interact with the security cameras. Select a security camera near the blue bunker, go into Scan mode, and then interact with the bunker while the camera is in Scan mode to open it. You can then head inside and go down the elevator to enter Scientific Testing Ground 1.
Atomic Heart Scientific Testing Ground 1 Bronze Challenge
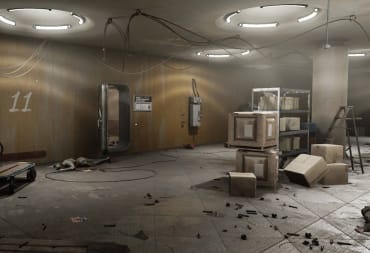
Once you enter Scientific Testing Ground 1, head straight ahead and you'll find a Breakroom on the left side of the hallway. Use it to save your game. You'll also hear some music to your right, but don't go there just yet -- first, continue down the hallway past the Breakroom and go around the corner. You'll find some loot there.
Go back to the breakroom and head through the red and grey metal gates toward the music. You'll see a grey metal wall with yellow arrows and a magnet symbol on them. Look up and use your Shok ability to make the first wall go down. You'll have to go past another two walls, using your Shok ability on the ceiling magnets to make them go up or down.
Proceed further down the tunnel and you'll enter a room with a lot of magnetic walls. The basic idea is the same: use Shok on the ceiling to make the platforms go up or down. You eventually want to get to this point:

Do a dash jump to the magnetic platform directly in front of you. Go up the stairs to your left and you can grab some Crafting loot from a chest. Then, head back down the stairs and stand on the magnetic platform again. Shok the ceiling to raise it up and you'll be able to easily jump onto the platform with the exit door.
After you exit the first challenge room, turn left and you'll see a chest in a caged room where you can grab some loot. Grab it and proceed further ahead.
The next room is a hallway with some junk and not much else. Go deeper into the hallway and you'll see a vent on a wall toward the back. Climb into the vent and go through it. When you land, you'll see three doors.

The door on the left is a Breakroom. The door with the golden light straight ahead has a "Bronze Lootyakin" where you can get the Fox - Handle Upgrade Recipe. to your right is the path to the silver challenge. Grab the Bronze Comrade Lootyakin, save your game, and then proceed into the boiler room on the right.
Atomic Heart Scientific Testing Ground 1 Silver Challenge
The boiler room to your right is not going to have much of interest, although you will have to fight some enemies. After you defeat them, Head to the right and you'll see a hallway with a blue truck. Go into this hallway, then turn right and go through the broken wall into an office. The office has some loot and a Breakroom where you can save your game again.
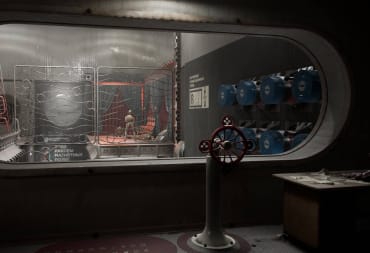
Proceed through the door marked "Magnetic and Mechanical Testing Workshop 02." You'll see another magnetic door on the other side. Use Shok on the magnets to open the door. Proceed ahead and you'll hear the Silver Comrade Lootyakin; this has the MP - Expansive Converter upgrade. Grab it and you're done with the silver challenge.
Atomic Heart Scientific Testing Ground 1 Gold Challenge
Head back to the magnetic door you just opened and use Shok on the magnets. The path you entered through will close, but another path will open on the right. Head through this path and you'll enter another chamber with moving magnetic platforms.
This will be another simple jumping puzzle, although this one has one tricky part -- the exit door is locked. Make your way to the ground underneath the exit door, then change the magnets on the ceiling to red and you'll see a laser puzzle revealed on one of the walls behind you. Here's where it is:

Solve the laser puzzle, then work your way back up the magnetic platforms and go through the exit door.
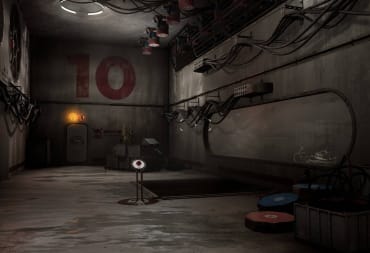
Proceed through the next tunnel and you'll see a metal grate and another door. You're almost at the end, but first, we're going to grab some more loot. Take a right through the next door and you'll see a staircase going up with some wood planks on it. On the right of this hallway, you'll see a room marked "Silo Equipment 02" with a loot chest on the upper floor.
Further down this tunnel and to the right is another loot chest along with a vent. You'll hear the Comrade Lootyakin music, but don't be confused -- you're hearing one of the Comrade Lootyakins from an earlier part of the facility through the vent.
Turn around and go back down the stairs with the wooden ramp. Take a right at the end of the hallway and you'll find the room with the Golden Comrade Lootyakin, a Breakroom, and an Elevator. The Golden Comrade Lootyakin will contain the Recipes for KS-23 - Extended Magazine and the Zvezdochka - Saw Dance Upgrades.
Once you're sure you've grabbed all three Comrade Lootyakins and all of the loot, you can activate the elevator with the wooden doors and leave. It will take you back up to the surface and you can continue with your mission. Don't worry if you've missed something -- you'll be able to return to Scientific Testing Ground 1 again by entering it the same way.
Atomic Heart Scientific Testing Ground 1 Loot
- Fox - Handle Upgrade (Bronze Comrade Lootyakin)
- MP - Expansive Converter Upgrade (Silver Comrade Lootyakin)
- KS-23 - Extended Magazine Upgrade (Gold Comrade Lootyakin)
- Zvezdochka - Saw Dance Upgrade (Gold Comrade Lootyakin)
- Various Crafting materials
We're all done with the Atomic Heart Scientific Testing Ground 1 Guide. Make sure to check out our other guides below!
Have a tip, or want to point out something we missed? Leave a Comment or e-mail us at tips@techraptor.net
One of my earliest memories is playing Super Mario Bros. on the Nintendo Entertainment System. I've had a controller in my hand since I was 4 and I… More about Robert N