In this guide, we'll tell you where to find the Atomic Heart Scientific Testing Ground 12, how to get inside, and how to solve its puzzles!
Quicklinks: Scientific Testing Ground 12 Location | How to Open Scientific Testing Ground 12
Bronze Challenge | Silver Challenge | Gold Challenge | Loot
Where is the Atomic Heart Scientific Testing Ground 12?
The Atomic Heart Scientific Testing Ground 12 can be found next to the Infirmary on the Northeast side of the map, on the other side of the bridge. You cannot cross over the bridge until you confront Petrov in the "Petrov of Opera" Quest at the Theater.
How to Open Scientific Testing Ground 12 in Atomic Heart
You can only open Scientific Testing Ground 12 after you've completed the quest "Petrov of Opera" and finished exploring the Theater. Once you have, the bridge will be open and you can travel across it to the Infirmary. It is strongly recommended that you take a car; otherwise, you will have to fight dozens of Mutants and multiple Plyusches.
Once you reach the Infirmary, clear out the immediate area and stand in front. Make sure to destroy any Daisy cameras so you don't set off an alarm.

On the left, you'll see a bunker with a red roof. As usual, this bunker has a Save Point and a Nora where you can Craft supplies and set up your Skills.
Go into the bunker, get whatever supplies you think you'll need, and save your game. Then, step back outside -- you'll see a path marked by wooden planks heading down to the beach.

Take the path down to the beach. You're going to encounter a few more robots along the way, so be ready for a fight.
The beach will have a small amount of loot in a chest next to the rowboat, so go ahead and grab that. Then, turn around.

You'll see that the beach continues in the opposite direction. Walk toward the dock you see in the distance. Along the way, you'll see several Mother plants spitting out Sprouts -- make sure to kill the Mothers on the cliff You'll see a chest next to one of the bunkers; as usual, loot it for Crafting materials.
Continue along the beach and you'll eventually see a hole in the cliff on your left with some wood supports. There's a Daisy camera nearby, so make sure to destroy it.

This hole in the cliff is the entrance to Scientific Testing Ground 12.
Head inside. You'll find another Nora if you need to resupply. Deeper in the cave, you'll see a chest next to an elevator. Loot the chest, then go down the elevator and you'll enter Scientific Testing Ground 12.
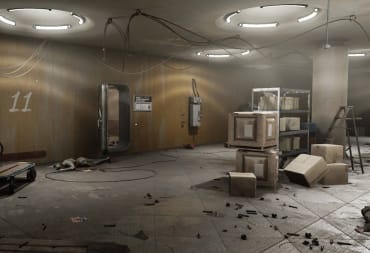
Atomic Heart Scientific Testing Ground 12 Bronze Challenge
The Bronze Challenge is fairly straightforward. Before we tackle it, though, we're going to get a bit of loot. Drop down into the pit and go to the back left corner -- you'll see a yellow sliding door. Use Telekinesis to slide it to the right, then head into the tunnel. You'll find a chest to the left with some Crafting loot.
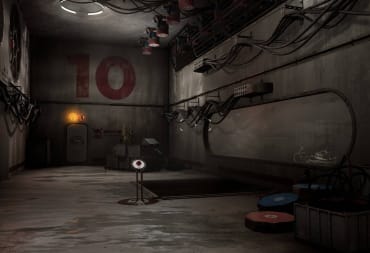
Head back out the pipes and climb up the magnetic platforms to get back to the starting area. You'll see a red crank, just like the ones in Scientific Testing Ground 6. Rotate the red crank until it's on 4 dots and use Shok on the upper left platform to swamp the magnets and cause the platforms to raise up. Then, rotate it to 3 dots and repeat the process: use Shok to cause another set of platforms to raise up.
Jump across the gap. You'll have to open a combination lock on a doorway. Walk through the doorway and you'll find a long hallway with some stairs that ends in a room with yellow pumps. You'll find a Breakroom to the right at the end of the hallway. There are some desks and cabinets near the Breakroom, but do not walk through that nearby door just yet -- that will lead you into a boss fight.
The Bronze Comrade Lootyakin can be found just past the Breakroom on the right side of the pump room. Grab it, and you'll get the KS-23 Thermal Scope Upgrade.
Atomic Heart Scientific Testing Ground 12 Silver Challenge
The Silver Challenge is on the opposite side of the Breakroom in the room with the yellow pumps. Make sure you have a Fat Boy, at least 12 Fat Boy rockets, a Kalash, at least 90 Kalash rounds, and plenty of healing items; I recommend at least 3 Large Neuromed capsules. As soon as you walk through the door, you'll have to face an NA-T256 "Natasha" robot and several LUC-1 "Owl" robots.
Focus on killing the Natasha with your Fat Boy (or whatever other weapons you have available). Killing the Owls will cause more to spawn, so just focus on avoiding their fire while you whittle down the Natasha's health.
Once the Natasha is dead, shift your focus to killing the Owls. You will be facing at least 3 at a time and more may possibly spawn. Eventually, you'll kill enough that they stop spawning.
Proceed forward into what looks like an elevator. It's actually a magnetic platform; look up and use Shok to raise it. This will take you into a long hallway.
The first room on your left is a Breakroom; you can stop to Craft what you need and save here, if necessary. Walk straight ahead through the next doorway and you'll find a small alcove with loot on your right. There's one more room on your left, but skip it for now -- continue walking down the hallway and you'll hear the Comrade Lootyakin music. Grab some more loot at the end of the hallway, then go open the Silver Comrade Lootyakin. You'll get the Kalash - Electrokinetic Stock and Fat Boy - Revolver Loading Module Upgrades.
Atomic Heart Scientific Testing Ground 12 Gold Challenge
After you've grabbed the Silver Comrade Lootyakin, head out of the room and turn right. You'll see a door with a red light above it. Go in and loot the room, and make sure to go into the back left of the room to grab loot there, too.
Once you've cleared the room out, back up and use Shok on the magnets to make the wall move. This will reveal the path forward into the next area. Walk forward, and you'll see a puzzle with a somewhat unusual mix of puzzle mechanics you've previously experienced.

First things first, there is a pit that you can fall into up ahead. Do not drop into it -- you will instantly die and there is nothing of value down there.
Now that we have that out of the way, your first move will be to pick up the Candle (glowing yellow orb) and use Telekinesis to throw it into the receptacle on the top of the red pillar. This will power up the Magnets and allow you to use Shok on them. Use Shok on the magnets above. This will reveal another Candle holder.

Use Telekinesis to grab the Candle and place it into the receptacle on the left.
This will cause the platform on the left to start rotating. One of the platforms does not have a yellow gate on it. Make sure to pull out the Candle before it finishes rotating; if you're too late, it will swing around again.

Put the Candle back into the red pillar's receptacle and it will power up the magnets on the ceiling again. Use Shok on the magnets.
Next, walk through the opening you've just created. Climb up the boxes on the right and you'll be in the alcove. Walk to the end of the alcove and you'll see a magnetic shutter. Slide this shutter to the right so you create an opening above.
Use Shok on the magnets again to raise up the floor pieces. Place the Candle in the rotation receptacle. This time, we're going to be watching the other side through the grate. You want to stop the rotation when you see an opening, like this:

Shok the ceiling magnets again to lower the magnetic floors. Look to your right and you'll see four silver bars with red dots -- you can climb up to the platform above. Walk through the alcove, down the boxes, and to the other side.
Shok the ceiling as needed to raise or lower the floor. Once you've passed through the second area, you'll see another magnetic shutter up and to the left. Use Telekinesis to open this shutter and you'll be able to see the Candle from this position:

Grab the Candle with Telekinesis, but make sure to stay on the platform. Then, turn around and put the Candle in the receptacle next to the door.
Walk through the newly-opened door straight ahead and you'll find the Gold Comrade Lootyakin. You'll get the Electro - Energy Vampire Block and Pashtet - Reflex Blade Upgrades as a reward for your hard work.
Further ahead, you'll find a Breakroom and the exit elevator. There are a number of lockers you can loot for Crafting materials right next to the elevator, so make sure to hit those up before you leave! The top of the elevator will deposit you in a bunker just next to the first beach you visited.
Atomic Heart Scientific Testing Ground 12 Loot
- KS-23 Thermal Scope Upgrade (Bronze Comrade Lootyakin)
- Kalash Electrokinetic Stock (Silver Comrade Lootyakin)
- Fat Boy - Revolver Loading Module Upgrade (Silver Comrade Lootyakin)
- Electro - Energy Vampire Block Upgrade (Golden Comrade Lootyakin)
- Pashtet - Reflex Blade Upgrade (Golden Comrade Lootyakin)
- Various Crafting materials
Thanks for reading our Atomic Heart Scientific Testing Ground 12 Guide. Make sure to check out our other guides below!
Have a tip, or want to point out something we missed? Leave a Comment or e-mail us at tips@techraptor.net
One of my earliest memories is playing Super Mario Bros. on the Nintendo Entertainment System. I've had a controller in my hand since I was 4 and I… More about Robert N