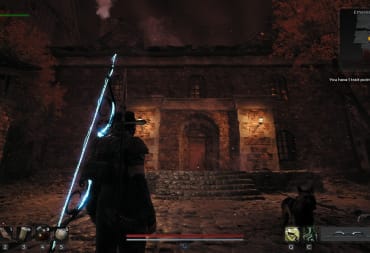
Remnant 2 is no stranger to puzzles in every area, covered from head to toe in secrets. One of these puzzle, found on Yaesha - is subtle and clever. In this guide, we'll show you how to get the solution to The Lament Puzzle Door.
First off, you can't solve this puzzle until you've completely cleared The Lament. You'll need to get past the initial traps, and then completely through the area so that you can unlock the door back to the beginning and make it easier to move between the upper and lower sections.
How to get past The Lament Trap Area
If you're stuck on getting past the early traps, here's a quick video I took showing how the arrows move and how to get to the end. Once I got the rhythm down, and noted that halfway through each area the pattern changes (starting w/ left side) - it was actually pretty easy!
How to Solve The Lament Puzzle Door on Yaesha
The Lament Puzzle actually has a simple solution, but it's very subtle and easy-to-miss. I probably wasted 30 minutes trying to figure it out, and the answer was right there the entire time!
First off, find the book nearby on the ground. It's going to have a lengthy set of stories, but on the first page is a symbol used to identify the correct bodies to correspond the puzzle solution with. See below a side-by-side comparison for my playthrough on what to look for:

Now that you've identified which body is with each symbol, head on up to the circular puzzle slider. Enter in the four puzzle symbols from top to middle, to complete the Lament Puzzle, and the door will open!
Note: There doesn't seem to be a specific order you must enter them - so enter all 4 and you'll be good to go!

Lament Door Puzzle Reward - Big Chest
With the door now open, head on through to the next area. Up ahead you'll find:
- 2 chests to open with crafting materials and scrap
- Opening one will spawn an enemy called WITHER that drops Kolket's Razor, which will be useful after the next part!
- Blood Tinged Ring - "Gain 2 Health Regeneration per second when within 10m of a Bleeding Entity"
Where you find the ring, there will be an overlook where you'll see a chest that you (seemingly) can't get to - but don't fret...there is a way down!!

Turn around and go back to the checkpoint crystal and face the way you came in. To the right, you'll see some pots you can smash - do that and you'll find a drop down below them so you can loot the riches within that big chest.
Once you drop down, head towards the smaller path that dead ends - you'll have to crouch and go underneath some water before you reach the long hallway, and at the end of it you'll find the Supply Room Key. After that, head towards the chest and unlock the shortcut above the ladder.
You'll be glad you grabbed the Supply Room Key, because now you'll need it to unlock the door in front of you and proceed on to another trap room... yay! Chances are you'll die here, so having the shortcut open will be good!
Largely - run down the middle and avoid the saws as they shift back and forth and you'll be home free. Make your way up to the chest, and open it to get the Red Widow Armor Set:
- Red Widow Headdress
- 13 Armor, 8 Weight
- Red Widow Raiment
- 45 Armor, 23 Weight
- Red Widow Leggings
- 23 Armor, 12 Weight
- Red Widow Bracers
- 7 armor, 5 weight
If you're curious, here's how that looks on your character:

The Lament Locked Door & What to do with Kolket's Razor
After collecting the Red Widow Set, and making your way back up, head up the ladder and back out to the Puzzle Door, then take a left towards the door you can unlock and follow the path until you can head downward into a new area.
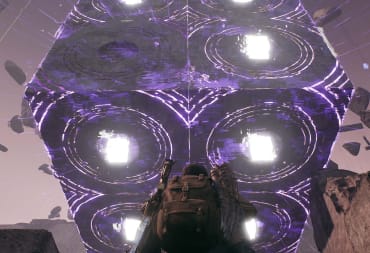
You'll eventually make your way to the Lament Puzzle, which is tricky but ultimately fairly easy. Basically, by shooting at and between the pedestals - you'll see your bullets getting blocked by an invisible path. You can also jump across (I did the first time), but this is a more slow and methodical way to make it to the other side.

You'll come to a door which requires a key, and this is where you might miss a step. You collected Kolket's Razor from Wither in the area before, but it doesn't help you... or does it?
Open your inventory and inspect Kolket's Razor, and move it around until you're able to interact with it. Once interacting, you'll have Kolket's Key which lets you unlock the door for some loot and the Ring of Diversion (Increases invulnerability window when evading and sliding.)
The Lament Hidden Area
On some shards of the Lament, there's an area with 4 statues that have blue gems in their faces. If you shoot these out, an area will open up below, and lead you to an elevator. Head through the elevator and towards the chest to get the Lithic Signet ring, which reduces all damage by 5%, but watch out because much like the angels in Doctor Who...if you're not looking an enemy will approach you!
Well, that's it for our The Lament Puzzle Door Guide! If this helped you out, check out more below:
Have a tip, or want to point out something we missed? Leave a Comment or e-mail us at tips@techraptor.net

Rutledge Daugette is the Guides Editor & Founder of TechRaptor. Rutledge's degree in Game Programming ultimately led him to found the site in 2013, with… More about Rutledge