Our The Lord of the Rings: Return to Moria Starter Guide will teach you the basics of the game and give you a walkthrough for the first few days in Moria!
The Lord of the Rings: Return to Moria is a survival game set in J.R.R. Tolkien's The Lord of the Rings universe. Though you'll start out with just the clothes on your back, you'll eventually be able to Craft the finest Dwarven Weapons and Armor to fight the forces of evil. Read on to learn how to get your adventure started!
The Lord of the Rings: Return to Moria HUD Explanation

- Minimap: This shows the Map for the area around you,
- Depth: This shows how deep into Moria you are. Generally speaking, a lower Depth -- represented by a higher number of fathoms -- means the area is more dangerous.
- Point of Interest: Any Points of Interest related to a Goal (Quest) will be shown on screen. You can turn these markers on or off by accessing the Map by pressing M on the keyboard.
- New Items - Any new items you unlock will be highlighted in the menu with a blue diamond. This counter shows you how many new items you've found that you haven't yet read the entries for.
- Buffs and Debuffs - Any Buffs or Debuffs you have will be shown here. Open up your Inventory and you'll see a detailed description of what each Buff or Debuff does.
- Health, Armor, Etc.: These will be explained in a subsequent image.
- Hotbar - These are the items that you can quickly access without going into your Inventory. Your Hotbar is made of actual Inventory slots, so anything stored on the Hotbar will not take up space in your Pack.
- Weapon Controls - This shows you what pressing buttons will do with your currently-equipped Weapon.
- Masterwork - This is a special Inventory slot where you can place a Masterwork item. You can only carry one Masterwork at a time.
- Chat - This is where the Chat window would be if you were using text chat.

- Light: This shows the light level of an area. Being in Darkness for too long can give you Debuffs. Sadly, your Handheld Torch doesn't provide enough light to benefit this stat.
- Armor: This bar shows the condition of your Armor. Armor gets drained before Health in most situations. Each blue helm represents an additional bar of Armor. Armor can only be replenished by repairing it.
- Health: The standard Health bar. If this reaches 0, you die.
- Hunger: This shows how hungry you are. If it reaches 0, you will start Starving and slowly losing Health.
- Morale: This shows how good of a mood your Dwarf is in. Certain environmental factors (such as a lack of light) can reduce your Morale. If it reaches 0, you'll get the "Despair" Debuff and start losing Health until you die.
- Day and Time: This shows how many Days you have been exploring Moria and the approximate Time.

- Energy: This shows how tired you are. If it gets too low, you'll suffer Debuffs. Sleep to restore your Energy.
- Stamina: Stamina is needed to run and perform a Dodge. You can recover Stamina by avoiding strenuous activity or with certain Foods.
- Notifications: Any newly unlocked items or important warnings will be shown here.
- Danger Level: In certain areas, making noise will increase the Danger level. If it gets too high, the Orcs will be able to track you down and a Horde will spawn near you. As far as we can tell, leaving the area and letting some time pass (such as by sleeping) can reset your Danger level.

The Lord of the Rings: Return to Moria Starter Guide
Now that you know the basics of the HUD, let's get moving with our The Lord of the Rings: Return to Moria Starter Guide! Your adventure begins when your Dwarf falls into the depths of Moria after an accident. You won't live for long unless you make the right moves, so read on!
Creating Your Character
Your first step will be to create your Dwarf. You have quite a few customization options to choose from for your beard, hair, and body. In addition, you can fine-tune the way your Dwarf moves, their voice, and their origin. The origin determines the clothes that you will wear.
Critically, you can change any of these details at any time on the menu. Don't worry too much if you can't quite get your Dwarf perfect -- you'll be able to tweak your design later!
Entering Moria
Your first steps are a basic mandatory tutorial. You'll learn how to Craft a Torch, Craft a basic Pickaxe, and build Quick Platforms. You'll also get your first pieces of Food. Food does not spoil and it regenerates, so pick up every piece you can.
One key step will be to inspect the Door of Durin that Gimli and the other Dwarves were trying to breach from the inside. You'll find some kind of purple rune is keeping it sealed, preventing you from heading back outside. The only way out is by heading deeper into Moria.
Along the way, you'll converse with Aric, a talking Raven of Erebor. He tells you that there are cursed shadows up ahead and that he hasn't been able to find a way out of Moria. You're going to have a long journey ahead of you, so it's time to Build a base camp!

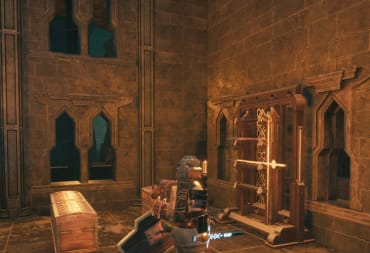
Rebuilding Ori's Outpost
You'll come across Ori's Outpost as you move deeper into Moria. This ruined structure will serve as an adequate base camp, but you'll need to clean things up first.
Make sure to pick up some Metal Scraps outside and Craft an Axe; this will allow you to more easily defend yourself should you encounter any wandering Wolves, Goblins, or Orcs. You'll also want to kill a few Rats as you're going to need 3 pieces of Meat shortly.,
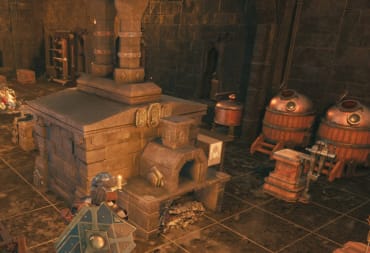
When you first encounter Ori's Outpost, you'll be given some prompts on cleaning things up and rebuilding. Take care not to destroy the Stone Hearth, the Meal Table next to it, the Furnace, or the Forge. Clear out all of the loose debris in the area and destroy the broken walls in front.

Build and claim a Bedroll, then get some sleep. If you die, you'll respawn at this Bedroll. The next day, you'll be prompted to Cook some Meat on the Stone Hearth. If you don't have enough, run around outside and chase down Rats.
You'll likely see some Goblins in the distance while you're rebuilding. As you approach, they will dig underground and vanish. This is a scripted event for this area that can repeat; the Goblins are watching you and they will immediately flee if you get too close.
However, there are also roving bands of hostile creatures that can pop up at any time, too. Treat any creature you see as a potential threat; there's no way of knowing for certain until you're already in a fight for your life.
Fortifying the Outpost
The area immediately surrounding Ori's Outpost has lots of debris that you can break up with your Pickaxe. You're going to want to collect some Stone and a bit of Wood Scraps at the minimum.
Open up the Build menu (press B on the keyboard) and fill in the missing walls with two new walls and a door. Then, build a perimeter of barriers outside. Add some Standing Torches and Wall Torches to light the area.

Your Camp can and will be sieged by Orcs and other foul creatures in The Lord of the Rings: Return to Moria. Having a multi-layered defense and sturdy walls will help prevent your stuff from getting smashed to bits.
Note how your Stone Walls look different from the ones that were there in the first place; these finer walls are made of Granite. You'll be able to get Granite after you progress past the first area; for now, simple Stone will have to do.
The Importance of Light and Heat
As I mentioned in the HUD explanation, Light is very important. You'll get Debuffs if you're in the darkness for too long and you won't be able to see anything, either. Make sure the inside and outside of your base is adequately lit.
Torches and Hearths won't just provide Light; they'll also keep you warm. Getting too cold can also give you a Debuff, so make sure to stand near some fire when you notice a cold debuff pop up.
An important note: for whatever reason, your handheld Torch and the thrown "Flare" Torches do not appear to give you any Light or Heat when it comes to your stats; they only give you the visual benefit of illuminating an area. I'm not sure if this is a bug or intentional, but that's how it is for now -- keep it in mind going forward.

Onward to Iron
Your next major step will be to make an Iron Ingot. That means you'll need to collect some Iron Ore. A marker will appear showing you where you can find some.
You'll need Coal to make metal ingots. There was some in Ori's Outpost that should help you get started.
Mine at least 30 Iron Ore, then fill up the Furnace with Iron Ingots. Once that's going, go back outside and collect more Iron Ore.
You will likely run out of Coal; fortunately, you should be able to find a Coal Vein in the same area. Get some Coal, too, and make a bunch of Iron.
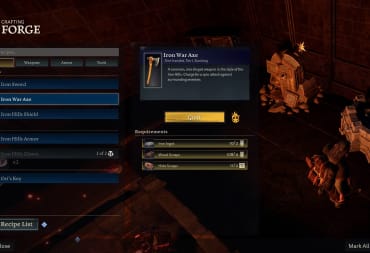
Repair the Forge, then make an Iron Sword as prompted. I also recommend that you make a Shield; this will allow you to block attacks more easily and shield bash to stun them.
It's also important to Build a Repair Smithy. This will allow you to use Metal Scraps to repair your Weapons, Tools, and Armor.
Once you've Crafted an Iron Sword, you'll be prompted to head east toward Durin's Highway. Before we go there, though, there are two more things to touch on.
Muznakans and Statues of Old
We're almost done with our The Lord of the Rings: Return to Moria Starter Guide, but we need to touch on a few key mechanics before we finish up.
First, let's talk about Muznakans.

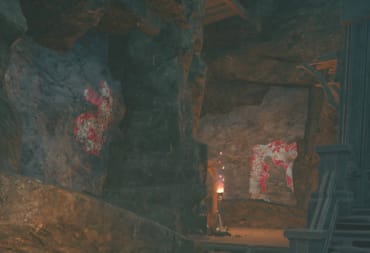
A Muznakan is an altar with several small statues representing dead Dwarves. Each area will typically have a Muznakan for you to find.
You can find the missing Muznakan Carvings throughout the area. Don't worry about having to search everywhere; in my experience, there are more Muznakan Carvings than you actually need.
Once you find them all, you can return them to the Muznakan altar and open it up. This will give you some loot and some Crafting Recipes; usually, you'll get access to new Weapons or Armor.
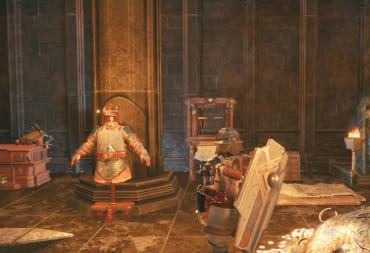
You can find your first Muznakan right outside of Ori's Outpost, but that's not all that's nearby -- you'll also see a Damaged Statue.

As you might expect, Damaged Statues need to be repaired. You'll have to Craft a Building Hammer before you can repair them.
When you repair a Statue, you have a good chance of getting a new Crafting Recipe (or part of one). These Statues are critical for getting better gear, so repair every Statue you come across!
Finally, there's the matter of the Map. You can place markers on the Map and it's easy to lose track of where something is. When you come across a Muznakan or a Statue you haven't repaired, make sure to mark it down -- you'll thank yourself later when you need to find them again!
Moria to Explore
By now, you have some Resources, a basic Camp, and a new goal: heading toward Durin's highway.
Anyone who has watched The Lord of the Rings knows that Moria is a treacherous place filled with mysteries and dangers. The Lord of the Rings: Return to Moria is no different, so you're in for a grand adventure! For now, we have a lot more to teach you about this game -- make sure to check out our other guides below!

The Lord of the Rings: Return to Moria F.A.Q.
What is The Lord of the Rings: Return to Moria?
The Lord of the Rings: Return to Moria is an action-adventure survival game set in a time after The Lord of the Rings books where your character explores Moria after the fall of Sauron.
Is The Lord of the Rings: Return to Moria Multiplayer?
Yes, The Lord of the Rings: Return to Moria has online multiplayer.
Where is The Lord of the Rings: Return to Moria Save File?
You can find The Lord of the Rings: Return to Moria Save File in:
C:\Users\USERNAME\AppData\Local\Moria\Saved\SaveGames
Where "USERNAME" is your Windows username.
What Happens When You Die in The Lord of the Rings: Return to Moria?
If you die in The Lord of the Rings: Return to Moria, you will drop all of your equipment on the ground where you stand. You'll respawn at the last Bedroll you slept at and you'll have to run back to where you died to retrieve your items.
Can You Swim in The Lord of the Rings: Return to Moria?
No, you cannot swim in The Lord of the Rings: Return to Moria. If you jump into the water, you'll be teleported back to land.
Is The Lord of the Rings: Return to Moria on Steam?
No, The Lord of the Rings: Return to Moria is not on Steam; it is an Epic Games Store exclusive at launch. However, many Epic Games Store Exclusives launch on Steam at a later date, so it may make its debut on Steam and other storefronts (such as GOG) after a period of several months.
Thanks for reading our The Lord of the Rings: Return to Moria Starter Guide. Make sure to check out our other guides below!
Have a tip, or want to point out something we missed? Leave a Comment or e-mail us at tips@techraptor.net
One of my earliest memories is playing Super Mario Bros. on the Nintendo Entertainment System. I've had a controller in my hand since I was 4 and I… More about Robert N