In this guide, we'll show you The Lord of the Rings: Return to Moria Map and reveal the interesting Locations you'll explore in Moria.
The Map of The Lord of the Rings: Return to Moria is a complex maze of Dwarven cities and massive caves, filled with danger and the forces of darkness. Cook up some good Food and ready your sharpest Weapons -- we're going to tell you what you need to know about the Map of Moria.
The Lord of the Rings: Return to Moria Map


The Lord of the Rings: Return to Moria Map is different for every playthrough, depending on the world seed entered when you created the world.
As far as we can tell, the Map is not exactly randomly generated; rather, it appears to be randomly assembled. The Eleven Quarter, for example, seems to look the same between the two worlds I generated, but it (and the surrounding halls) are not in the same exact locations.
Take a look at these two maps of The Western Halls as an example:

The Map on the left is my first playthrough where I've progressed through The Western Halls and The Lower Deeps. The Map on the right is from my second playthrough. Notice how the rooms at the top part are not exactly lined up.
The general beats will be the same -- you'll go through The Western Halls, into the Elvish Quarter, and then down into the Mines of Moria -- but there are subtle differences in how the rooms are actually arranged.
How to Fast Travel in The Lord of the Rings: Return to Moria
You can fast travel in The Lord of the Rings: Return to Moria by interacting with a Map Stone. You'll have to rebuild the Map Stones using Black Diamonds which can be acquired from Orkish Chests in certain areas.
You can also Build a Map Stone anywhere in the world. This will allow you to fast travel directly to your Camp (or anywhere else you'd like to place one).
It's important to note that fast traveling is not instant teleportation; while you do save time in the real world, the game treats fast traveling as if you walked that distance on foot. That means that your Energy and Hunger will be lower when you get to the other side. It's important to carry Food or Rations with you if you're fast traveling to somewhere that isn't one of your bases.

The Lord of the Rings: Return to Moria Locations
Here are all of the notable Locations in The Lord of the Rings: Return to Moria that we've found thus far.
The Western Halls
The Western Halls is the first major region of Moria where you begin your adventure. Gimli intended for this to be the point where a Dwarven expedition would step foot into Moria, but a mishap trapped you inside.
The Doors of Durin
The Doors of Durin are the western gates into Moria. The Fellowship of the Ring entered these doors when they decided to go into Moria. After the fall of Sauron, Gimli has cleared the rubble from the doors and has been attempting to open them to no avail; it is later revealed that the forces of shadow have locked them from the other side with dark magic.
Westgate
Westgate is the abandoned town on the opposite side of The Doors of Durin. You'll likely build your first Camp here.
The Elven Quarter
The Eleven Quarter is a forested enclave that was once apparently a home away from home for Elves. Now, fell beasts occupy this land.
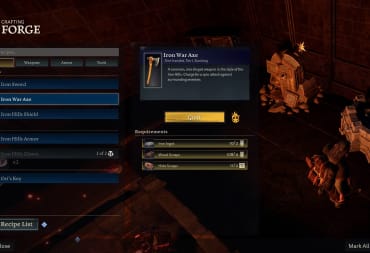
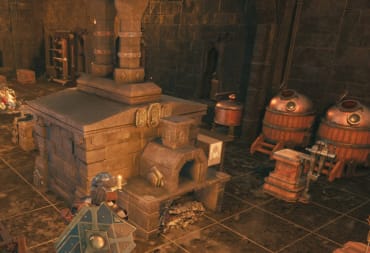
Great Forge of Narvi
The Great Forge of Narvi is the first of the Great Forges of Moria you'll encounter. Certain Weapons and Armor can only be Crafted in specific Great Forges -- once you've restarted them.
The Mines of Moria
The Mines of Moria are well-known to Tolkien fans; it is here that The Fellowship fought a climatic battle against hordes of Orks. Take care when making the descent as you can easily fall to your death.
Though it doesn't seem like it, it's possible to climb back out of The Mines of Moria. Remember, you can always Build some platforms if you can't quite find the path back out!
The Crystal Descent
The Crystal Descent is the gateway to The Lower Deeps, the second region of The Lord of the Rings: Return to Moria. You'll need to get your hands on specific materials before you can repair the Lift (elevator) and make your way into the next region of Moria.
The Lower Deeps
The Lower Deeps are an area that is much closer to natural caves than an inhabited city. Poisonous Mushrooms and mysterious clouds of dark energy pollute the area, and the Goblins and Orks that patrol this area are tougher than anything you've fought yet. Worse of all, you'll encounter massive Trolls secreted away in dark corners of The Lower Deeps.
A Flooded Forge
A massive pump station had previously held back underground water, but it has since fallen into disrepair. You'll need to build a pier across the water and repair the pumps, but the water isn't entirely safe...
The Great Belegost Forge
This Great Forge is where you can make the Belegost Weapons and Armor.
Tomb of Kings
As the name implies, the Tomb of Kings is where several honored Dwarves are buried, including Durin I. This is also home to Durin's Muznakan.
The Eastern Stairs
The Eastern Stairs head up to Dwarrowdelf, but you'll have to repair them first.
Library of Kibil-nala
The Library of Kibil-nala contains ancient Dwarven knowledge that will help you go further into Moria.
Dwarrowdelf
Dwarrowdelf is the main "city" of Moria and the former seat of Dwarven Power which Gimli and the current Dwarven King seek to reclaim. Much of the city has been ruined, and hostile Orks, Trolls, and darker beasts roam the massive halls and staircases.
The Bridge of Khazad-dum
The Bridge of Khazad-dum leads to the eastern exit of Moria. Unfortunately, the bridge has been destroyed as a result of Gandalf's fight against the Balrog and will have to be rebuilt.
The Eastern Bastion
The Eastern Bastion is a defensive wall near the Bridge of Khazad-dum. It is an excellent place for Building a Camp that can be relatively free of Orks, especially if you utilize the side room and balconies.
Balin's Seat
Balin's Seat is the final resting place of Balin, former Lord of Moria.
The Seat of Durin
The Seat of Durin is the throne for the Dwarven King.
Great Forge of Durin
The Great Forge of Durin sites behind The Seat of Durin. It is here that you can reforge Durin's Axe.
Great Nogrod Forge
Dwarrowdelf boasts the unique privelege of having two Great Forges. The Great Nogrod Forge isn't quite as special as the fireplace of ol' Durin, but it's home to two of the most powerful Weapons you can get before defeating the final boss: the Red Sword of Nogrod and the Red Axe of Nogrod.
Barazinbar
Barazinbar is the name of Moria's central mountain and serves as the geographical center of the Dwarven Kingdom. It is under this mountain where the Dwarves mined for Mithril and other riches -- and where they eventually awakened the Balrog.
An important feature of this area is its extreme verticality -- you will likely go up and down cliffs multiple times to get from one side to the other. It's a good idea to Build small Camps once you get into a more centralized location on the other side of a cliff to save you the trouble of all of that climbing if you need to respawn.
The Upper Armories of Third Deep
The Upper Armories of Third Deep is the location where you'll first enter Barazinbar. It's largely devoid of meaningful loot or enemies.
The Crossroads of Zirakzigil
The Crossroads of Zirakzigil links together the Mines of Moria, The Western Halls, and Dwarrowdwelf. You'll need Durin's Axe in order to destroy the Shadow Magic that is blocking the doors to make full use of this area.
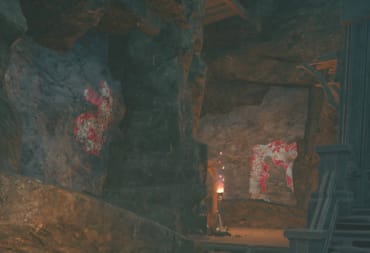
Cruel Caradhras
Cruel Caradhras is another name for the mountain Barazinbar, specifically the red-tinted caverns underneath it.
The Mithril Lode
The Mithril Lode is the area where Mithril was first discovered and mined by the Dwarves until they awakened the Balrog.
Great Mithril Forge
The Great Mithril Forge is the only place where you can forge Mithril into powerful weapons and armor. These hallowed furnaces have outfitted many a dwarf with the finest equipment -- and now it's your turn.
Mithril Mine Shaft
The Mithril Mine Shaft is a special variant of the Darkest Deeps that can only be found in Barazinbar. This is where you can find Mithril -- along with the usual threats encountered in the Darkest Deeps.
The Domain of the Shadow Orcs
The Domain of the Shadow Orcs is an Orc Camp that you'll have to pass through to get to the Dragon's Hoard and fight the final boss of the game.
Well of Shadows
The Well of Shadows is where the dark energies of Morgoth are leaking into Moria and corrupting it. You'll need to seal it to end the curse plaguing this once-great Dwarven city.
Balrog's Lair
The Balrog's Lair is where the great Balrog known as Durin's Bane was first awakened. This is also where you'll fight the final boss of the game.
The Darkest Deeps
The Darkest Deeps is a sub-region within several areas of Moria including The Lower Deeps, Dwarrowdelf, and Barazinbar. It can be entered through a room with two planks passing over a deep, narrow pit.

This unique location can be found in unique rooms within The Lower Deeps and Dwarrowdelf. The mines at the bottom contain several valuable Resources including Black Diamonds, Sun-Stone, and other gems.
To descend to the Darkest Deeps, you will need to Build at least 4 Rope Ladders. You will probably need to place several Quick Platforms as well. It is highly advisable that you Build a small Camp at the top in case you fall and die.
About halfway down, the Darkest Deeps becomes so dark that you get the "In Darkness" debuff. No carried or placed Torches can dispel this Darkness, so your Morale will continually drain until it is empty. Once it is, you'll be affected by the "Despair" debuff and slowly lose health over time. I'd further advise that you bring at least 20 or 30 Complex Rations with you to heal the constant damage.

Aside from the environmental hazards, you may encounter Spiders in The Darkest Deeps. That means that you might get even more ongoing damage due to the Poison debuff.
Finally (and most importantly), each instance of The Darkest Deep has a "Nameless Beast" that sort of looks like a black bear with red lines on it. Nameless Beasts are incredibly tough and can kill you in a few hits, even with sturdy Armor. Fortunately, they will avoid you as long as you keep your distance; it's best to avoid them.
That's the end of our The Lord of the Rings: Return to Moria Map and Locations Guide. Have a gander at our other guides below!
Have a tip, or want to point out something we missed? Leave a Comment or e-mail us at tips@techraptor.net
One of my earliest memories is playing Super Mario Bros. on the Nintendo Entertainment System. I've had a controller in my hand since I was 4 and I… More about Robert N