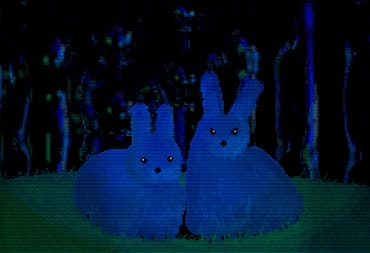
After you've completed Animal Well, maybe hunted down all the Eggs, and even discovered some other secrets you might be wondering, what else is there? Just when you think you've hit the bottom of the Well you might notice the small face and floppy ears of a bunny rabbit. What looks to be the final collectible of Animal Well is the various Secret Bunnies that are hidden out in the world.
In this guide, we'll cover the locations of all of the Secret Bunnies we're aware of as well as keep this updated as more are discovered.
BUT, before we get into any of these Bunnies be sure to turn back if you don't want any spoiled, it's recommended you check out some of the puzzle-cracking efforts that are going on in the Animal Well discord. If you do want to go ahead and learn the answers to what we have then go on ahead.

There are sixteen secret bunnies to be found in Animal Well, all are tied to a puzzle based in the location you end up once you've reached the second ending of the game. They appear in order left to right so we've organized them as such. At the moment we've discovered 16 out of 16 bunnies.
Animal Well Secret Bunny Locations
Note: At the time of writing it's believed that there are only 16 Secret Bunnies. The labels below have been updated to indicate the Bunny order from the statues on the ground from left to right.
Secret Bunny Statue #1 - Bunny Mural
This Secret Bunny is obtained by correctly filling out the Bunny Mural. This is an ARG puzzle where every player only gets one piece.
The Animal Well Discord community was able to come together to complete this, you can see the Animal Well Bunny Mural solution here.
Secret Bunny Statue #2 - Hidden In The Vines
To find this Secret Bunny you need to make it to the puzzle room with the Chinchilla on the sliding platforms in the Jungle. Once inside you can search and locate a code to play on your Animal Flute.

The codes are behind the vines at the top of the map. It's been noticed by many that you won't be able to see them if your brightness is too low, you might need to stare hard.
The answer in this room is: Right - Up Right - Right - Down - Right - Down Left - Down Left - Right
Secret Bunny Statue #4 - Tutorial Bunny Tease
You can first see this Secret Bunny at the beginning of the game. It is on the ledge to the left just before the room you obtain your map in. After reaching the end of the game and obtaining your B. B. Wand in the room before you drop down to the TNT there is a hidden wall to the left.
Return to the area with the fish blowing bubbles and the giant Stork/Cranes to the left of the central area of the map. Make your way to the far right of the Stork/Crane room and out through a secret exit in the top right of the room.
Complete the spike room gauntlet to reach the ledge you first saw this bunny on.
Secret Bunny Statue #5 - Numbers On The Map
As you explore the world of Animal Well you might have noticed inconspicuous pillars in the background that show a symbol like the one on your map stamps. Each of these pillars also has a number associated to them.

Go around the map collecting each of these locations and note them down on your map. Drawing a line between all of the numbered symbols you'll end up with a series of eight numbers. Playing these numbers on the Animal Flute will teleport you to a secret location in the Jungle region that you were previously unable to access that holds a Secret Bunny.
This location is also very important if you're looking to speedrun Animal Well for the statues.
If you're just wanting to know the answer it is: Up Left - Up - Down Right - Down - Down Left - Down - Left - Down
Secret Bunny Statue #7 - Ultraviolet Bunny
This Secret Bunny is hidden in certain rooms on the map that you can only see once you've obtained the UV light. While there are a few places that this Secret Bunny can appear it will stop appearing once you've collided with it.
The rooms that has been discovered to be the most consistent is to simply wait at the telephone where you place the four flames until you see sparkles with your activated UV light and chase the rabbit to the left towards the Egg Room. Once you connect with this Secret Bunny it will be captured.
Secret Bunny Statue #8 - Fish Mural
From the central area of the map head to the left towards where you obtained the B. Wand. Before you drop into the top of the Stork/Crane room there is a room with a fish mural on the wall. Use your UV Wand to reveal a pattern hidden in gold symbols on the wall to play on your flute. Play this pattern and a room will appear for you to drop into and find this Secret Bunny.
If you just want the answer it's Left > Left > Bottom Right > Right > Upper Right > Left > Left > Upper Right
Secret Bunny Statue #9 - Musical Face Ghost
From the start of the game go to the right, then up, and to the left. Follow the path until you reach the room with the ghost with no candle. Play the flute in a circle clockwise and it will turn into a rabbit.


Secret Bunny Statue #10 - Singing Crows
From the Brown Bear warp door in the top right of the map travel right, up, and left to reach a room with singing crows. Play the flute in the direction they're cawing and a secret rabbit will be revealed.
The direction they sing in seems to be different game to game.

Secret Bunny Statue #11 - Is It A Duck Or A Rabbit?
Head to the right from the central space of Animal Well and you'll see a duck walking around.
In the North-East corner of the map you'll have entered a room with a image of a duck/rabbit on the left and a series of strange faces. These faces correspond to the pattern found in the room with the B. B. Wand near the end of the game.
Translate the faces that you see on the duck/rabbit mural to the directions on the Animal Flute and then play that song for the Duck near the entrance and it will turn into a Secret Rabbit.
If you just want the correct answer to play it is: Up -> Down -> Up -> Down -> Left -> Right -> Left -> Right
Secret Bunny Statue #12 - Dreaming Bunny
To obtain this Bunny you just need to have your character remain idle until they fall asleep. After a few moment of being asleep they will begin to dream of a Secret Bunny. When this rabbit appears jump up and touch it to obtain it.
Secret Bunny Statue #13 - Bulb Rabbit
This Secret Rabbit can be found by playing the song related to the flower that you are released from at the start of the game. After obtaining your Fireworks for the first time in the room below you'll see a mural with four bulbs on it.

For here you'll need two pieces of information:
- What direction the sparkles are when you start a new game on each of the three save files
Note: If you've already started a game on a save file you can copy the save file to a different slot and then erase where it was originally - What the look of the plant you hatch (?) from looks like before you hop out of it in a new game
Each of the new game pods has a different look that corresponds to the way it looks on the mural and should be attached to the four notes that come out of it as sparkles when you jump out. You can then play each of these sections in order according to the pattern you see on the mural.
For each player the three colored bulbs - Blue, Yellow, and Magenta - are on different save files but the answer seems to be consistent across players.
The answer is Right - Down - Left - Up - Right - Down - Up Left - Up Right - Right - Down - Left - Up - Down Right - Down Left - Up Left - Up Right
Secret Bunny Statue #14 - The Floor Is Lava
This is arguably the hardest Secret Bunny to obtain in Animal Well.
To obtain this Bunny you need to go to the room with three barking dogs that is in the upper left of the map, just to the right of the alternating maze.
Stand behind the alternating wall in the top right of the Three Dog room and then you'll need to use your bubble to make it two screens to the left, two screens up, one screen back down, and one screen to the right. Once you reach the room with the blocks that the Slink raises jump into the poison to respawn on the last safe ground which will now put you behind the switch wall.

Here are some tips for the process:
- Use the upgraded B. Wand: Find the B. B. Wand near the end of the game to allow yourself to spawn many bubbles, this will make the process far easier.
- Alternating Items: Because you freeze in place when you access your inventory anytime you need to swap between your B. B. Wand, Disc, or Remote access your inventory to give yourself some breathing room
- Set up the Disc before you start: In the Three Dog Room set up the disc to be distracting the dogs, this then means you have access to the whole screen instead of needing to stay near the top. Keep in mind you'll need to keep avoiding the Disc so you don't land on it or pick it up.
You can also use the Spinning Top in the Three Dog Room to allow for the dogs to continue being distracted while also letting you not have to worry about accidentally colliding with the Disc. - Take the middle chute: Once you're in the room with the single dog set up the Disc to distract the dog and then use the wider middle chute to reach the top. Here you'll want to just spam bubbles so even if a few pop in the tight space you'll have somewhere safe to land.
Secret Bunny Statue #16 - TV Rabbit
Inside the house at the end of the game your TV is flashing a number of bright colors. Use your Remote and the channel will change to show a face. Using the remote more will show it cycle through seven additional faces. Note down each of these eight faces and compare it to the face mural in the room where you obtain the B. B. Wand.
Play the song you discover in the house and a Secret Bunny will jump out of the TV.
Secret Bunny Statue #17 - Origami Bunny
When you gain access to the office there is a PC with a printer next to it. If you're a PC player and the computer you're playing on has access to a printer that PC will be turned on. Accessing the PC will send a print job to your printer. These will print instructions to create an Origami Secret Rabbit of your own, once assembled it will give you instructions for a song to play on your Animal Flute that will earn you the Origami Bunny Figure and a Secret Bunny will appear from the computer.

If you don't have a printer attached to your PC or are playing on a Console version of the game you can obtain the instructions for your very own Origami Bunny here.
You can also investigate the grass growing out of the Dog Bowl in the room one down and one to the right of the Top Left Bear Warp Door. The blades of grass here create a barcode (though you might need to alter and stretch the image to get your barcode reading app of choice to read it.
If you're just after the answer is it: Right - Up Right - Up - Left - Up Left - Up - Left - Down
Secret Bunny Statue #18 - Ghost Dog Statue
When exploring the Jungle are in the room one left and down from the Brown Bear Warp Door (Middle left from the warp room) you might notice a dog statue with bunny ears. This statue is similar to the ones that activate in the Dog area in the top-left of the map when the ghost flies near them.
To obtain this Secret Bunny you need to lead the ghost from the M. Disc shrine area all the way over to the Ghost Dog Statue for it to transform into a Bunny.


Secret Bunny Statue #20 - Top Left Spike Room
From the top left of the map use the disc to get across the stretch of water. Then get as much height as you can and fly back to the right. Halfway along is a path hidden by vines. Inside is a spike gauntlet that you can use disc-riding, or the wheel to get through.
There are a number of ways to complete these room. The most common way I've seen people completing it is by throwing the disc at the apex of your jump you're able to land on it and ride it. To reach the first platform on the left you simply need to do this once, however to get to the top left of the map you need to perform a disc ride to the right, and then immediately time one to the left.
What to do when you have all of the Secret Bunnies?
After collecting all Secret Bunnies, and making sure you have access to the Office, you're ready for the next layer of depth in this Animal Well puzzle as the BDTP on the blackboard is solved.
Have a tip, or want to point out something we missed? Leave a Comment or e-mail us at tips@techraptor.net
Andrew has written Video Game and Entertainment news, reviews, and guides for 10+ years. As Senior Content Manager, he assists in creating and editing… More about Andrew