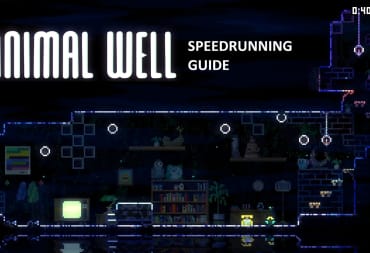
If you're any amount of time into Animal Well you've likely stumbled upon an Egg or two. These collectibles are a reward to anyone who is searching through nooks and crannies, and solving the different secrets the game poses to you. In this guide we'll go over where you can find all of the Animal Well eggs around the map.
The Eggs are an important part of your quest after you reach the initial credit sequence. Not only will they unlock a few necessary items along the way but will open up an even deeper secret once you have one of the optional items.
This guide will break down the eggs region by region while also showing you where they'll appear in your Egg Room so if you're only missing a few you can hop right to them.
Animal Well Egg Room Location And Rewards
Below are all of the eggs that you can find in Animal Well and where they will appear on the peacock room. You can use the reference number provided to jump down to the name and location of that egg from the Biome Lists below.
You can also use the Biome maps to point you toward rooms that have eggs.

Animal Well Eggs - Locations
Starting Area and Central Room
This area comprises where the game begins, as well as the central chamber where the flame statues can be found.

- [3E] Clover Egg
This Egg can be found in a chest immediately to the left of where you start the game
- [4D] Gorgeous Egg
From the Telephone in the Starting area travel two rooms to the right where there's an enemy and a candle. Reach the room above and move to the far left and drop into a gap. Follow this to reach the Candle, from the candle jump up and to the right to find a small hidden alcove and this Egg
- [12C] Rain Egg
Use your Top on the ground immediately to the right of the Egg Room to reveal this chest underneath.
- [11C] Holiday Egg
To the right of the Egg Room use a Bubble to lower yourself off the right edge. To your left is a hidden alcove you can jump into.
- [13D] Ice Egg
Behind the S Medal door, you can obtain the Ice Egg by completing the platforming challenge.
- [6E] Iridescent Egg
Behind the S Medal door. Activate the remote in the Snake room to gain control of it and eat the four fruit to unlock the door to this chest in the top left.
- [5E] Neon Egg
Behind the S Medal door. In the room where you obtain the Radio use the Bouncy Ball to break platforms to the left. Inside is a Breakout game, win it to get the Neon Egg.
- [XX] 65th Egg
This is a reward for collecting all other Eggs
Water and Fish Biome

This biome is to the left and down from the Central Room.
- [2D] Normal Egg
Reach the tall room with four fish blowing bubbles. Drop to the lowest portion of the shaft and jump into a hidden passage in the left wall. Inside you will find a chest with this Egg.
- [10C] Mystic Egg
Reach the tall room with four fish blowing bubbles. Climb to the top and complete the puzzle in the room to the left. This will open the gate on the right from the bubbles with this egg.
- [3D] Great Egg
Reach the tall room with four fish blowing bubbles. Drop to the lowest portion of the shaft and leave through the right. Use your Bubble Wand to safely platform past the storks to obtain this egg.
- [8C] Ancient Egg
In the room two above from the Fish Warp Door make your way to the top right. There is a hidden alcove up and to the left, you can use your Bubble Wand to reach it.
- [14C] Dazzle Egg
In the room to the left of the room with 10 fans. Use your Bubble Wand to platform from the top right of the room to the top left
- [9C] Magic Egg
In the room with the save telephone to the left of the room with ten fans use your bubble on the fish head to travel through the pipe. Activate the three switches in the next room to reach this egg.
- [5C] Friendship Egg
From the Magic Egg rooms exit using the right-most fish head to reach a dark room above it. Inside use the platforms and search for the chest behind the hanging vines.
- [8D] Sunset Egg
From the Fish Warp Door room head one room to the right. Destroy the spikes on the central island to reveal a passage down. Inside in the Egg
- [1D] Virtual Egg
From the central area head left until you reach the room with the fish mosaic and alternating platforms. Make your way to the top left of the area and ride the disc out the top right. On the next screen, you'll find this egg.
- [8E] Scarlet Egg
From the Penguin Save point head down and to the left. Use the Top in this room to open a new path to the left with a Bobcat pacing in the background. Use a bubble and yoyo to lower yourself down and break the spikes in the lower left of this room. Make your way through and drop down to reach a chest on spikes. Use the Wheel to get access to it.
- [4E] Brick Egg
From the Penguin Save Room travel down two rooms and then exit through the hidden space in the top right. Use your Wheel to solve this room and obtain the Brick Egg.
- [7D] Galaxy Egg
Once you've obtained the remote travel to the Fish Warp Door room and use it to close the left wall, but open a space below it. Complete the room inside to obtain this egg.
- [9D] Goodnight Egg
After reaching the Save Room near the Penguins leave through the top right. Make your way through the spike maze and penguins until you're almost out. Break the spikes to the right and destroy the enemy, then continue breaking spikes to reach this Egg
Cave and Dog Biome

This biome is to the left and up from the Central Room.
- [5B] Evil Egg
Head left from the room with the alternating platform waterfall. Play your flute to make turtles appear creating a path. The last turtle will be wearing the chest.
- [10B] Red Egg
From the save room to the left of the Mock Disc chest head left and follow the loop until you reach the room with the alternating switch platforms. Leave out the top left and solve the switch puzzle with the two Gerbils to obtain this egg.
- [2B] Depraved Egg
In the room above the alternating platform waterfall is a maze with switches. Make your way through this switch maze by setting up the disc to trigger the bricks to change. There is a chest in the lower right part of the maze with this Egg.
- [12A] Egg As A Service
From the pitch-dark room head out to the upper right to reach a room with a Kangaroo statue. There is a hidden alcove in the bottom right of this screen
- [11A] Vanity Egg
Past the Kangaroo Door use the Bouncy Ball to open a path in the upper left. Inside is a chest with this egg
- [9A] Forbidden Egg
From the top left Save Point, where there's water that stretches out to the left, use your Disc to fly across the water. At the end is a path with this egg.
- [4A] Brown Egg
To the right of the top left Save Point, in the room with the Bear Warp Door, leave through the top exit and head left. In this room obtain the chest to get this Egg
- [5A] Raw Egg
Four rooms to the left of the M. Disc shrine use a key to get into the door at the top of this room. Solve the puzzle in the room to the left to get this Egg.
- [4B] Upside Down Egg
In the room below the Bat Room with the candle exit out the bottom right and you'll find a chest you can access.
- [12B] Sour Egg
From the Egg Room travel one to the right, two up, and one to the left where the Sausage Dog chases you into the hole. Run all the way to the right and then exit through a hidden space in the top to find this egg.
- [7A] Big Egg
Can be found at the top of the elevator that runs along the left of the Well Shaft. Use the Remote partway down the elevator to gain access to swap the direction and ride it to the top.
- [9B] Plant Egg
From the Bear Warp Door head to the left and across the water on the disc. Drop your slinky so it falls into the water hitting an invisible switch and raising the block. Travel inside to reach a room with a disc timing puzzle.
- [11B] Orange Egg
In the save room to the left of where you obtain the Mock Disc use the Top to break the ground revealing this chest.
- [13E] Crystal Egg
Use the Bear Warp Door and then exit through the top of the room. Use your Bouncy Ball to break the panels in the middle column. The Top will reveal a switch to the left that you can use to raise the block and exit through the top of this room. Complete the puzzles in the next room to obtain this egg. You will need the Wheel.
- [3A] Reference Egg
From the Bear Warp Door head up one screen and then two to the left. Complete the puzzle in this room with a Slink and Disc to obtain this egg
Jungle and Hedgehog Biome

This biome is to the right and up from the Central Room.
- [4C] Future Egg
In the room with the hedgehogs and Gerbils head to the right and you'll see a Gerbil on a platform. Toggle switches to get him to the pressure plate on the right side of the room to obtain this egg.
- [7C] Transcendental Egg
After obtaining the Slink use your bubble to slowly lower yourself into the center of the room below. There will be an alcove to the left in darkness, jump into it to find this Egg
- [3B] Chaos Egg
From the room where you need to drop the slink to hit three switches find the secret exit in the bottom right of the room. Inside is a room with two monkeys, and there is a chest hidden in the grass
- [8A] Swan Egg
In the room to the left of the stoats that destroy your slinky near the top of the map, the Swan Egg can be found in a chamber with mice. You need to move these mice so that they don't block your way in.
- [10A] Shadow Egg
To the right of the room with the crows, you'll see a room with poison on it. You can drop your slinky to create a slowly moving path to make your way across this room and avoid the poison. Climb up the ladder to reach this egg.
- [13B] Postmodern Egg
Two rooms to the left of where you collected the slink this egg is in a chest behind a locked door and buried underground where the Top can access. To reach this you need to activate the switch on the left side of the Well shaft that can be reached after obtaining the fire in the ghost/dog area
- [3C] Zen Egg
From the Capybara save room travel one room down and one room to the left to reach a room where you previously obtained a Key. Use the Gerbil and your Slinky to weigh down both switches and travel to where the chest was. You'll find this chest to the right.
- [1C] Universal Basic Egg
From the Capybara save room travel one room down and one room to the left to reach a room where you previously obtained a Key. Use the Gerbil and your Slinky to weigh down both switches and travel to where the chest was. Exit to the left and complete the next room to obtain this Egg.
- [2C] Laissez-faire Egg
From the Capybara save room travel two rooms down and one to the left to reach a dark room where three enemies spawn. Exit this room through the top left. Scare the sleeping Gerbil with fireworks to push it into the switch and get this egg.
- [13C] Razzle Egg
Return to the entrance of the Jungle area after obtaining the fire here. A Chameleon that was there previously is now gone, climb into this area to obtain the Razzle Egg.
- [6C] Truth Egg
From the Slink room head out the left passage to a room with a crow and a small well/waterfall. Drop down the waterfall to a platform and use your disc to ride to the left, jumping to reach the small platform. Follow this path to reach the egg.
- [8B] Value Egg
From the Capybara Save Room travel down one and to the right. There will be a room with a hedgehog in a 3x3 grid. Use the B. B. Wand to reach the top of this structure and exit through a space. Complete the puzzle in the room above to obtain this Egg
- [6A] Pickled Egg
Immediately after dropping into the Well from the end of the game hug the right wall to fall into a hidden alcove.
- [7B] Chocolate Egg
From the top of the Well at the end of the game use a bubble to lower yourself down until you reach an alcove on the right with a chest. It may need a switch or remote to allow you to reach it.
Cavern and Bird Biome

This biome is to the right and down from the Central Room.
- [6B] Sweet Egg (Actually starts in the Cavern and Bird Biome Sine Wave Room)
In the Sine Wave room use your Bubble Wand on the fish head and jump into it to travel to an area in the North-West of the map with this Egg
- [11E] Jade Egg
In the room with the monitor showing the Sine Wave line up the wave with the three points to open the door and obtain this egg
- [7E] Rust Egg
To the left of the Sine Wave room, there is a dark room. Head to the far left and climb up to exit in the top left of the room. This egg is here
- [2E] Desert Egg
In the room with the moving platforms jump up and to the right just as you reach the screen to be able to reach the chest in the lower right of the screen.
- [5D] Planet Egg
From the Bunny Mural head to the right and then down one room into a room with alternating platforms. Use the Yoyo to break the spikes on the ground and leave the room through the bottom left. Inside this room is a chest with an egg, there is also a chest with a match.
- [11D] Travel Egg
In the room with the animal in its burrow use a key on the door to the left to find this egg.
- [10D] Dream Egg
From the Bunny Mural room head down through the opened passage. Get inside the alcove to the right with the switch and drop down to the right. Follow this path to reach another Egg.
- [1E] Bubble Egg
From the animal burrow head to the right one room and then down one. In the top right of this dark room, you'll find this egg.
- [10E] Ruby Egg
Travel to the room to the left of the Frog Warp Door. Stand on the glowing bird on the right-hand side of the stage and activate your lantern. You will drop down onto a platform in the dark in the room below with a chest on it.
- [14D] Fire Egg
From the Animal Burrow travel to the room below and two to the left to reach where you fall into the deeper area of the map. Use the disc to travel across the gap and reach this chest.
- [12D] Promise Egg
From the animal burrow travel to the right into the dark rooms. Travel right again to the room with the birds that don't let you fall. Break the spikes on the floor with the yoyo and then use your Lantern to drop down and reveal a ladder to the right
- [6D] Moon Egg
From the animal burrow travel to the right into the dark rooms. Travel up and there's a secret passage to the right of this room. Use the disc to jump up and reach the next room. Use the Lantern to traverse this room safely
- [9E] Sapphire Egg
From the Frog Warp Door room travel two rooms to the left. Stand on a glowing bird and activate your lantern. You will drop down to a space below this floor with a chest
- [12E] Obsidian Egg
Go down the elevator towards the Ostrich area. Make sure the rat coffins are travelling to the left and use the Disc to stay between two as they continue to the left. In this space is an Egg.
- [14E] Golden Egg
Return to where the Ostrich was on the wheel in the bottom right of the map. Travel one room to the left and use the Wheel to get access to two hidden switches in the lower center of this screen. The chest is in a hidden alcove to the right.
Final Biome
This Biome reveals itself after all four flames have been collected and placed in the Central Room. There are no collectible eggs to be found inside.
Have a tip, or want to point out something we missed? Leave a Comment or e-mail us at tips@techraptor.net
Andrew has written Video Game and Entertainment news, reviews, and guides for 10+ years. As Senior Content Manager, he assists in creating and editing… More about Andrew