Our Forever Skies Underdust Laboratory Walkthrough will guide you from the point you get the Location Radar until the end of the first Underdust expedition.
By now, you should have a sturdy Ship and quite a few Resources to your name in Forever Skies. You probably have no issues getting Food and Water while you're flying around above the poisoned Earth. A greater challenge awaits, though -- taking an elevator to the surface and exploring the ruins of human civilization on foot. Read on to learn how to survive this new nightmare!
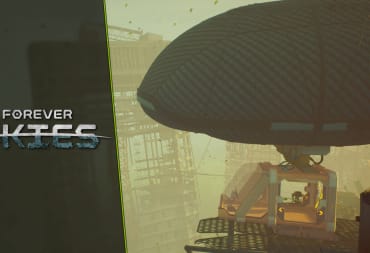
Forever Skies Underdust Laboratory Walkthrough
You have a sweet Ship, a Map, and some basic supplies. Now we'll kick off the Forever Skies Underdust Laboratory Walkthrough and take you in somewhat of the
< Navigation Technology Walkthrough | Underdust Laboratory
In the previous part of our Walkthrough, we made the Ship bigger, faster, and able to fly higher. Now we're going to put it to good use and head toward our next objective!
Heading to the Greenhouse Tower
Fly toward the nearest exclamation point in an orange diamond on the Map. We're looking for a Tower with three green lights on the roof.

Make sure to grab Food, Metals, and Synthetics along the way as needed.
Greenhouse Towers are much larger than anything you've encountered before. You can land your Ship on one of the concrete platforms, just like a Wind Farm.

Your main Task is to find an "Overgrown Glasshouse" in the Greenhouse Tower. these can typically be found at the very top of the Tower.
Before you head into the Tower, you'll want to take a couple of Empty Bottles with you. If you don't have any, Craft at least 2 Empty Bottles at the Fabricator.
Climb into the Tower and start exploring. You'll find all sorts of plants that you can pick up and cook for Food. (Some of these plants are used in Crafting recipes later on down the line, but don't worry about that for now -- you'll be able to easily get more later.) Food spoils, so only take what you have an immediate need for and leave the rest in the ground.
Greenhouse Towers have several new Resources: Epoxy, Plant Oil, and Polymer. Plant Oil can only be retrieved with an Empty Bottle or an Empty Large Bottle. At the minimum, I recommend picking up at least 5 Epoxy and 5 Plant Oil.
Move up to the "Overgrown Glasshouse" at the top of the Greenhouse Tower. When you get there, however, you'll find that your path is blocked by vines.

If you haven't encountered it already, this will unlock the ability to Research the Knife. The Knife lets you cut through some obstacles (such as these vines), broken Glass, and other plants. (You can find many of these new plants such as Coffee Nuts throughout the Greenhouse Tower, although the spawns are random and there are no guarantees.) The Knife will also allow you to cut locks on doors
Return to your Ship and Research the Knife. Then, Craft the Knife at the Fabricator. Return to the Overgrown Glasshouse at the top of the Greenhouse Tower and cut the vines away. Cutting these vines will give you a new Resource called Biomass; you can get more by cutting grass or plants in Greenhouse Towers, Overgrown Towers, and elsewhere.

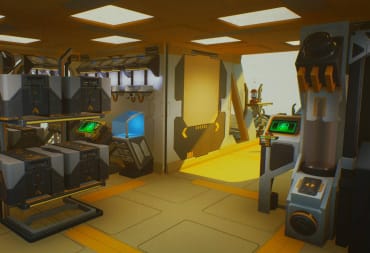
Inside, you'll find several Bruiseflower and a computer that needs to be powered up. You can also find a couple of unique posters that you can put on the walls of your Ship.
Head up to the roof of the Greenhouse Tower and get the Solid State Battery out of the electrical box. If you don't have a Solid State Battery because you used it elsewhere, you can go to any other nearby tower and take a Solid State Battery from there. Interacting with the laptop will give you coordinates for the Descent to the Underdust location, your first foray into the deadly surface of Earth.
Let's not leave just yet, though. Fly around the Greenhouse Tower and grab up any Resources you can find. You'll also notice that there's something special sitting on one of the landing pads:

This is an Upgrade Station. The Upgrade Station can be used to make improved versions of things. For example, you can make a better version of the Engines that lets you fly faster.
Flying to the Underdust
Once you've cleaned out the Greenhouse Tower, lift off of the landing pad and head for the exclamation point in an orange diamond marked on your radar.

One key thing I'd like to highlight is the addition of the "Large Bottle." This stores 20 units of liquid in one space (as opposed to 5 units of liquid with the standard Bottle). I strongly recommend hitting up several Greenhouse Towers and getting enough Polymer to make at 7 of these Bottles -- 4 for Clean Water, 1 for Dirty Water, 1 for Plant Oil, and 1 for a new Resource we're going to find in the next area.
We're also going to want to try to find some useful items for the Ship. Search the blue question mark icons on the Location Radar until you find the Overgrown Tower variant of the Radio Tower. Inside, you'll find a Wrecked Tool Charger that you can scan. Scan it, Research it, and install it on a wall of your Ship; this will allow you to recharge your Tools as long as there is a Solid State Battery connected to the Wrecked Tool Charger.
Naturally, you're going to want to grab whatever other Resources you can along the way. When you feel like you have a good few Resources, start heading toward your destination at the orange diamond with the exclamation point. After a short time, you'll see your destination in the distance:

This is a Descent to the Underdust Tower. It has a single purple light on top of a massive metal circle.
Entering the Underdust
Head inside and you'll see a door with a yellow button and a blue cable. To the right, you'll find a Solid State Battery.

Grab the Solid State Battery, head up the nearby ladder, and drop down the nearby hole in the ceiling with the blue cable heading down it.
Read the laptop if you wish, then head into the elevator. Push the button and ride it to the bottom.

Now you're actually in the Underdust. A new mechanic is introduced in this area -- once you step out of the elevator, your Oxygen meter will start depleting. If it drops to 0, you die. You can restore your Oxygen by returning to the elevator.
There are several new Resources available here. These include Energy Crystal and Dust Daisy. You can also find Polymer, Transformers, and many other useful Resources here.
For your first foray into the Underdust, you're going to want to grab the following Resources:
- 6+ Energy Crystal
- 2+ Polymer
- As many Transformers as you can find
Don't worry about exploring too heavily -- we need to make some special equipment before we get in too deep into this underground area. Just focus on following the above-listed items in the area near the elevator. If you get lost, you can follow the white arrows on the floor back to the elevator.
Next, you'll want to take the elevator back up to the surface. Return to your Ship and Research the following items at the Research Station:
- Circuit Board
- Crystal Battery
- Extractor
- Motherboard
- Upgraded Tool Charger
Once you have this Research completed, you should make the following items:
- 1 Extractor
- 1 Upgraded Tool Charger
- 1 Crystal Battery
Equip the Extractor on your Tool Bar. Place a Crystal Battery into the Upgraded Tool Charger. You can only recharge the Extractor in the Upgraded Tool Charger -- it's important to have one ready to go in case you need to recharge the Extractor. Make sure you bring your Knife and Scanner with you, too.
Finding the Underdust Laboratory
Head back down the elevator. Go straight and turn left and you'll see a tall yellow ladder going up:

This is your first step toward the Underdust Lab. Climb up the ladder.
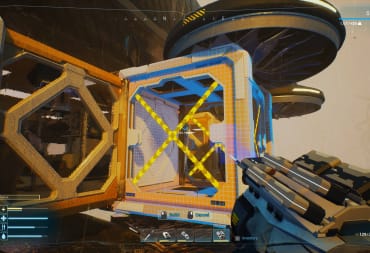
Once you're at the top, you'll see some metal walls behind you. Use your Extractor to destroy the metal walls, then walk forward along the wooden beam.
At the end of the beam, you'll see some debris making a ramp on the left. On the right is a blue container with a Crystal Battery in it. Pick up this Crystal Battery, then head up the ramp and install a Crystal Battery in the Oxygen Refill Station.
Next, head up the broken staircase to the right of the Oxygen Refill Station. Turn around and you'll see another ladder:

Work your way around the beams and climb up this second ladder.
At the top of the ladder, you'll find two things to Scan:

Scan both of these items. Pick up the Crystal Battery on the floor, then head back down toward the elevator.
Go back into the elevator to recharge your oxygen. Head back out and turn left; you'll find a locked door:

In this new area, you can find a lot of Energy Crystals -- at least 10 -- along with a bunch of Plastic Scrap and other supplies.
Walk through the door and turn left, left again, then right. You'll find yourself in this room marked by a purple hanging flower on the back wall:

Go into the room and head down the ramp. As you get closer, you'll see the white and red flower move toward you.
Scan the flower.

This is an Icedew Flower. It prevents you from passing through this area because it detects your body heat. To counter it, you'll have to lower your body heat by giving yourself Hypothermia through a crafted item. We can't do that just yet, though.
Finding the Medium Oxygen Tank
Head back out the door where you came in. This time, we're going to head to the right through this somewhat concealed doorway:

This will lead us to another room with another Icedew Flower.
There are several things to do in this room. First, you should have at least one Crystal Battery in your inventory if you've picked up all of the ones I've pointed out. If you do, put it into the Oxygen Refill Station since we'll be operating out of this area for a short time.
Next, turn to your left and you'll see a metal beam blocking a doorway. Destroy it with your Extractor and you'll open up a faster pathway back to the elevator.
Once that's done, you should take note of a ramp behind the Oxygen Refill Station. Follow it up to higher ground.

At the top of this ramp, you'll find a door.
Head inside the door and you'll find a corpse next to a Medium Oxygen Tank, along with a Crystal Battery and an unpowered Oxygen Refill Station. (Thanks to YouTuber GDP Duncan for the tip on finding it!)

Scan the Medium Oxygen Tank and take the Crystal Battery. (Do not use it in this Oxygen Refill Station; you won't be coming back here.)
Climb back down and head toward the pathway to the elevator you just opened up. On the right, you'll see several green plants that you can scan:

These are Green Colander plants. They're used in a handful of Crafting recipes, one of which is the Medium Oxygen Tank you just scanned a few moments ago.
Unlocking Virus Research
Take the newly-opened pathway back to the elevator. Grab at least 2 Dust Daisies (the orange flowers) along the way, then head up the elevator and back to your Ship.
Head to the Research Station on the Ship. Research the Virus Sample Analyzer. Then, make one using the Fabricator and place it on your Ship. You'll also have to make a Crystal Battery in order to power the Virus Sample Analyzer.
Place a Dust Daisy in the Virus Sample Analyzer and complete the Virus minigame. Once you've done that, you'll be able to Craft the Vertigo Virus at will in the Fabricator. You'll get a single sample of the Vertigo Virus out of the bottom slot in the Virus Sample Analyzer.
Take the Vertigo Virus Sample over to the Research Station and use it to Research the Hypothermia Booster. While that Research is going on, make a new Vertigo Virus at the Fabricator. When the Hypothermia Booster Research is completed, you can Craft a Hypothermia Booster at the Fabricator.
You can also Research the Medium Oxygen Tank for the cost of 1 Green Colander. It's not really worth it in the current state of the game, though; it only adds an extra 50 Oxygen. (You'll also need to find the Upgrade Station and Craft it to actually make the Medium Oxygen Tank.)
Delving into the Underdust Tunnels
Once you have the Hypothermia Booster, take the elevator back down to the Underdust. Head to either of the tunnel entrances; it doesn't really matter which since they're both connected. In the center of a nearby tunnel interaction, you'll find an Oxygen Refill Station and a Crystal Battery.

Power up the Oxygen Refill Station with the nearby Crystal Battery. This will allow you to thoroughly loot the Underdust Tunnels.
Head down the tunnel to the right of the Oxygen Refill Station.

This will trigger a cutscene where you get attacked by giant mantises. A force field will emerge to protect you, so you don't have to worry about combat just yet.
This is the end of story content for Forever Skies as it stands at the moment, and this tunnel will be closed up in all future versions of Descent to the Underdust that you visit. However, there are a few more things that we can grab.
Wrapping Up the Story
First, walk up to the dead mantis. You can harvest three Mantis Glands from it and Research another Virus by putting it into the Virus Sample Analyzer.

Once this is done, take a turn to the right and go into one of the nearby buildings.
Inside, you'll find a new friend that you can take home with you.

You'll need to find and scan the Wrecked Soft Cushion at the "Temporary Camp" Radio Tower Variant to give your new Friendly Insect pet a home. Once you've acquired it, you can place the Soft Cushion in your Ship.
This will allow you to place the Friendly Mantis inside of it like a storage chest; the Friendly Mantis will then sit on top of it and hang out on your Ship.

With the Friendly Mantis safely secured, we can head back out of the Underdust Tunnels. We have just one more stop to make.
Finding Bigger Storage
Make your way back to this room with one of the entrances to the Underdust Tunnels.

Follow the arrow and it will take you past one of the Icedew Flowers. If your Hypothermia Booster is still active, you can walk past it.
Just behind this Icedew Flower is a handful of supplies and, more importantly, a Wrecked Storage Box.

Scan the Wrecked Storage Box and you'll be able to Craft the Storage Box at the Fabricator. This is the largest storage solution available in the Early Access launch version of the game, providing 25 slots for anything you might want to put in there.
We've reached the end of this Forever Skies Underdust Laboratory Walkthrough and the end of the story in the Early Access launch version of the game, but there's still some more to explore. You can check out other locations using the Map or build your Ship into something much more awesome. In the meantime, make sure to check out our other guides below!
< Navigation Technology Walkthrough | Underdust Laboratory
We're at the end of the Forever Skies Underdust Laboratory Walkthrough, but there's plenty more to explore -- check out our other guides below!
Have a tip, or want to point out something we missed? Leave a Comment or e-mail us at tips@techraptor.net
One of my earliest memories is playing Super Mario Bros. on the Nintendo Entertainment System. I've had a controller in my hand since I was 4 and I… More about Robert N