This Nightingale Guide will teach you the basics, explain the HUD, and show you a walkthrough for the first few hours of the game!
Nightingale is an always-online survival crafting game where players can use magical Cards to travel to fantasy Realms and explore the fate of humanity after the destruction of Earth. Read on to learn about the HUD and get started with your adventure!
Nightingale HUD Explanation
![]()
- Compass: This shows the direction you're facing.
- Objective(s): Your current objectives are listed here.
- Buffs/Debuffs: Any buffs or debuffs (including those from active Cards) are listed here.
- Health Bar: The standard Health Bar. When this reaches 0, you are knocked down and must either be revived or choose to respawn.
- Rest: This shows how long since you've last rested in a bed. A lower Rest meter will make it more difficult to restore Stamina naturally, and a critically low Rest meter will make it functionally impossible to carry out actions.
- Hunger: This shows how full your stomach is. Keeping your Hunger Bar full is essential to staying healthy. If your Hunger gets too low, you'll start to lose health.
- Food Buffs: Any active buffs from food will be shown here. You can get the specific details of each buff by hovering over its icon in the menu.
- Stamina: A standard Stamina meter. Stamina is required for running, jumping, attacking, using tools, and for some special abilities. The Stamina meter vanishes when you are not consuming Stamina. Channeled buffs and debuffs (such as "Wet" or "Hot") will also appear near here.
- Main Hand Hotbar: The five items on the left-side Hotbar (numbered 1–5) are either equipped in your main hand or are two-handed items.
- Off-Hand Hotbar: The five items on the right-side Hotbar (numbered 6–0) are equipped in your off-hand; these cannot be used if you're holding a two-handed weapon or tool in your main hand.
- Quick Slot: A sixth off-hand slot that is ideal for potions, food, and other consumables.
- Log: This shows you a log of events in the game such as resources that you've picked up.
- Chat: Pressing this button brings up the chat window.
- Actions: This shows you the actions bound to specific keys or mouse buttons.

Nightingale Guide | Starter Guide
Now that we've explained the HUD and some of the basic mechanics, let's dive into the meat of this Nightingale Guide! Our Starter Guide will walk you through the opening hours of the game and help you overcome your first challenges.
Creating Your Character
You'll begin your adventure in Nightingale by creating and naming your character. Character creation in this game is a little unusual compared to some other games, but it shouldn't be too difficult to figure out.
Aside from making your character, you'll also choose the difficulty of your initial Realm. Difficulty can be set for each subsequent Realm once you've progressed past the extended tutorial and your first Abeyance Realm.
Puck and a Tutorial Through the Realms
You'll finally get to move around in a dark cave with a temple-like structure. Head toward the Portal and you'll have a conversation with a small floating humanoid named Puck.
Puck tells you the basics about the Realms and warns you of an incoming attack. Step through the Portal as soon as you can to avoid getting your butt kicked!

Your First Forest
The other side of the Portal leads you to a Forest Biome. This is the first of three Biomes you'll explore in the tutorial.
Puck tasks you with picking up some berries, but we're going to go a step further — grab more berries than you're required to, and get some Sticks and Fiber by harvesting plants, too.
Eat the Raw Berries and you'll be prompted to build a Campfire and make some Cooked Berries. Then, you'll be able to talk to Puck again and move on to another Realm. Before you go, make sure to grab a few dozen Sticks and Plant Fibre — you'll need it in the next Realm!
A Deadly Desert
The Desert is your next stop and it's a little more dangerous than the Forest. Simply standing in the sun can cause you to get overheated and suffer penalties!
This second Biome is all about building a basic survival shelter. I advise that you head toward the structures in the distance; there are more resources (and more shade) near the Portal compared to the area where you spawn.

Stay out of the sun as best as you can, follow the tutorial steps, and make your way through the Portal to the next Biome.
Sauntering Through a Swamp
The Swamp is the third and final Biome of the tutorial. Here, you'll learn to fight hostile wildlife and other deadly creatures. This, too, is a fairly straightforward chunk of the game.
I advise that you use the resources in the Swamp Biome to craft a complete set of tools via your inventory. These will be your only defense against hostile enemies, and you can use them to collect resources, too. I recommend using either the Scythe or the Axe.
Activating the last Portal will trigger a fight against the Bound, otherworldly creatures that are tougher than your average wildlife. Succeed, and you'll be well on your way to finding a permanent home.
Arriving at Abeyance
Complete the final battle in the Swamp and Puck will present you with a choice: you can imagine a Forest, Swamp, or Desert. This choice will be your "Abeyance" Realm, a relatively safe home realm where you can establish a permanent base.
I strongly recommend that you pick the Forest. This is a decently-balanced Realm that won't be overly challenging for new players and it has abundant resources.
Once you've made your decision, activate the Portal and step through. You'll arrive at your Abeyance Realm and you'll have a somewhat easier challenge ahead: picking a spot for your home.
Placing Your Estate Cairn
Puck will task you with placing an "Estate Cairn." This is your respawn point and it also serves as a marker for the area where you will build your home.
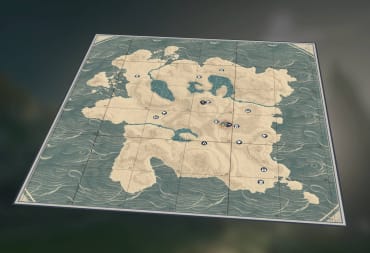
Explore the area thoroughly and find somewhere that looks nice. Pay special attention to the Map — I recommend setting up somewhere equidistant to the Portal and the Essence Trader, simply for the sake of convenience.

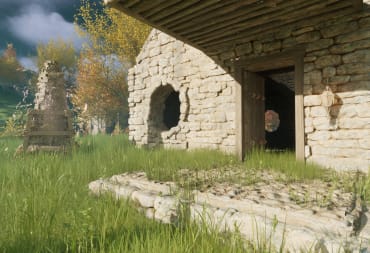
Building a Base
Now it's time to build a small base. I recommend setting up a structure that is 3 Foundations wide, 3 Foundations deep, and 1 story tall. Make sure to build Roof tiles, too. The "Hail" weather event can slowly kill you over time and you'll want the protection of a roof overhead.
Enemies can attack and destroy your base if you're not careful, so make sure to completely enclose it. You'll want to have at least one Door, too.
You can always expand your base later, but a small 3x3 structure will be enough for the early crafting stations for now. Make sure to place the following objects inside of your base:
- Campfire
- Bedroll
- Simple Workbench
- Simple Tanning Station
- At least 2 Angling Baskets

Your First Hunt
Your main goal, for now, will be to upgrade your Gear Score to 20 or higher. The only practical way to do that is by making a set of Leather equipment, and you'll need Essence and Hide to do that.
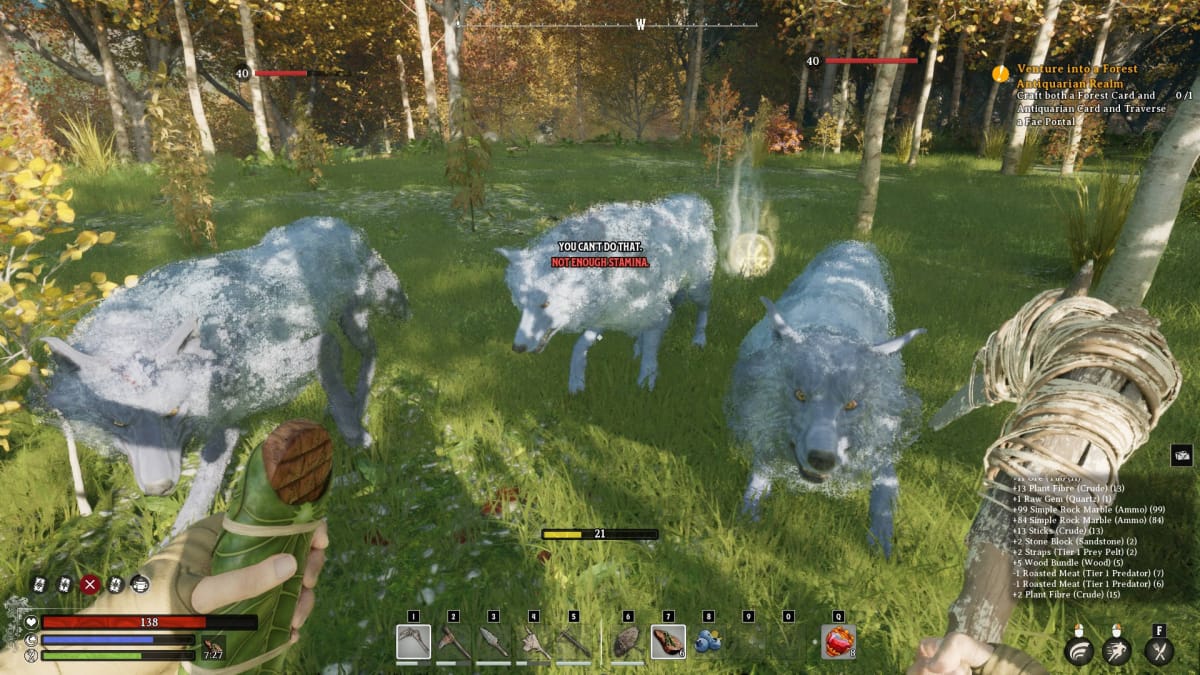
Don't bother trying to hunt passive wildlife; they're quick to run away and you'll have to chase them halfway across the Realm. Instead, you should focus on fighting hostile wildlife such as wolves and boars in the Forest Realm (or their equivalents if you selected another Realm).
Although fighting hostile wildlife will be more challenging, they won't run away. This is the most reliable way to collect the Hides you'll need. You'll also be able to get a fair amount of meat that you can cook, too!
Collect at least 3 Hide to start. When you have it, return to your base.
The Simple Slingbow (and other Tools)
Your next task will be to craft a Simple Slingbow. This will be your first ranged weapon and it will make the rest of your hunting much easier.
Convert all 3 Hide into Straps. Then, use these Straps to make a Simple Slingbow, Simple Sickle, and Simple Mining Pick. These tools will help you harvest a wider range of materials.
Naturally, you're going to need ammo for the Slingbow. Craft at least 200 Simple Rock Marbles at the Simple Workbench. You shouldn't leave your base without at least one stack of 99 Simple Rock Marbles!
Don't forget to cook all of the meat you got from the animals you've hunted, too. Fill up your belly, and then get ready to head out the door once again.

Hunt Smarter
With the Simple Slingbow in hand, you'll have a much easier time hunting hostile wildlife. You can also choose to fight the Bound at the various Points of Interest in your Abeyance Realm; doing so will get you access to some useful loot in these Points of Interest.
You are going to need at least 22 Hide. 2 Hide make 1 Leather, and you'll need 11 Leather to make a full set of new gear.
Keep in mind that you can only combine two of the same Hide; if you have 9 of one Hide type and 13 of another Hide type, you'll end up falling short. (It can't hurt to get a little extra, either, as you will likely need Leather later on down the line.)
Getting Essence Fast
You're also going to need to collect a fair amount of Essence to unlock new crafting recipes and workstations. Though you can find some in the wild or get it as drops from enemies, the easiest way to get it is to simply break down resources you've harvested.
In my experience, it's best to craft Simple Rock Marbles for the express purpose of breaking them down into Essence. One Simple Rock Marble gives you 2 Essence.
You don't need to worry about Essence too much just yet, but you're going to need hundreds of it later. For now, make sure to collect around 120 Essence and hold on to enough extra to keep your tools repaired.
Buying New Blueprints
Once you have 22 Hide, you can make the Leather you need to upgrade your equipment. However, actually making the equipment will require unlocking a new workstation.
Open up the Map and look for the Essence Trader. This NPC will sell you new blueprints and other useful items in exchange for Essence. At the minimum, you're going to want to buy the Simple Sewing Bench.

Recruiting a Follower
Going to the Essence Trader will also unlock a nearby quest to help an NPC. All you need to do is complete a handful of prebuilt structures at their camp. Once you do, you can recruit them as a follower.
Followers are incredibly handy for solo players and they're likely to be more powerful than you at this early stage of the game. You could steal their equipment for yourself, but it's better to let them keep it for now.
The reason, simply put, is that a Follower can revive you if you go down. You can let your Follower tank damage and revive you while you pelt enemies from afar with the Simple Slingbow.
For now, take your new blueprint and your new Follower back to your base.
Preparing for Battle
Now it's time to prepare for your first boss fight. Convert your 22 Hide into 11 Leather, then make the following at the Simple Sewing Bench:
- Simple Boots
- Simple Capelet
- Simple Pack
- Simple Gloves
- Simple Headwrap
- Simple Breeches
- Simple Shirt
You'll also need some Plant Fibre to make this stuff, but you should know how to find that by now. (Protip: using a Scythe on a plant gives you more Plant Fibre than picking it by hand!)
I also advise that you empty your inventory of any excess resources. Make sure to have at least 500 Simple Rock Marbles with you. Yes, you really are going to want to have that many for the upcoming battle.
Before you go to your actual end goal, it's advisable to clear out some of the Points of Interest that are dotted around the map. These small towers and forts have useful treasure such as healing potions inside, and those can be tremendously helpful for the fight ahead.
As an alternative, you can simply craft a fair amount of Healing Salve; around 20 or so should be enough for the battles ahead.
Diving Into the Antiquarian Site of Power
It's now time to go into the Antiquarian Site of Power. This subterranean structure is packed with Bound enemies and you'll have to deal with a boss fight at the bottom.

Considering that it's a steep drop, it may be worth it to visit the Realmic Transmuter on the Map. This will allow you to play the "Thinned Veil" Card which essentially lowers gravity and negates fall damage altogether. If you can find one, you can literally float down past most of the enemies and go straight to the boss.
Otherwise, you should slowly work your way down the stairs and kill every single Bound you come across. The last thing you'll want to try to do is loot your corpse while a swarm of Bound is surrounding it!
Killing the Fabled Automaton Knight
Your final challenge lies in the bottommost room of the Antiquarian Site of Power. A strange machine surrounded by lasers sits in the center of the room and a button is nearby. Pushing the button, however, will spawn your first true boss fight: the Fabled Automaton Knight.

The Fabled Automaton Knight can be pretty fast and it hits like a truck. The Thinned Veil Card can be especially useful for dodging its attacks; it's seriously a good idea to activate it if you can find one!
Keep your distance from the Fabled Automaton Knight and let your Follower distract it with melee. Stay as far away as you can and keep pelting it with shots from your Simple Slingbow. Use the pillars in the room for cover and take care not to get stuck on anything.
Keep in mind that losing this fight will force you to start it all over again. Don't try to rush to a finish; carefully and patiently whittle down the health of your foe.
If you're careful, you'll be able to kill the Fabled Automaton Knight in no time. You can then interact with the pedestal and unlock the Antiquarian Card!
Revealing More Realms
With the Antiquarian Card unlocked, you'll soon be able to travel to new Realms and explore new challenges. Unfortunately, you have to do a bit more Crafting, first.
You can create new Cards using the Simple Enchanter's Focus. This workstation, in turn, requires the advanced materials Lumber, Ingot, and Glass, which means you'll need the Saw Table and Smelter, too.
Visit the Essence Merchant and purchase the workbenches you need. Gather the necessary resources and you'll be able to build the Simple Enchanter's Focus. From there, you'll gain access to the ability to make Cards, although you'll need to gather some other resources and some additional Workstations to make that happen.
For now, though, you should have a solid grasp of Nightingale's basics. Good luck on your adventures, and make sure to check out our other guides below!

Nightingale Multiplayer Functionality
Nightingale is an always-online game and it supports multiplayer for up to 6 players in a single Realm.
Nightingale Save File Location
As an always-online game, the Nightingale save file is stored online; you can't gain access to it as far as we can tell.
Nightingale Death Consequences
If you die in Nightingale, you'll drop everything in your backpack on the ground and you'll have to retrieve it later. You'll lose any food buffs that you had prior to death and you'll respawn at the start of the zone or at your Estate Cairn.
Thanks for reading our Nightingale Guide! Stay tuned for more guides about this great survival game!
Have a tip, or want to point out something we missed? Leave a Comment or e-mail us at tips@techraptor.net
One of my earliest memories is playing Super Mario Bros. on the Nintendo Entertainment System. I've had a controller in my hand since I was 4 and I… More about Robert N