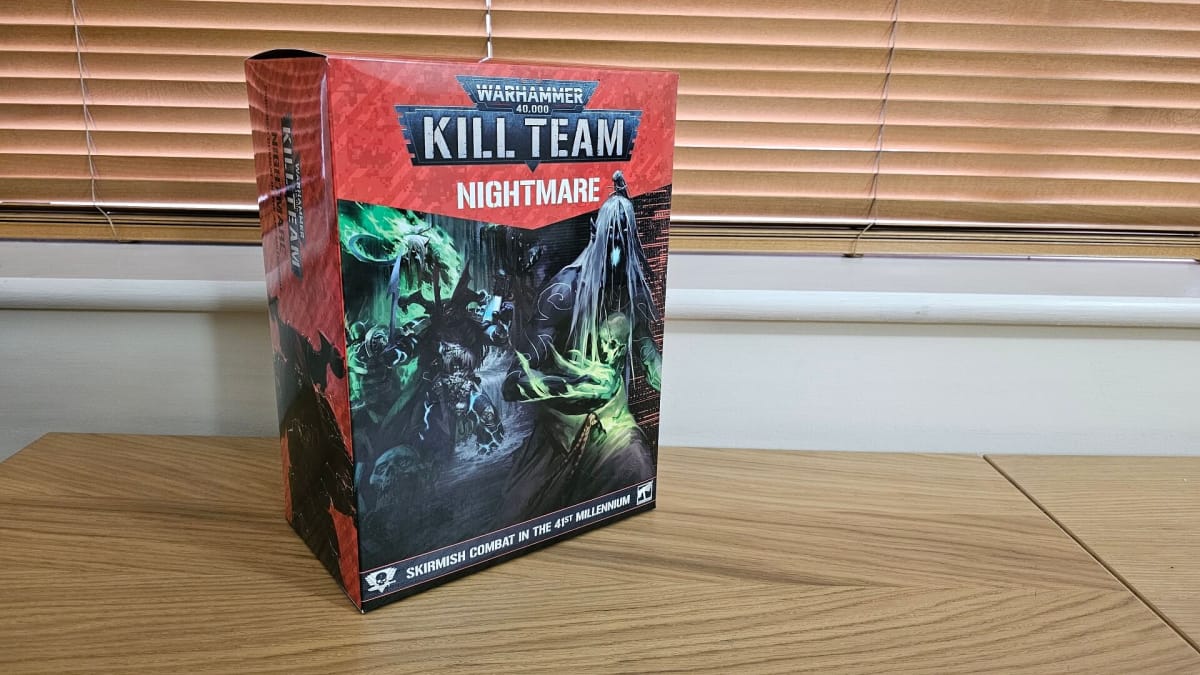
Kill Team Nightmare is the second expansion in the Bheta-Decima campaign. Like Kill Team Salvation before, it breaks from the format of previous Kill Team seasons, and while still introducing 2 brand new kill teams, the Nightmare box doesn't include the wealth of scenery that all previous big boxes have had. In this article, we'll have a look at what's in the Nightmare box, talk in-depth about the 2 new kill teams and kill zone, and explain why this box is different from previous seasons, and if you're a new player, what you need to use it.
Kill Team is a skirmish wargame, set in Games Workshop's larger Warhammer 40,000 setting. As a skirmish game, Kill Team features a small number of elite troops, fighting special operations battles, rather than huge battles fought with entire armies. If you want to check out the Kill Team rules before you buy, Games Workshop has made the core rules available to download for free. We've covered Kill Team in depth since the last edition, and you can read our guide to all the current Kill Team products, or check back to where the Gallowdark started in our Kill Team Into the Dark preview.
What Does Kill Team Nightmare Contain?
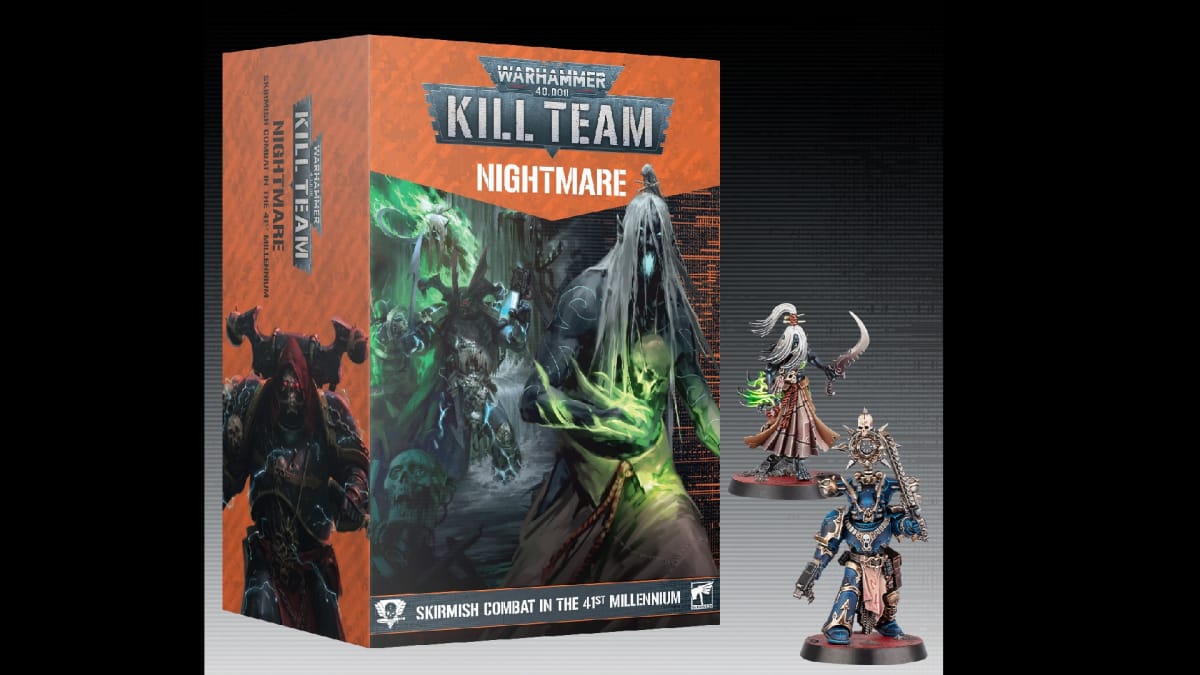
Kill Team Nightmare contains:
- Kill Team Nightmare campaign book
- 10x Night Lord Chaos Space Marines for the Nemesis Claw kill team
- 10x Drukhari Mandrakes for the Mandrakes kill team
- Datacards for all operatives from both kill teams
- A token set for both kill teams
- A card set including equipment, abilities, tac ops, ploys, and token guide for both kill teams
- A Generatorum Hub large scenery piece
What Do I Need To Use The Kill Team Nightmare Box?
Kill Team Nightmare is an expansion pack for Kill Team, so it doesn't require everything needed to play.
To use Kill Team Nightmare you will also need the Kill Team Essentials:
- Kill Team Core Rulebook
- 6-sided dice and measuring tools
- Kill Team Token Set
- Kill Team Critical Operations cards (not essential for Open Play, but required for Matched Play and are great for easing setup)
- A game board and scenery set (you can use anything you want, including your existing scenery, or the new official set for this season, the Killzone: Bheta-Decima scenery box)
What Does the Kill Team Nightmare Campaign Book Add To Games?
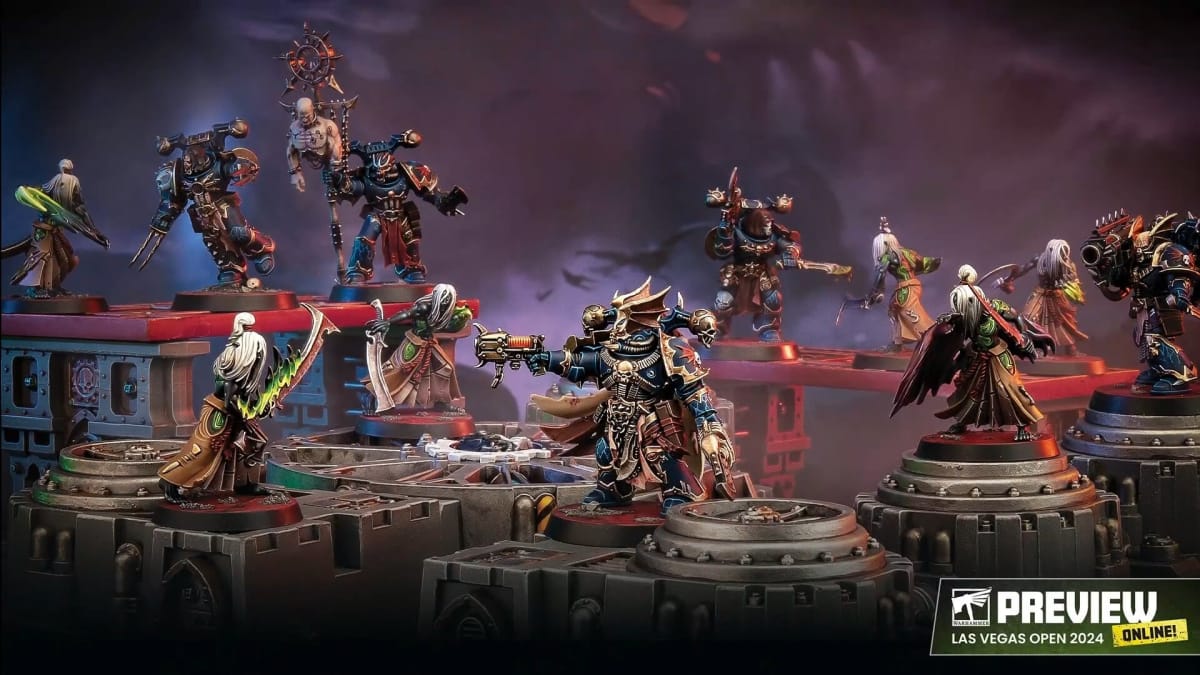
The Nightmare campaign book is split into several chapters, the first, Nightmare, details the end of the Gallowfall and the world of Bheta-Decima, which the 2 factions of this expansion are fighting on. The next chapter contains the background for Chaos Space Marine Night Lords and the Drukhari Mandrakes' kill teams, along with narrative ideas and hooks to flesh them out.
The core of the book is the datacards, abilities, special rules, ploys, and spec ops details for the 2 new kill teams included in the set, and we look at both new kill teams in detail below.
The book closes with Killzone: Bheta-Decima, Killzone: Nightmare, and the hazardous areas rules that the Killzones are based on. The oceans of Bheta-Decima block line of sight because of the surging waves and can't be moved across without fly due to the strong currents, toxic waters, and underwater predators. It also includes the rules for Bheta-Decima Narrative Twists, additional rules to add narrative elements to your games, rules like the Ocean Predator, which can damage a random operative, and the end of each turning point. The book closes with Critical Operations: Nightmare Mission Pack, a series of 9 matched play missions, using the Nightmare and Bheta-Decima Killzones.
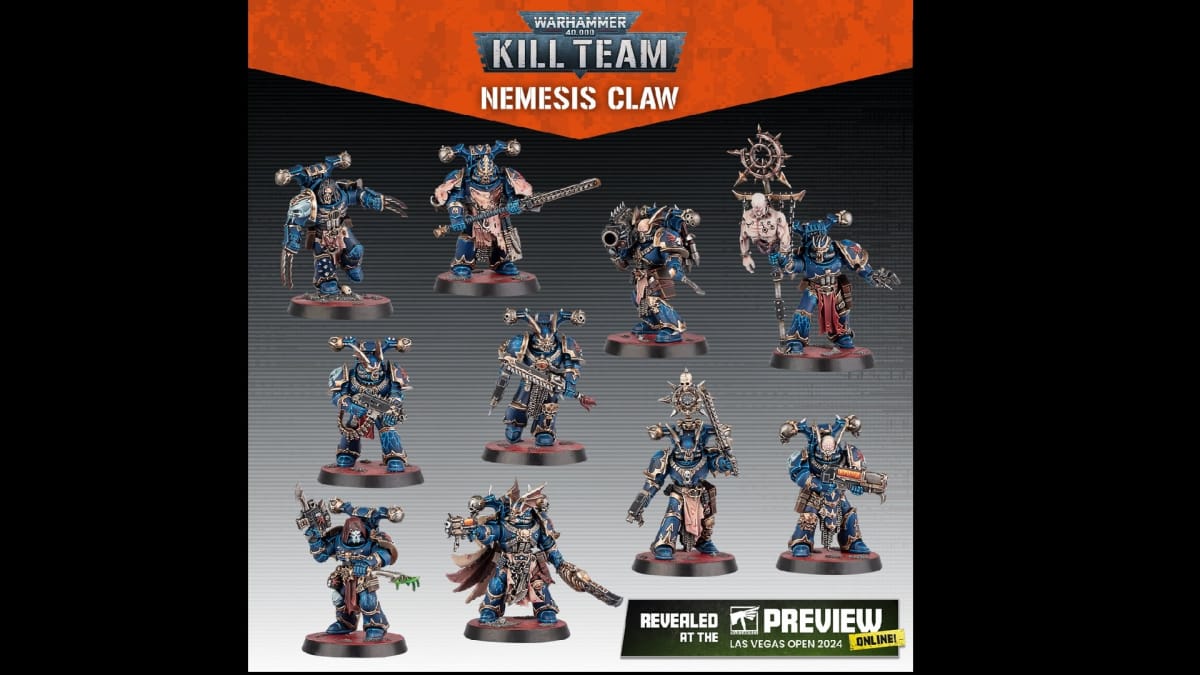
What are the Chaos Space Marine Night Lords Nemesis Kill Team Troop Choices?
The Chaos Space Marines, or Traitor Marines, are those who followed Horus during the events of the Horus Heresy or have turned away from the Emperor's light since then. The Night Lords were a chapter of Space Marines that followed Horus, battling against the Emperor's armies. But some say that had fallen long before that. Their methods of war have always been extreme terror. Attacking from the darkness, executions, and torture. Usually, it was enough to strike fear into a planet to simply know that the Night Lords were coming.
The Night Lords Nemesis kill team has 8 different troop types and can field 6 operatives in games, and all options can be built out of a single box, but you will need to make some choices for the armaments for the Visionary, Gunner, and Heavy Gunner troop operatives if only using a single box.
The Night Lords are masters of striking unseen from the shadows, and their In Midnight Clad special rules, make them obscured if they're more than 6 inches away, have a conceal order, and are near terrain.
The Night Lord Nemesis troop choices are:
- Night Lord Visionary - The Visionary is the leader of the Nemesis kill team and has 4 armament options. These are a bolt pistol, and either a power first, power maul, or power weapon, or a plasma pistol and Nostraman chainblade. Your choice will depend on the enemies you're facing and what special rules you'll want with your close combat weapons. The extra damage and AP on the plasma pistol is always tempting though, and the chainblade is still a viable close combat weapon. They also generate Prescience tokens each turn, which can be used to pass an action, allowing you to activate operatives later in the turn, or once per turn discard a successful hit dice against the Visionary. As an action, they can also discard a Prescience token to gain a command point.
- Night Lord Fearmonger - The Fearmonger is all about the Terrochem tokens, which deal D3 mortal wounds each turn to each operative that has one. They can give out Terrorchem tokens through their tainted blade, their single-use Terrorchem vial with its blast radius, and also by poisoning objective tokens that they control.
- Night Lord Screecher - The Screecher comes armed with a pair of lightning claws, and can use them very effectively. 5 attacks, hitting on 3+ with lethal 5+ (which drop to 4+ if the target has already been damaged) and relentless. They also worsen the weapon skill and ballistic skill of enemy operatives by being close by, making it hard for them to be hit in return.
- Night Lord Skinthief - The Skinthief comes armed with the powerful Nostraman chainglaive, which gains reap 1 and rending on a critical hit. Their special abilities also reduce damage against them in close combat, and if they incapacitate an enemy, they can stop nearby enemy operatives from taking mission actions or controlling objective markers.
- Night Lord Ventrilokar - The Ventrilokar carries the Night Lord's standard, the dismembered torso of a slain Space Marine, animated with dark sorcery. Their APL is counted as 1 higher for objective control, and as a special action, they can choose from 3 different options for a nearby enemy operative. Either subtracting 1 from their APL, changing their order, which can be very powerful for making an opponent's concealed operative visible, or make them perform a free dash action, where you specify their movement, which is usually much more powerful than the first 2 options. You can move an operative away from an objective, which can be better than simply reducing their APL by 1, or you can move them away from terrain, making them clearly visible to all operatives.
- Night Lord Gunner - The Gunner has 3 weapon options. The short-range, torrent flamer, the high-damage AP2 but short-range meltagun, or the longer-range AP1 plasma gun. Your choice will entirely depend on the battlefield and the enemies you face.
- Night Lord Heavy Gunner - The Heavy Gunner has 2 weapon options. The heavy bolter, that gains P1 on a crit, or the missile launcher with its choice of blast frag grenades, or AP krak grenades. Your choice will depend on the battlefield, but the flexibility of the missile launcher makes it a lot more adaptable than the heavy bolter.
- Night Lord Warrior - The standard Night Lord can be armed with a boltgun and fists, or a bolt pistol and chainsword. With some of the great options above, and only 5 troop choices after the Visionary, it will be unlikely you will take a warrior, but if you do, the battlefield will dictate your weapon choice, the pistol/chainsword option suiting the close confines of the Gallowdark more than open terrain.
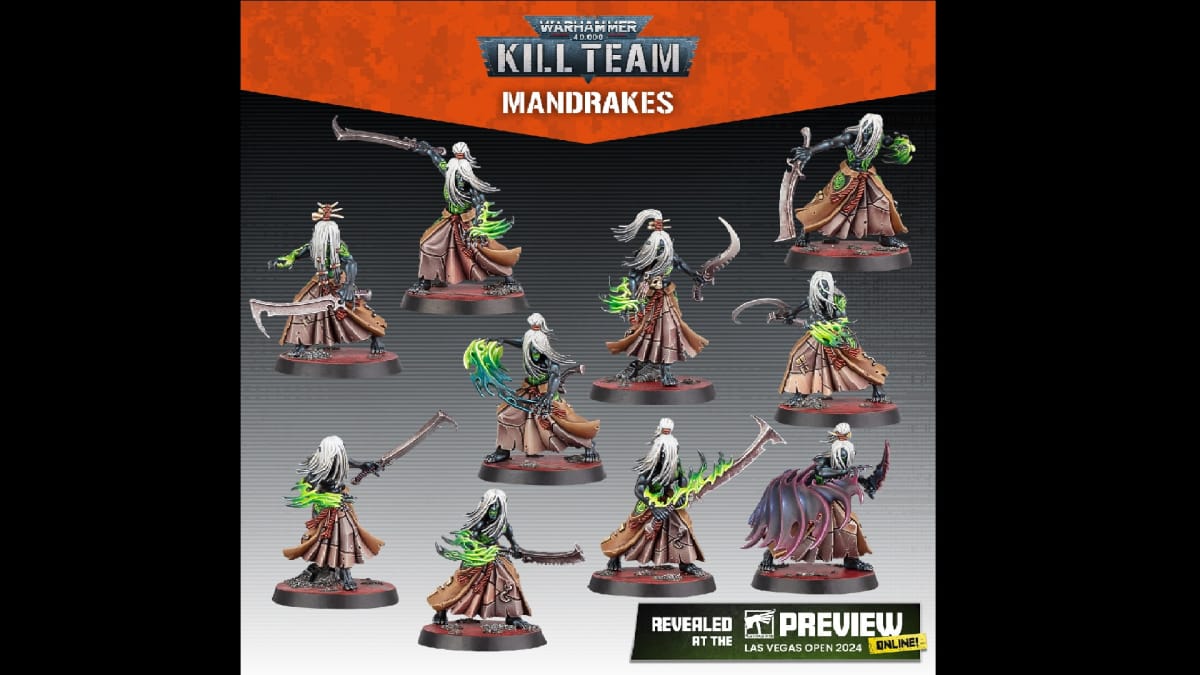
What are the Drukhari Mandrakes Kill Team Troop Choices?
The Drukhari are the vicious and spiteful cousins of the Aeldari. But even within the Drukhari, the Mandrakes are an unknown shadowy force, with their own agendas and objectives. Arriving to fight, taking captives, or not, and then disappearing again.
The Mandrakes have 6 troop choices, which include the leader and 4 specialists. Nightmare contains 2 identical sprues, which allow you to build the leader, 4 specialists, and 5 Mandrake Warriors.
Like the Night Lords, the Mandrakes have an affinity with the shadows, and they are considered Within Shadow if they are near the heavy part of a terrain feature, or under a vantage point. Being Within Shadow means that their 5+ invulnerable save drops to 4+ and allows one operative per turn to use the Shadow Passage action that lets them bounce from Within Shadow to another Within Shadow area, at the cost of performing ranged attacks next turn.
The Drukhari Mandrakes troop choices are:
- Mandrake Nightfiend - The leader of the Mandrakes Kill Team. They come armed with a baleblast and huskblade. The latter has 5 attacks, hitting on 2+ with Lethal 5+. Their Harrowing Whispers ability can also delay nearby enemies from activating, by rolling above their APL. They also have a defensive Oubliex, which allows them to negate an attack dice on a 5+. It activates at the start of each turn and deactivates after its use, but reactivates if the Nightfiend incapacities an enemy with its huskblade.
- Mandrake Abyssal - The Abyssal comes armed with the adaptive balesurge, that can either be fired with the blast special rule, or lethal 5+. As an action, they can also use their Wreath in Balefire action, which allows them to give a friendly or enemy operative a Balefire token, which increases damage against enemy operatives and reduces damage to friendly operatives.
- Mandrake Chooser of the Flesh - The Chooser comes armed with the powerful baleblade, with Brutal, Lethal 5+, and on a crit, it gets Reap 2. After they incapacitate enemies, they gain Soul Harvest tokens, which can be spent to add 1 to a Mandrake's APL until the end of the battle or heal D6 wounds.
- Mandrake Dirgemaw - The Dirgemaw comes armed the same as the standard Warrior, but they have access to the short-range, indirect horrifying scream attack, and with their unique Pareidolic Projection action, they can select a visible, or Within Shadow enemy that is treated as Injured until the Dirgemaw's next turn. They also have a Haunting Focus special ability, which lets them select an enemy during the strategy phase, and when the enemy activates, the Dirgemaw can activate first, but can only target the selected enemy with attacks that turn.
- Mandrake Shadeweaver - The Shadeweaver comes armed the same as the Mandrake Warriors, but has some powerful abilities. Like the unique Open Shadow Portal 2AP action, that allows them to open a Shadow Portal, giving them a free Shadow Passage action, and leaving a Shadow Portal token where they start and end their move. The Shadow Portal tokens then allow Mandrake operatives to avoid the once-per-turn restriction of the Shadow Passage ability between those tokens. They can also use the Weave Darkness unique action to drop an obscuring smoke token within visibility.
- Mandrake Warrior - The standard Mandrake Warrior can still be deadly, and when they are Within Shadow, their glimmersteel blades gain an extra crit damage, which is made more powerful by their Lethal 5+ rule. They also have the Soulstrike special rule that all Mandrake ranged weapons have, which negates invulnerable saves, and targets need to roll under their APL and not their save.
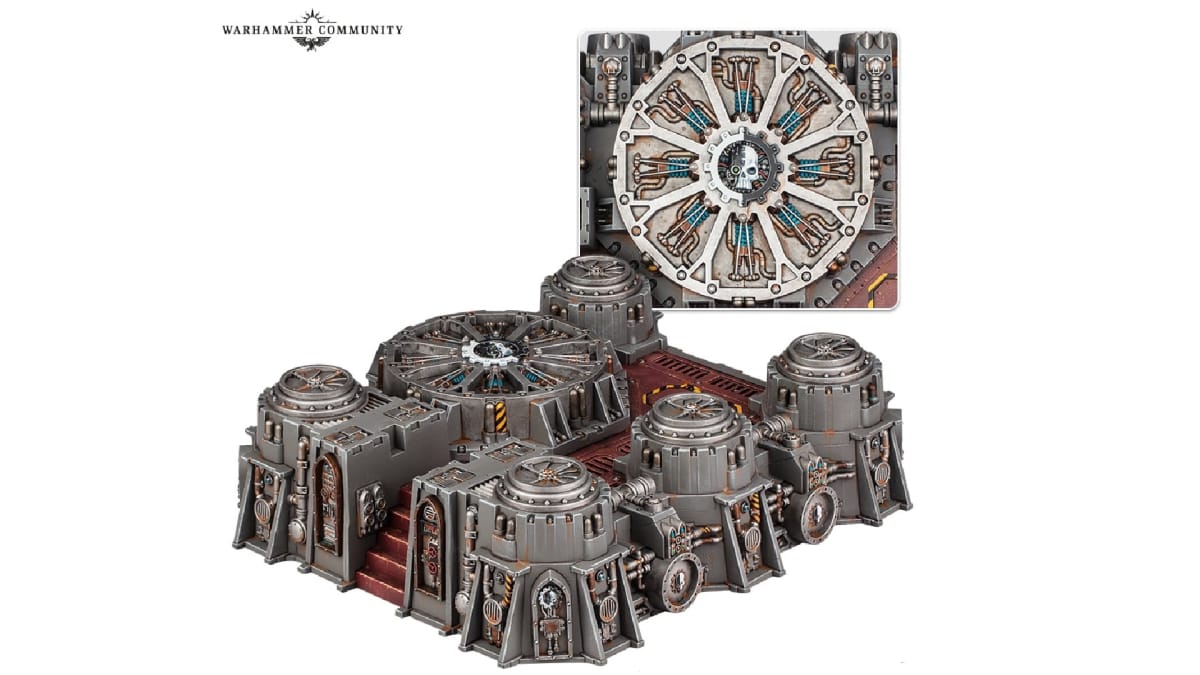
What Scenery Does The Kill Team Nightmare Box Contain?
Kill Team Nightmare comes with a single large scenery piece, the Generatorum Hub, which has multiple levels to fight over. It is used alongside the Bheta-Decima scenery for the missions in the back of the campaign book. If you want the official scenery for Killzone: Bheta-Decima you'll need to pick up that set separately, but you can make do with other walkway style scenery pieces if you want to play the missions out of the book.
Should I Buy Kill Team Nightmare?
If you want either of the kill teams in this set, then this will probably be the only way to get them for a couple of months before their individual release. Both new sets of miniatures are very thematic against each other, and the focus on shadow fighting would be even better in last season's Gallowdark terrain. If you don't want either kill team, then the only part of the expansion that you will use is the new killzones, missions, and the Bheta-Decima Narrative Twists. These will almost certainly be available in the Annual at the end of the season, and previous seasons have seen books released separately alongside the individual kill team releases if you're happy to wait.
The copy of Kill Team Nightmare used to produce this guide was provided by Games Workshop.
Have a tip, or want to point out something we missed? Leave a Comment or e-mail us at tips@techraptor.net
