In this guide, we'll tell you how to get access to Atomic Heart Scientific Testing Ground 9 and how to solve the puzzles inside!
Quicklinks: Scientific Testing Ground 9 Location | How to Open Scientific Testing Ground 9
Bronze Challenge | Silver Challenge | Gold Challenge | Loot
Where is the Atomic Heart Scientific Testing Ground 9?
You can find the Atomic Heart Scientific Testing Ground 9 in the town southwest of the Kollectiv Complex. The elevator is located in a small shack next to the statue, but you'll have to open it first.

How to Open Scientific Testing Ground 9 in Atomic Heart
Opening Scientific Testing Ground 9 in Atomic Heart will take a little more work than usual -- the Daisy security cameras have been powered down due to an infestation of mutants.
First, head over to the nearby docks.

Dive into the water and you'll find a pipe that you can swim into. Follow the pipe to its end and you'll encounter some Polymer. Go into the Polymer and move vertically; you'll emerge inside of a facility.
This underground facility is quite expansive. It has a fair few biological enemies (such as Mutants and Sprouts) to deal with, but it shouldn't be a problem as long as you have one or two decent guns. Take your time looting this place.
Your first goal is to reach the boiler room. The boiler room has four boilers that are not powered. A locked door is also in this room.

Open the locked door and you'll find a box of Candles (glowing yellow orbs) and a pipe. Put Candles into the pipes and light all four boilers. Once they're lit, they'll explode, resolving the problem and powering the security cameras back on.
Nearby is another locked door. Open it and you'll have a shortcut leading back to the path you used to enter the underground. Go back down through the Polymer, out the water pipe, and back up to the surface.
The Daisy security cameras are now online. You'll find a tower just on the other side of the docks:

Go up the tower and interact with the Volan to gain access to the cameras. Use them to open up the elevator next to the statue. Head back down the tower's elevator, over the water, and toward the statue in the town. You can now enter the elevator and head down into Scientific Testing Ground 9.
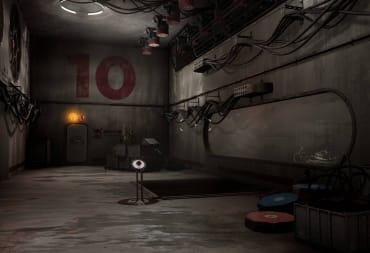
Atomic Heart Scientific Testing Ground 9 Bronze Challenge
As usual, you'll find a Breakroom right after the entrance of Scientific Testing Ground 9. Save your game.
Your first puzzle involves using Shok on some Polymer on the ground around a spinning light that prompts you to use Shok. If you use Shok on this area, it will cause the door to quickly open and close -- don't use it just yet.
Stand next to the door and use Shok, then walk through the door.

The Polymer will eventually be consumed by the electricity. If you don't make it through the door in time, you can head back to the Breakroom and swap out some of your Neuropolymer to pick up the Polymeric Jet Skill and try again.
In the next room, you'll find a large open pool of water and a Candle (glowing yellow orb) on a pedestal. Do not try to swim into the water -- there are deadly lasers that will instantly kill you.
Grab the Candle and put it in the receptacle next to the door. The door will open partway. Crouch and go underneath it. Straight ahead and to the left is the room with the Bronze Comrade Lootyakin -- you'll find the KS-23 - Collimator Upgrade inside.
Head back out of the loot room and down the stairs. You'll find a control room to the right. Push the button and it will open up a submerged room in the pool. Head back up the stairs, crouch through the door, and carefully dive into the pool. Make sure not to sink too low or you'll get instantly killed.
Take this second Candle through the low door. Place it in the receptacle on the other side. Crawl back through the door and grab the first Candle. Then, take both and put them in the receptacles on either side of the other locked door in the room.

Walk through the doors and you'll find some rooms with some loot. You'll also find another button. Push the button and a door will open in the first room with the pool.
Now, it's time to reverse everything you've done. Pull a Candle from one of the two receptacles and put it in the door that only opens halfway. Grab the other Candle and put it in the receptacle on the other side of the half-open door. Crawl back under the door and pick up the Candle.
You'll now have two Candles in the same room. Walk them over to the door one at a time to open it up. Do not go through the door just yet!

This opens the door to the next section. As usual, there will be a fight up ahead -- don't walk through the doors just yet. There's a Breakroom to your right -- head in and save your game.
Atomic Heart Scientific Testing Ground 9 Silver Challenge
The next room is going to be an intense fight. I strongly recommend that you have a Fat Boy with at least 12 Fat Boy rockets.
You'll have to fight a Plyusch, several Mutants, and a heck of a lot of Sprouts. Climb up onto the high ground and use the Fat Boy to keep the Plyusch stunlocked. Once it's dead, look around the room and kill all of the Mothers. Then, clean up the Mutants and Sprouts.
Loot all of the dead enemies, then walk to the far side of the room and you'll find a locked door. Open the door. Head down the hallway and you'll find the Silver Comrade Lootyakin in a side room to the right with the Dominator - Impulse Divider Upgrade.
Atomic Heart Scientific Testing Ground 9 Gold Challenge
The final challenge in Scientific Testing Ground 9 is surprisingly easy. Look up and you'll see several Candle receptacles next to magnets. There is one Candle in a receptacle nearby.
Turn around and you'll see a caged room with some magnets in the ceiling. Use Shok on the magnets and you'll get access to the caged area. You'll find a second Candle on the upper platform of the caged area.
Take the two Candles and use them on the receptacles on the walls to make platforms pop out. Swap the candles on your way up to the top of the room. At the top, you'll find one more receptacle next to the door. Pull up a Candle from the lowest platform and put it in the receptacle to open the door.
Move through the open door and you'll find the Gold Comrde Lootyakin inside; it has the Kalash - Electromagnetic Polarizer Upgrade and the Pashtet - Handle Upgrades. You can then take an elevator back up to the surface.
Atomic Heart Scientific Testing Ground 9 Loot
- KS-23 - Collimator Upgrade (Bronze Comrade Lootyakin)
- Dominator - Impulse Divider Upgrade (Silver Comrade Lootyakin)
- Kalash - Electromagnetic Polarizer Upgrade (Gold Comrade Lootyakin)
- Pashtet - Handle Upgrade (Gold Comrade Lootyakin)
- Various loot
That's the end of our Atomic Heart Scientific Testing Ground 9 Guide. Check out our other guides below!
Have a tip, or want to point out something we missed? Leave a Comment or e-mail us at tips@techraptor.net
One of my earliest memories is playing Super Mario Bros. on the Nintendo Entertainment System. I've had a controller in my hand since I was 4 and I… More about Robert N