Whether you feel alcohol is over- or underrepresented in your life, the fact remains that they do more good than ill in Monster Hunter World: Iceborne. With the expansion, more canteen ingredients and effects have surfaced. We'll focus on one particular buff and elusive ingredient in our Monster Hunter World: Iceborne Snow Wight Ingredient Guide today, namely Snow White.
Monster Hunter World: Iceborne Snow Wight Ingredient Guide
What is Felyne Safeguard?
Felyne Safeguard is a canteen buff that, once per mission, lets your team 'cart' or faint without consequence. For a well-coordinated team, this buff is not all that useful, though such teams are a rare sight when dealing with random players. Especially with SOSs that you may answer, there's no telling what state the mission and the host are going to be in when you arrive. Considering that most missions commonly have up to three shared 'cartings' before the mission fails, and fainting may come as swiftly as a single heavy hit from a strong monster, coming in hot with Felyne Safeguard is a little bit of extra security in securing the victory in face of a teammate who's inadequately equipped for the challenge.
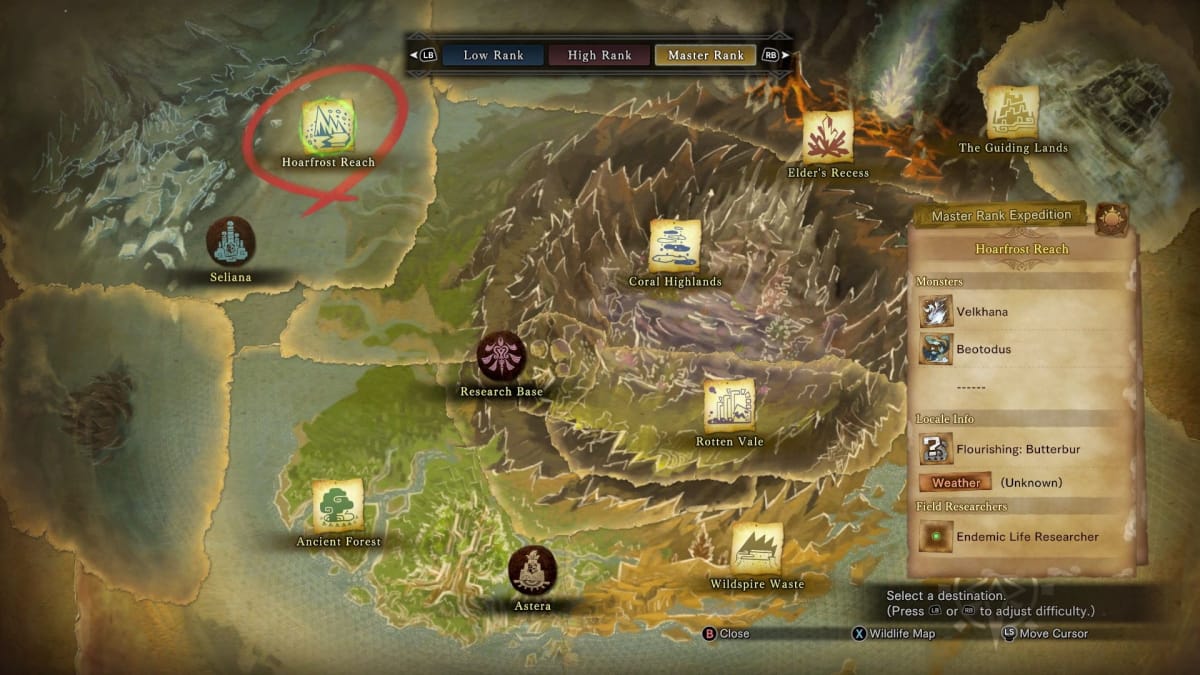
To obtain the buff, you need to gather six stacks of Preparation in the canteen, coming from all six dark red drinks that are permanently obtained after meeting a certain requirement. Two of the ingredients are obtained after one Side Quest, one is obtained after completing a delivery request, and three are obtained from gathering specific items for the first time. These items are Exquisite Butterbur, Millenium Butterbur, and Snow White. The former two are easy enough to obtain in a common gathering expedition in the Hoarfrost Reach and can actually be obtained on the way to the latter. However, the Snow White item responsible for providing the Entrancing Alembic to the canteen is a far more elusive item to obtain.
Monster Hunter World: Iceborne - Preparation

In true Monster Hunter fashion, very little is explained when noticing you lack the necessary food item. There's no ingredient nor drink name, simply a question mark that points out you lack it, and the buff's name taunting you. While most ingredient items aren't that difficult to be found and, at worst, require a specific area condition, Snow White requires not only traversing a somewhat tricky route but also requires the Hoarfrost Reach locale state (shown under Locale Info) to be specifically set to "Flourishing: Butterbur." If it doesn't say this, engage in a mission or expedition and return from it to reroll it. Keep doing this until the Locale Info changes to it, as going into the Hoarfrost Reach without it will not make Snow White spawn in its remote location.
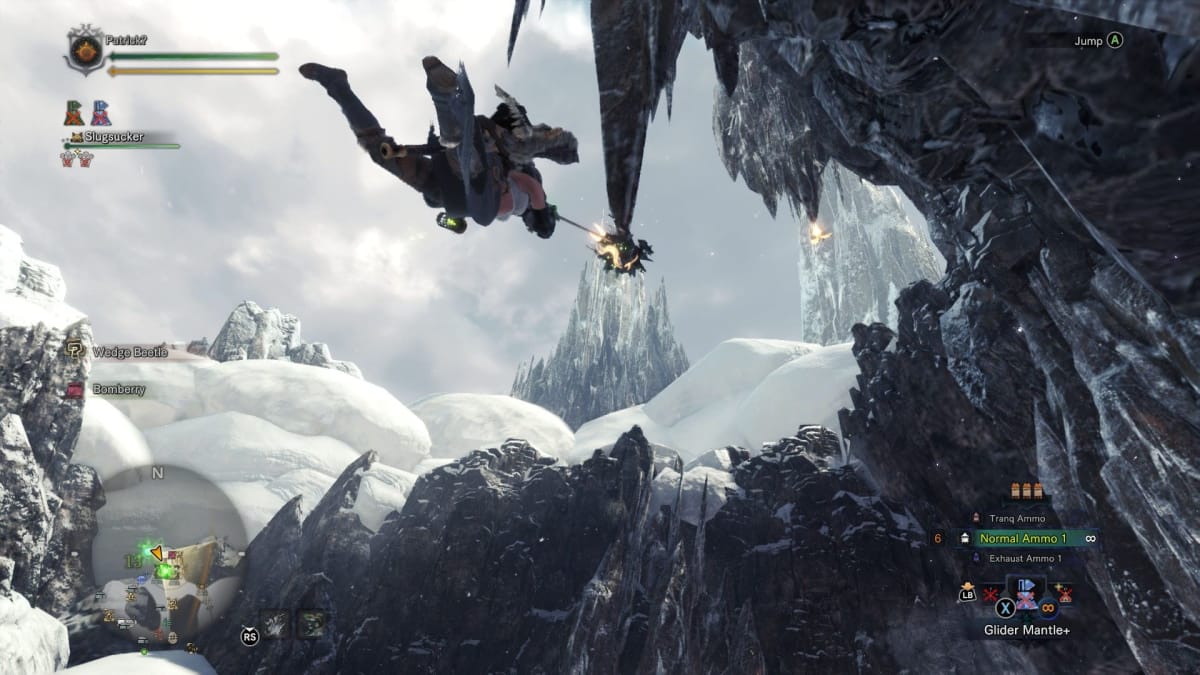
On top of that, be sure to bring your Glider Mantle, as you'll need it to reach a ledge that's just too high to wall-run up to. You may also want to practice your Wedge Beetle targeting, as you'll need to grab onto two and jump off the second in quick succession.
Monster Hunter World: Iceborne - Swinging Around

It doesn't matter much which encampment you arrive on as long as you make your way to zone 13 and head to the location shown above. Mark a resource spot or the like for having your scoutflies or tailraider mount guide you there. When you arrive, you should be greeted with a perhaps familiar sight.

With the underpass in front of you, head on forward and drop down, then climb back up on the other side using the snow. Once there, look up and you should see a wedge beetle. Latch onto it and keep an eye out for the second one that's a little higher up. You may have to jump off the wedge beetle in order to get in range of the second one in order to latch onto it. There's no repercussion for failing the grab, so feel free to experiment with it, though do keep in mind that the second wedge beetle will disconnect from you after a few seconds.

Before you connect to the second Wedge Beetle, be prepared to look for a ledge you can jump toward. Landing on it will be your halfway point and is mainly just a matter of practice.

In the picture above you'll see an entrance that you should fairly easily stumble upon once you've reached the ledge. To your left you'll find an icy wall and some ridges, and in front you'll see an exit you can jump down from. I would heavily argue against jumping down there unless you particularly feel like doing the Wedge Beetle section again.

Now, this is going to take some practice, but you're free to try this over and over without repercussion. What you're meant to do is sprint up against the left wall shown here to jump off the wall while aiming your camera at the right wall. Doing this correctly will enable you to do a second wall jump, which you should aim at the climbable ice wall.

Once you're at the top of the climbable ice wall, turn your camera to the right, facing the ledge in front of you, and press the jump button in order to jump off.

Now you need to do the same thing a second time, but without the ice wall this time. It'll take some practice again, as you'll need to maximize the height you gain and jump off at the right moment in order to reach the ledge up top. You've gotten this far, you can surely do it!
Monster Hunter World: Iceborne - Snow White's Last Few Hurdles

Once up, get past the wedge beetle jump to meet your last obstacle: an intermittently shooting steam geyser.

This one might be a little intimidating and is the reason you (hopefully) brought the Glider Mantle. Equip it, and then walk into the Steam Geyser every time it spouts out. The steam will lift you up while wearing the Glider Mantle. Give it a few tries and scout with your camera for the nearby ledge that you're meant to grab onto. Try to walk into the Geyser as close to the center as possible and you should have enough lift to reach the ledge. Once there, victory is yours!

And that's it! There should be three small butterbur bushes that should provide you with all the remaining ingredients for the Preparation buff stacks. In the very least, the furthest bush should give you the Snow White ingredient as long as the Flourishing: Butterbur locale info is active. Otherwise, it will not be there!

With the Entrancing Alembic now available to your canteen, you'll have access to Felyne Safeguard. However, you can also opt for the Felyne Cleats or Felyne Tailor buffs that require only two and four dark red drinks to obtain, respectively. The first one will allow you to move at normal speed through any terrain, and the latter will shorten the cooldowns for specialized tools.
Either way, I hope you'll make good use of the buff when needed. Using the buff to save an ill-prepared host's doomed mission from failure is an MVP move, not to mention that after about 20 minutes you'll be able to eat again at the camp and pick up a different buff. Drive responsibly!
Have a tip, or want to point out something we missed? Leave a Comment or e-mail us at tips@techraptor.net


