Eyes up, Guardians. The Bungie 30th Anniversary Pack has gone live, and with it includes a brand new Dungeon for Destiny 2: Grasp of Avarice. This is a must-play Dungeon since it is key to getting one of Destiny's most iconic weapons: The Gjallarhorn. It is also the only way to get the new rad-looking Echo Thorn armor for your character. But given how tricky it can be to navigate a brand new Dungeon due to its new mechanics and challenges, going in blind can lead to a lot of frustration. Thankfully we have just the guide for you.
Please note that this guide will not include the locations of Wilhelm-7's lost messages to unlock the Gjallarhorn's alternate skin. We have yet to discover all twelve of them at time of writing.

Destiny 2 Grasp of Avarice Dungeon Walkthrough Guide – The Beginning and Burdens of Riches
After speaking to Shaw Han in the Cosmodrome on Earth, you can select the Dungeon from the Director. Once in, you'll be loaded into a special version of Skywatch where the infamous Loot Cave is. It is here that the cave will spawn countless nonstop hive enemies. Killing them will make them drop special golden engrams. Picking them up will give you an ongoing status called Burden of Riches. This status will have a ticking clock of 30 seconds. If the clock reaches zero, you instantly die. Picking up another engram resets the clock.
This is one of Grasp of Avarice's central mechanics. You need to collect as many stacks of Burden of Riches as possible and seek out a bundle of cloudy looking quartz crystals that is tucked away inside the titular Loot Cave. Standing near the crystals long enough will cause Burden of Riches to go away and make the crystals grow. Once they grow to a fixed amount, a hole will open in the ground which will lead to the Dungeon proper.

Destiny 2: Grasp of Avarice – Wilhelm's Traps
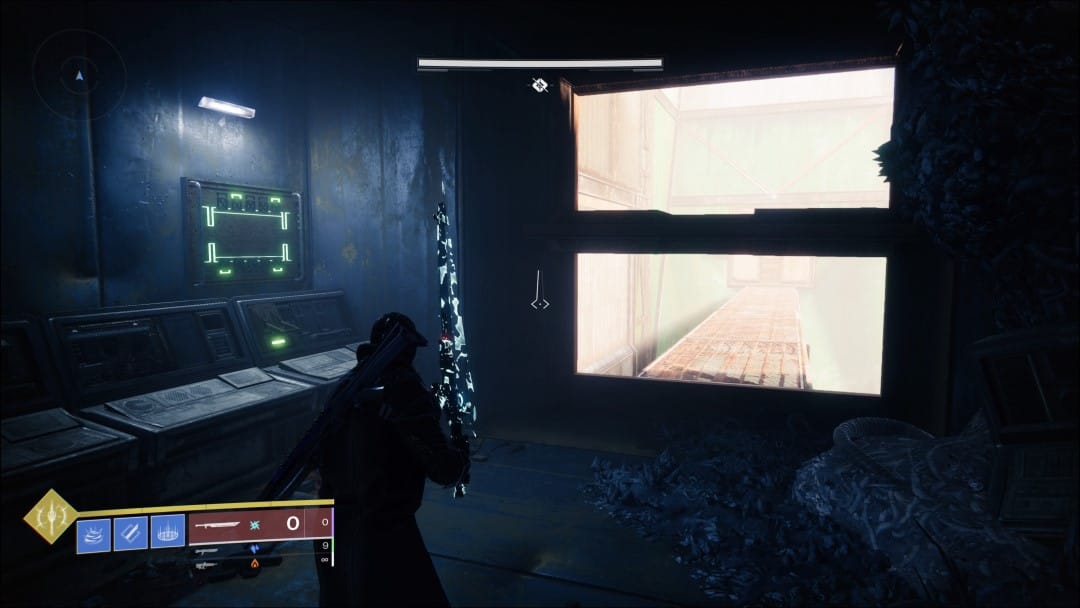
After making your way past a few gun battles with the Hive in a crystal cave, eventually you'll find yourself in front of a large sealed hatch door with a body on the ground. You'll see a lever near the locked door as well as two regular-looking doors on the right side. Do not pull the lever, you will instantly die. Instead, go to the door marked with a danger sign and open it. Inside you will see an abandoned office with a control console on the other side.
Before you run to the console, look at the floor. You should see a rusted iron pressure plate. This is tied to an instakill spike trap. It will not be the last one you see going through this section. Avoid it at all costs.
Hop over the trap and activate the console, this will open the large hatch. Enter this newly opened pathway and you should be in front of a large chasm followed by an elevated platform. Jump to this platform and hug the right side. The floor should fall away like a trap door within about a second. On the right side wall should be a small room with another command console. Activate it, then leap to another platform from the right side looking out. Do not touch the command console on this platform, it is a trap.

Instead, double back out the way you came to the room with the body and look up. You should spot a way upwards to some scaffolding. You should see six different tunnels, three on each side, now opened. A few of these have more of those pressure plates followed by fans. Activating one of these pressure plates will activate the fans which will blow away into a wall instantly killing you.
Go to the farthest most right tunnel from the scaffolding. The fan should be rusted up and lightly covered in trash. Furthermore, you should see some light pouring in on the pressure plate. Trigger the plate and a hatch will open up above you. Leap up and carefully follow your path upwards. Heads up, there is another spike trap plate on one platform, and the final stretch leading into a corridor are trap doors that lead to spiky death below. Sprint or glide across accordingly.

Destiny 2 Grasp of Avarice Dungeon Walkthrough Guide – The Reservoir and Silos
Following the corridor, you should come up to another command console followed by a sealed door. Activate the console and the door will open. Pay attention to the display seen over the console's controls. It will show two rows of rooms, one with green lights, and ones with red Xs. The idea is that the green rooms are open while the Xs mark closed doors. Step out of the door and you will be in a reservoir between two sluice gates. The idea behind this puzzle is that you need to find the command console to open up doors so you can proceed.
But since this is guide, let's cut through all of the trial and error. Your goal is to reach the door way on the other side of the reservoir. If you're looking at the display before entering, it is the rightmost door on the side opposite where you come from. If you need a bit of help to get there, you can slip into the other doors that are open. These should get you access to rooms full of Hive enemies and additional consoles to flip to give you more platforms. Bear in mind that you need to keep your destination open. Also, some of these Hive rooms do have instakill spike traps, but you can use them to take out Hive if you're clever.
Once you make your way to the room, look up. You should see a hole through some grating. Climb up and follow the path. You should find another new console. Activate it and head back down. Do not immediately make your way back. A Shrieker will have spawned in the middle of the reservoir. Take that out first before you proceed. The far end of the reservoir should be open. If you don't spot it immediately, the overlapping fire from Hive Knights should give it away. Make your way there, kill the Hive, and activate another console tucked away in the room. This will open the second door on the opposite side.

Follow the path and you should find yourself in a large abandoned missile silo packed with Fallen enemies. As you fight, make your way across the outer walls until you come across another command console. Activate it, then continue your way around the circumference of the room and look for a newly opened room. Fight your way inside and activate a second console. Bear in mind with each console activated you will spawn a Hive Wizard so keep some solar weapons on hand to melt them.
Once the second console is activated, another wave of Fallen will spawn from a third location. One of them is wielding a Scorch Cannon. Kill them immediately and take the cannon. This is where the second unique mechanic of Grasp of Avarice is introduced. There should only be one locked door left in the silo. Right next to it should be a circular looking mechanical device. Fire the Scorch Cannon at this device. You should see damage numbers pop up if you do it right. With each consecutive hit, the gate will rise.
However, if you're savvy, you charge up the Scorch Cannon's shots. Hold down the fire button and wait until the round flashes twice. Let go of the fire button and a larger blast should go off, instantly opening the gate. This is charging the cannon shot. You will be seeing more of these locking mechanisms later and you will need to conserve ammo.

The gate should open up to a large staircase showered in red lights. Do not run up these stairs immediately. A large metal barrel will roll down and crush you. Check the left and right walls and you will find safe spots, highlighted by regular floodlights. Run up to one of those immediately and wait for the barrel to pass.
Once you continue up the staircase, you should be in a large storage room. Look for several crates leading up to an air vent. Follow this path and you will be on your way to Grasp of Avarice's very first boss battle.

Destiny 2 Grasp of Avarice Dungeon Walkthrough Guide – Phry'zhia the Insatiable Boss Battle
If you have Raid Banners, drop them down now before you jump into the boss arena. If you are still holding on to the Scorch Cannon from the silo section, even better.
First, get a feel of the map. In the very middle of the arena is the titula Phry'zhia: a giant Hive ogre with a lot of death lasers. On the left and right sides of the arena are more of those Scorch Cannon devices tied to some shuttered doors. In the far back is a Fallen with a Scorch Cannon. Finally on the way in you should see a bunch of crystals like at the Loot Cave entrance. For brevity's sake, I will be calling them Avarice Crystals.
The idea behind the battle should be straightforward if you've been paying attention. Carefully make your way past the boss, fighting off any Hive you see. If you can, immediately bank any Burden of Riches you get during this time. Kill the Fallen and take his Scorch Cannon. Next, you need to see which of the two devices are active. You can tell this because they'll be lit up with blue lights. Use the cannon to open up the doors. Inside should be a ton of Hive enemies. Tear through these Hive and they will drop more Burden of Riches engrams. Once the whole room is dead, go back to the Avarice Crystal and bank.

Once that is done, rinse and repeat for the other room. But a few things to keep in mind. First, you'll want to stay moving as much as you can. If you stay behind cover to avoid Phry'zhia's eye blasts, waves of Hive thralls will show up and ambush you. In addition, Phry'zhia has a powerful solar grenate ability he can throw into the arena and burn you to a crisp. Keep running circles and only get into cover to heal or reload. Also, do not stay in these rooms for too long. If the doors close with you still insice, you'll instantly die.
Once you've banked enough engrams at the Avarice Crystal, it should start glowing and should receive a message saying “Phry'zhia has succumbed to temptation.” That is your queue that the damage phase has begun. Throw out your Supers, power weapons, grenades, everything you can to just melt this boss. As a recommendation, the Sleeper Stimulant has gotten buffed recently and pairs really well with the Disintegration seasonal mod if you really want the boss to feel it.
Either way, repeat all of these steps until Phry'zhia is dead, collect your dungeon chest full of loot and proceed further in.

Destiny 2 Grasp of Avarice Dungeon Walkthrough Guide – Sparrow Death Race
Follow the path out of Phry'zhia's boss room and you should be in a large open room with two levers in front of a large hangar door. Do not pull the right lever, it is booby trapped.
But before you pull the left lever, make sure you and your fireteam have their Sparrows ready. This is because once the lever is thrown and the doors open, you will need to move fast. This is effectively a large Sparrow race similar to the chase setpiece from the Scourge of the Past Raid. There are mines scattered throughout the race track, all ticking down on a timer. You need to speed through these mines in order to dismantle them. If the timer hits zero, a total party wipe happens. This is easier said than done since you'll have enemies firing at you, and if your Sparrow is blown up you're screwed.
There are hidden buttons peppered throughout the track as you speed across. These are usually hidden near ramps or tricky bottlenecks. Hit these buttons and the timer on the mines will be extended. Make your way through all of these mines and you should end the race leaping through a large stone formation in the shape of a human skull into a new location. Make your way through this section and you should end up in the next major encounter of the Dungeon.

Destiny 2 Grasp of Avarice Dungeon Walkthrough Guide – Fallen Shield Battle
The Fallen Shield battle is a giant puzzle boss battle. The aforementioned shield is the giant hot air balloon looking thing in the middle of this large cave. There are several little dotted islands surrounding this shield full of enemies and no real indicator on where to go.
The first thing you need to get is to find a Fallen with a Scorch Cannon and take it from them. Next you will need to find a Scorch Cannon device. Each of them should be tied to a launcher somewhere in the area. Go up to these launchers and you should get a prompt to rotate it. Orient it so you go to another one of the islands in the arena. After activating the Scorch Cannon device, you can delay this with a charged shot, make sure you and your team are on the plate. This will ensure the launcher fires all of you to the next area.
Repeat this until you find a servitor enemy with a white shield. Stick around fight the Fallen that spawn here. They should drop golden engrams. Look around for an Avarice Crystal and bank your stacks of Burden of Riches. Once the Crystal is fully charged, the servitor's shield should go down.

Once you destroy the servitor, its mechanical body should still hang around. Roll it like a ball to one of the launchers, rotate it so it faces the giant Fallen Shield, then activate the launcher. This should fire the servitor like a rocket and blast a weak spot on the shield, taking a large chunk of health out of it.
Repeat this entire process until the entire health bar is depleted. Once that is done, all of the launchers should aim to a new island just below the shield. Go there and use the launcher found on this island to ascend through the (now destroyed) shield into the final boss room.

Destiny 2 Grasp of Avarice Dungeon Walkthrough Guide – Captain Avarrok The Covetous Boss Battle
Congratulations, this is the final battle of Destiny 2's Grasp of Avarice dungeon: Captain Avarrok The Covetous. There are waves of Fallen enemies, three distinct platforms on the left, right, and center, and a large outcropping of Avarice Crystals right in the middle.
This is basically a repeat of the Phry'zhia boss battle with a few twists thrown in. Clean up Avarrok's minions and keep an eye out for two additional boss enemies that will help him. One is a cloaked assassin that will hop around and cut you. The other one is a sniper Shank that will wreck your day. Take both of these out before you do anything else, it'll save you some headaches.Once those two lackeys are down, more waves of Fallen should spawn. Take them out, look for a Scorch Cannon among them and snatch it up.
This is where things get a little weird. There are three Scorch Cannon devices, one on each side attached to the half-rings decorating the center platform. Like the Phry'zhia fight, only one of them is active at a time. However, you absolutely need to do a charged Scorch Cannon shot for this to have any effect. This is because the force of the shot will cause three devices surrounding the arena to activate jet rockets and launch into the air. If you detonate a fully charged cannon shot, all of these devices will strike some storage caskets hanging on the wall, covering the arena in golden engrams. Think of it like an old carnival strongman contest where the cannon shot is the hammer and the caskets are the bell.

From here, your rhythm should be self-explanatory. Take out the mobs, defeat the sniper shank and assassin, get cannons, ring the bells, bank the engrams, damage phase, repeat.
Congratulations, you should be able to defeat Captain Avarrok and finally clear the Grasp of Avarice dungeon in Destiny 2. If this is your first clear, go back to Shaw Han to continue your quest to reclaim your Gjallarhorn.
Have a tip, or want to point out something we missed? Leave a Comment or e-mail us at tips@techraptor.net


