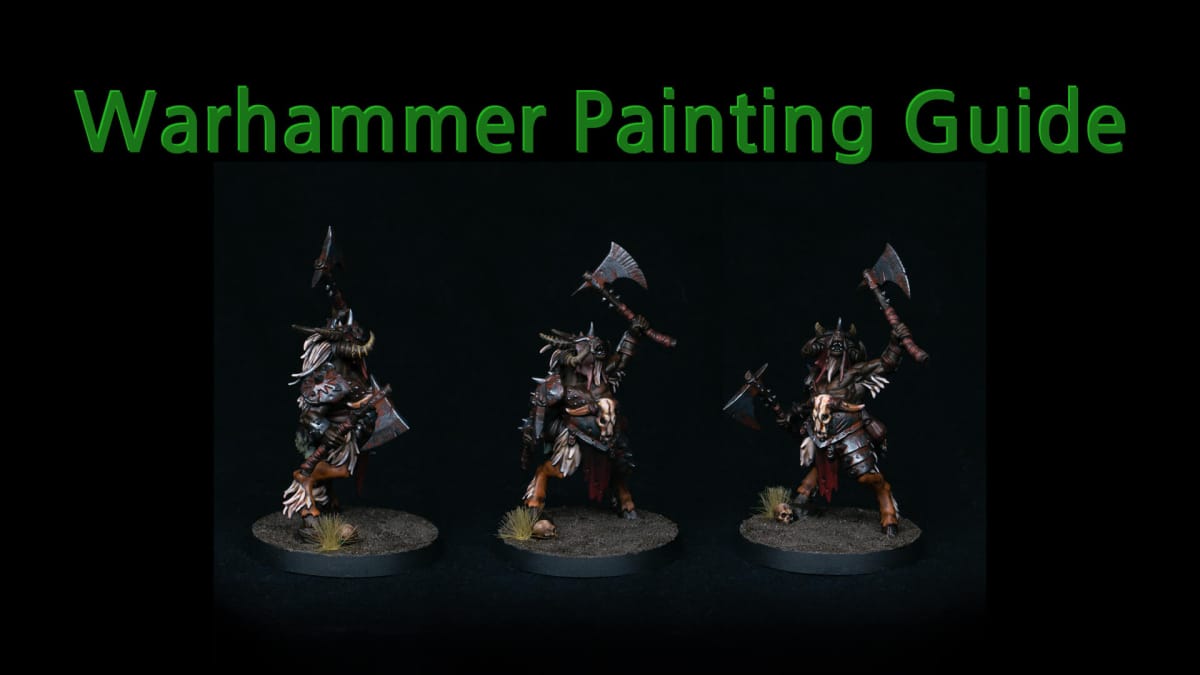
For many aspirant Warhammer players, building and painting the miniatures that comprise your army is one of the main draws of the hobby. But for some, this process can feel super daunting. To help, we've create this is a beginner's guide to painting the new Beastlord, a fantastic model released for the Beasts of Chaos Warhammer: Age of Sigmar army. So follow along on our first ever Warhammer Painting Guide, as we use minimal paint colors, focusing instead on a very approachable way to get your new beastly hero onto the table quickly (while still looking great).
Warhammer Painting Guide - Phase One: Basing and First Steps
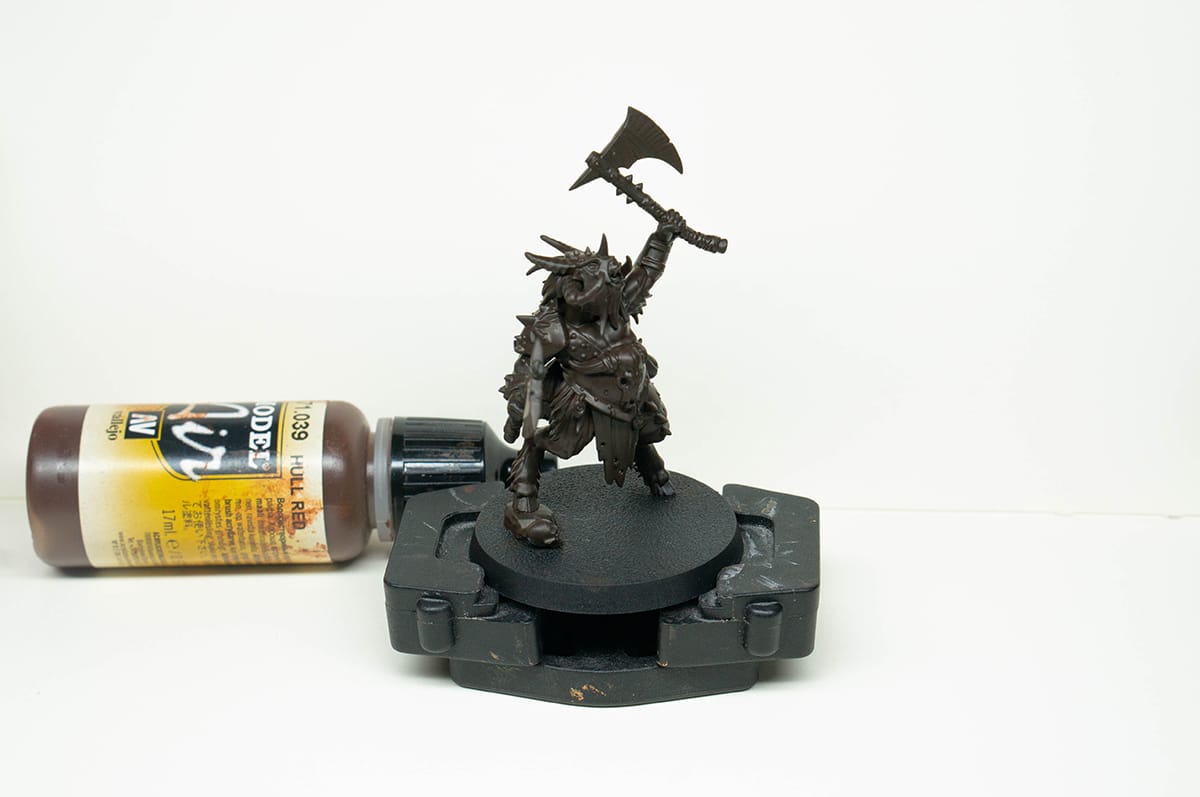
1. The first thing I did was prime the model black, and then cover the entire thing with vallejo hull red. Be patient with your application and remember that you’ll probably want to thin your paint, and do a couple layers. Make sure the model completely dries in between layers.
The reason we’re starting with an all over color is for color harmony and also since we’re starting with a dark color, any little area we don’t reach will read as a shadow, instead of a missed spot.
Before moving on I paint the eye vallejo gore red. Doing it at this stage is nice cause there’s no other paint to really screw it up. Any mistake can be covered with hull red or painted over as we keep adding colors.
Also, paint brand doesn’t really matter too much. You’ll see me reference various paints, but really any bottle that’s a similar color will do the same thing. Paint brands are kinda like pizza, sure some are better than others, and they all have their own wonderful nuance, but the best one is probably just whatever is closest.
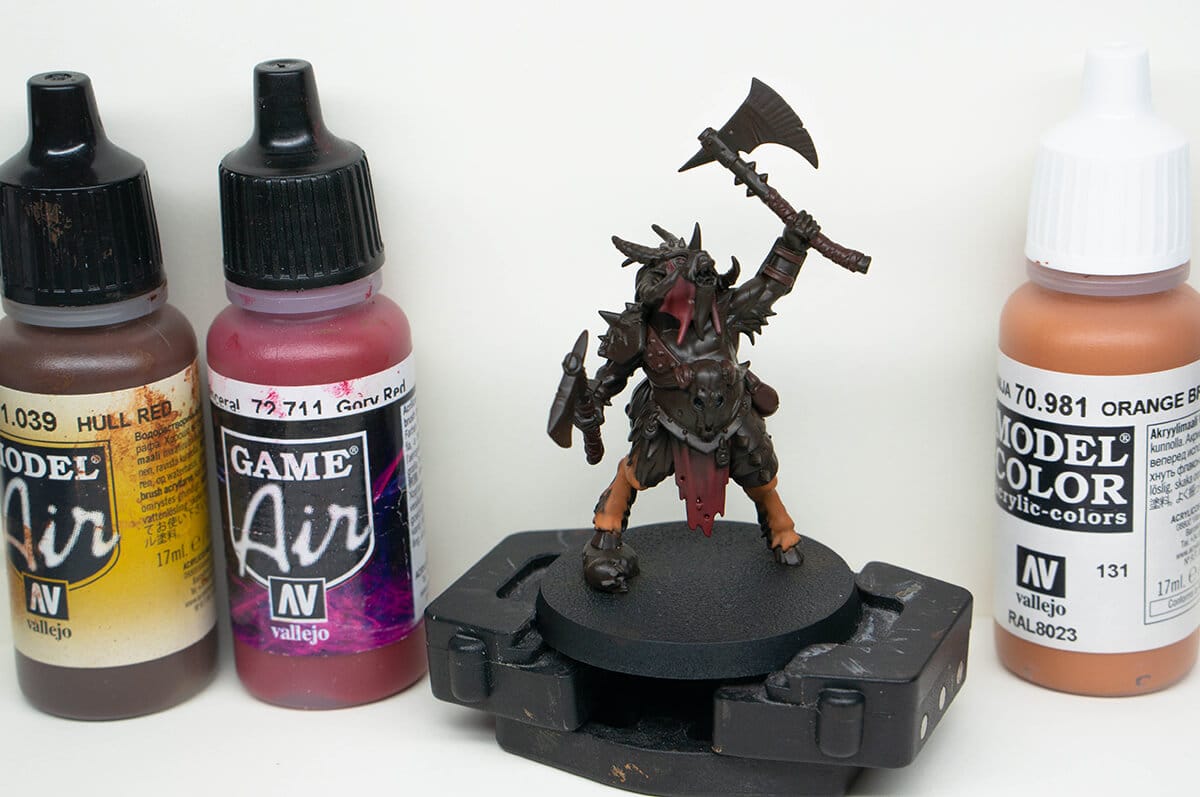
2. The cloth was painted vallejo gore red, the lower legs vallejo orange brown, and then the leather color was created by mixing vallejo hull red, and gore red.
When painting the cloth try to follow the natural folds of the fabric, in this case painting by dragging your paint brush down towards the bottom. If you do this each layer, focusing more and more on the raised areas, you’ll get a nice natural highlight.
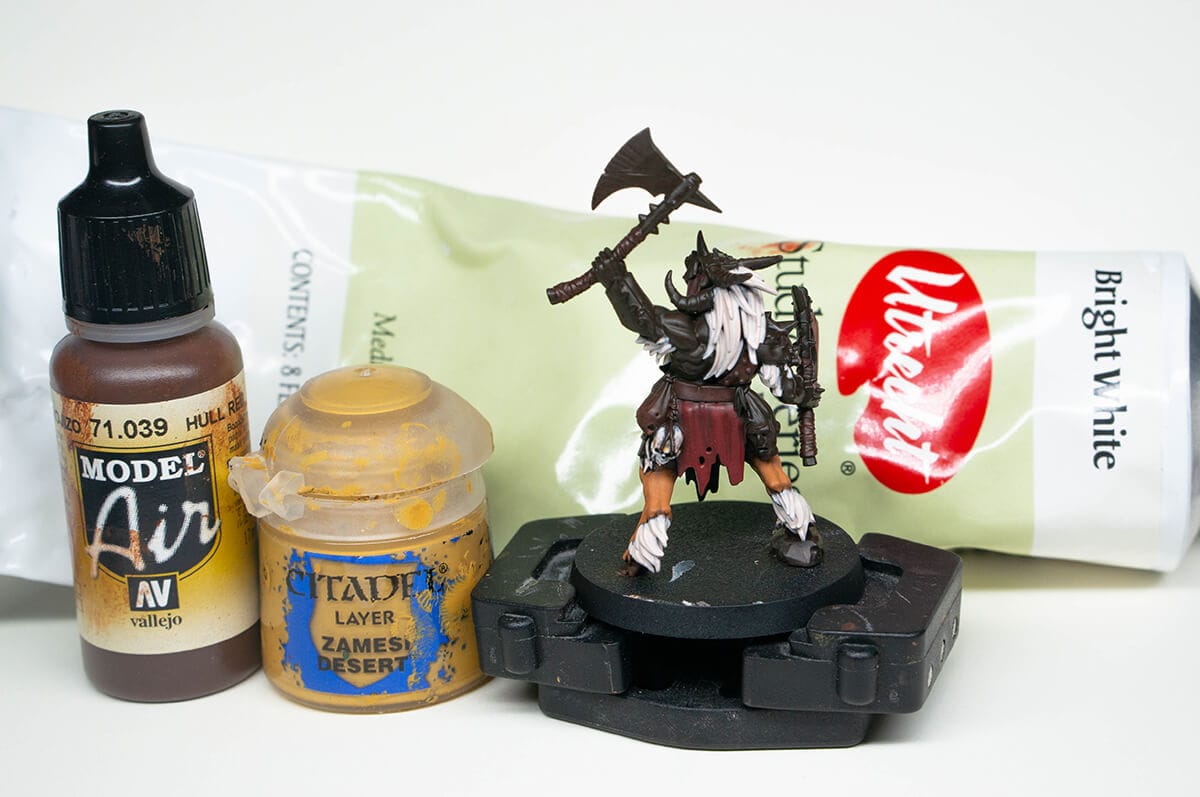
3. For all the fur and hair I mixed vallejo hull red into white until I got an off white color. Also used this on the teeth. I had to thin this quite a bit since I use a medium body white, typically used by traditional artists. I find it better to just use this tube since you get a lot and think the pigment quality is a lot better than what you find in some miniature paint whites.
Since we’re leaping from dark brown to a much lighter color, this will take a couple of passes. You might find it easier to start with an in between color and adding white as you keep layering.
The skulls were done by stippling* on the fur/hair color and then stippling citadel zamesi desert, a yellow ochre color, into the places where shadows would be. This same technique was repeated with hull red, focusing on the even deeper shadows.
I’m going to leave the skin this dark brown for now, since I’m kinda going for a Black Phillip ala The VVitch thing.
*Stippling is a painting technique where instead of strokes you place dots of paint.
Warhammer Painting Guide - Phase Two: Layering and Shades
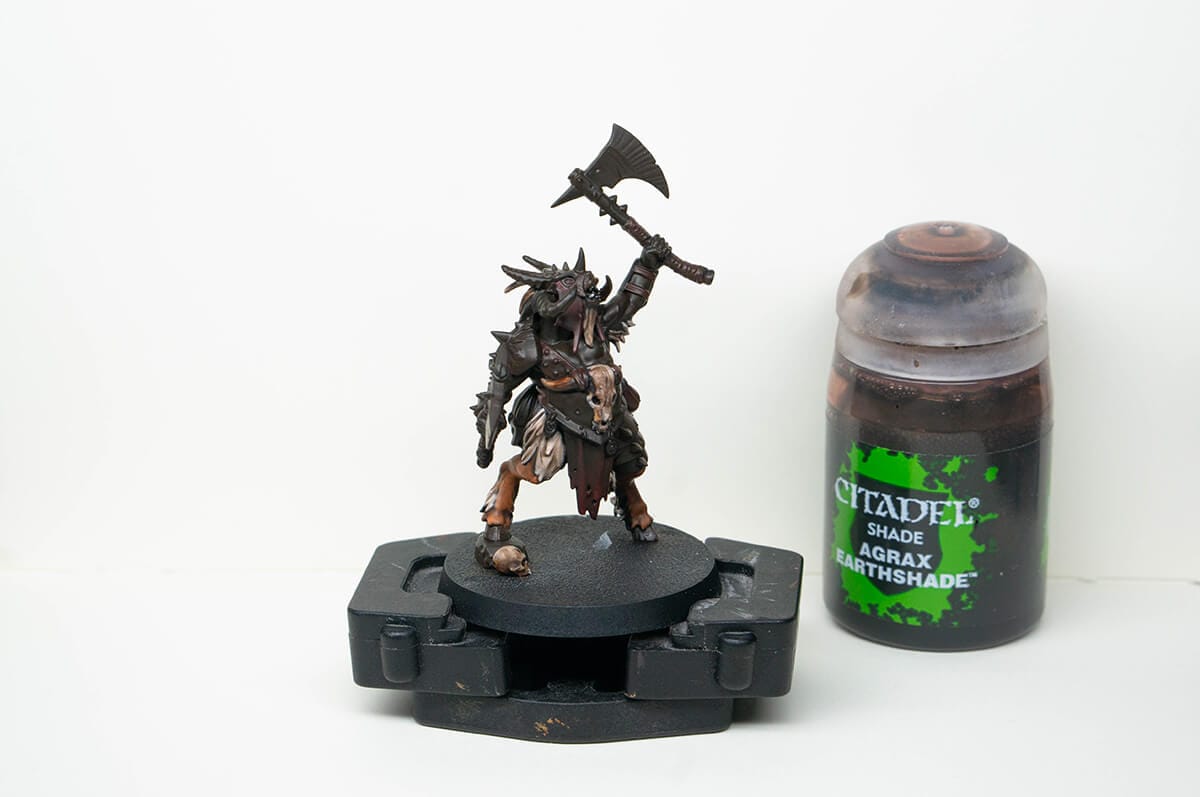
4. I’ve never been overly fond of washes/aggrax earthshade, but I figured “hey, it’s a beginner’s guide, let’s use it”.
What a fool I was. As you can see I really slopped it all over the previous colors. This resulted in a patchy drying, and it even became cloudy in some spots. Learn from my mistakes and shake the heck out of your aggrax earthshade, and go slowly only applying a thin amount into the recesses. You can always add more.
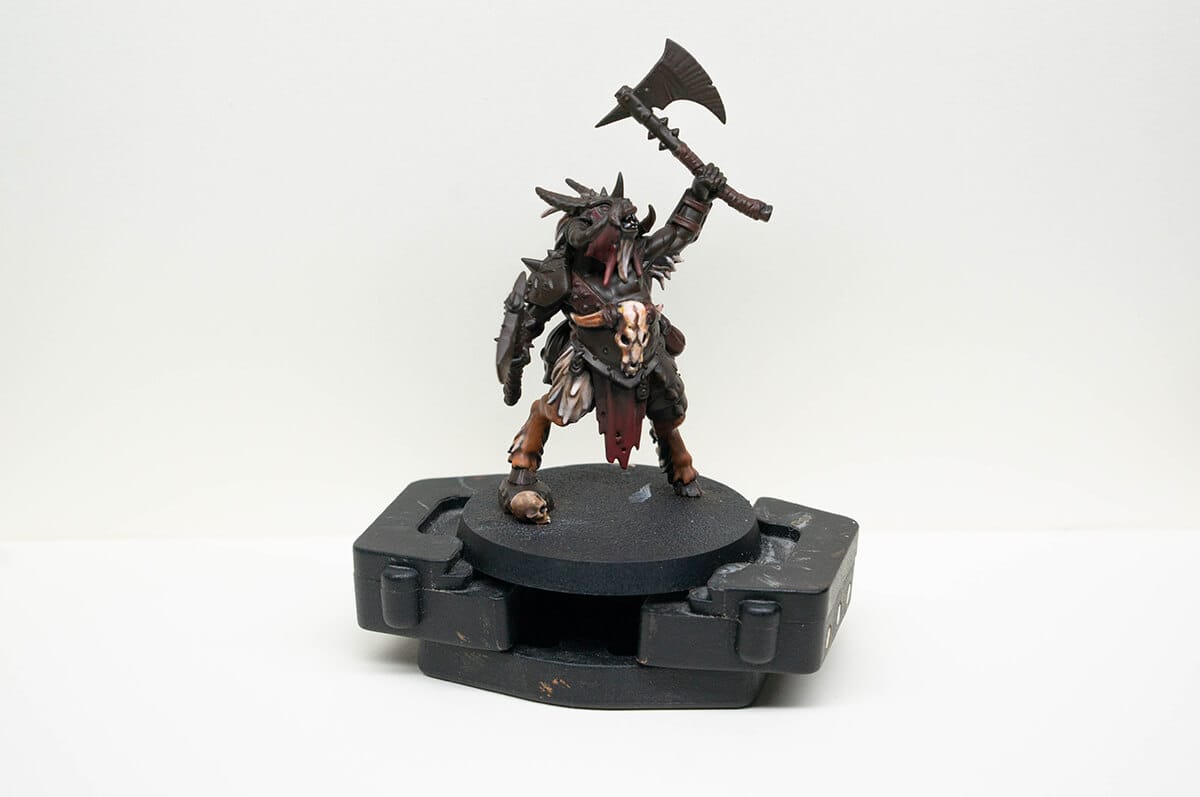
5. It all ended up being okay, and I reapplied the colors over their now washed versions.
For the hair and fur try to pick out individual strains and clumps, if you don’t think you can nail painting the little bits dry brushing would also totally work.
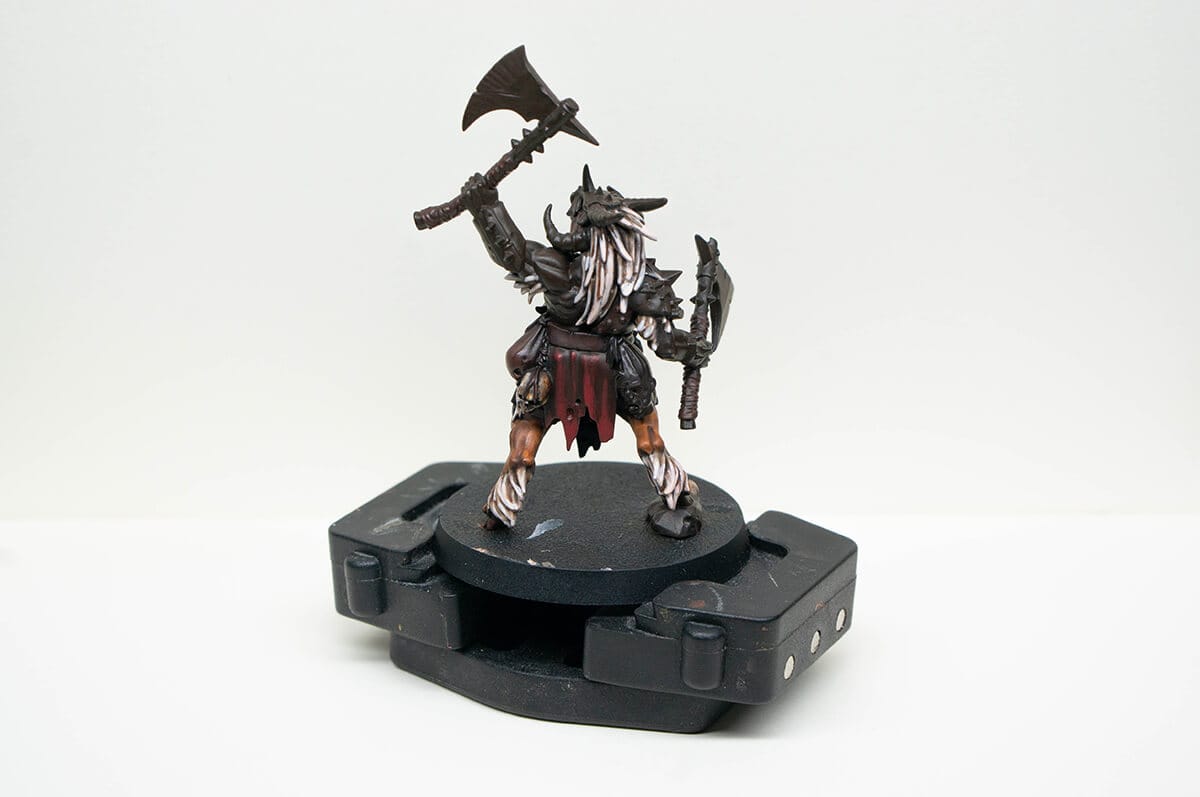
For the skulls, I stippled more off-white and ochre color onto it, and also making sure to work some hull red into the cracks, notably the big one on the front of his armor. If I needed some more color variation I mixed hull red and ochre for areas like the horns and below the cheek bones.
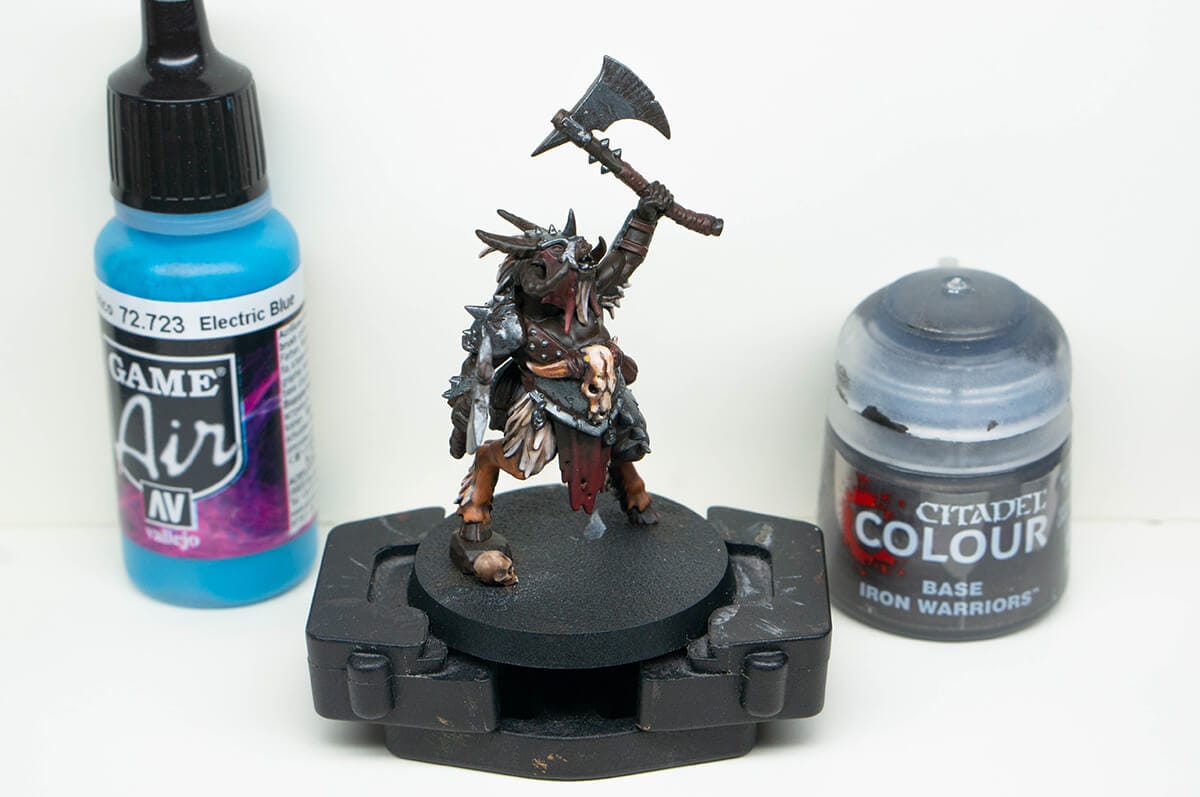
6. Since we’ve been working with mostly warm colors, I wanted to bring some coolness to the metal (🤘). I’ve mixed in a bit of vallejo electric blue into citadel iron warriors. You just need to add enough to tint it.
From there I stippled it on the armor, making sure to leave the edges and recesses the hull red color. This creates some easy and effective weathering.
For the weapons I used a combo of stippling it on and overbrushing to create a weathered look.
We’re going for not full coverage of the metal, and want to make sure there’s some hull red peaking out.
Warhammer Painting Guide - Phase Three: Final Touches and Detailing
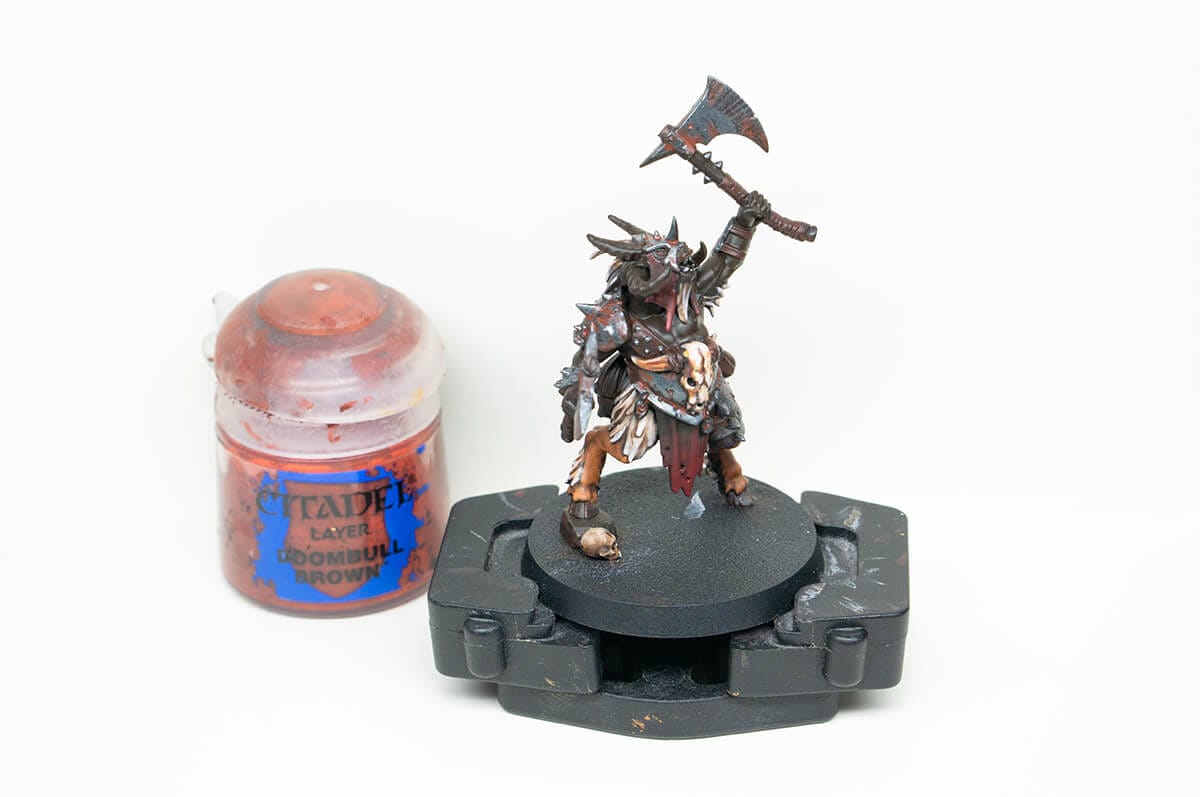
7. Then, citadel doom bull brown is watered down until it runs into recesses. I apply this into the cracks in the armor. Feel free to keep adding layers until you get your desired saturation. I also make tiny dots where I think rust would fall to help vary up the weathering effect.
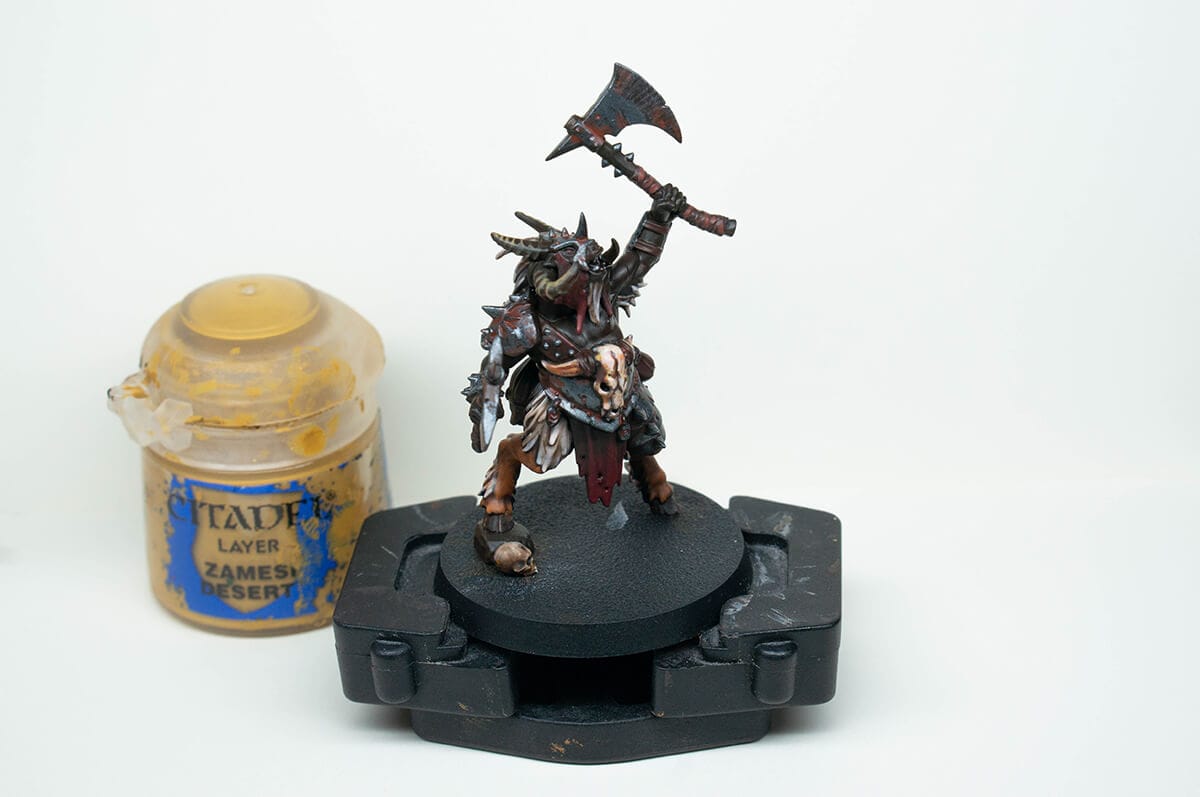
8. I added a bit of zemesi desert to the leather color and picked out some of the weapon handle straps. I focused on just hitting a couple prominent ones with this highlight instead of meticulously trying to edge highlight every little strap. Then I gave a single edge highlight to the strap on his chest, and his belt.
If you’re worried about nailing this step, just skip the edge highlight and do a dry brush on the weapon straps.
The horns were then drybrushed with just zemesi desert.
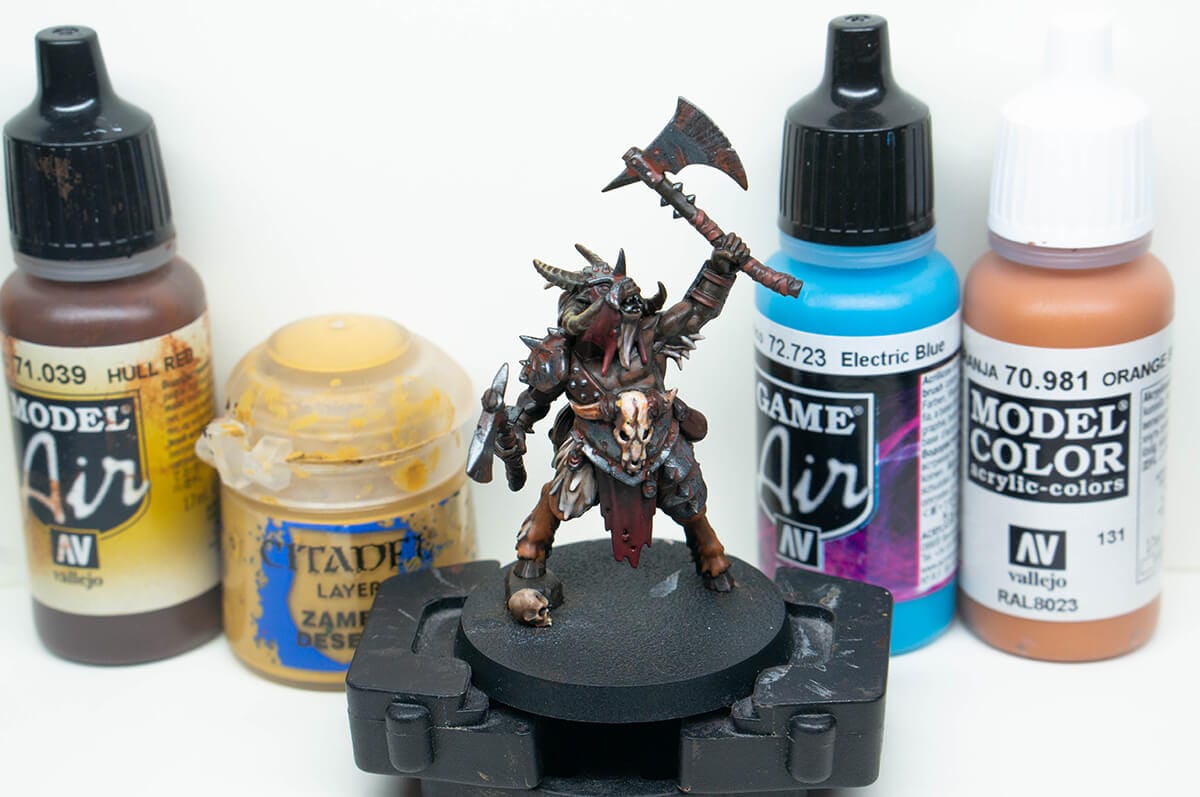
9. To finish up the skin, I applied a small highlight on the raised parts of the flesh. I tried to think about the “top” section of each muscle. This color was created by added zemesi desert to hull red.
To create the dead guy green color for the severed head, I mixed orange brown and electric blue in equal parts. Because blue and orange sit opposite of each other on the color wheel, they’re considered “complimentary colors” and when mixing them, they’ll create an earthy, desaturated color. This is cool to remember cause if you ever want to desaturate a color in the future, try mixing in a smidge of it’s compliment.
I stopped here but if you wanted to add zemesi desert, or white to the skin color it would help it look more pallid instead of green.
Warhammer Painting Guide - The Final Product
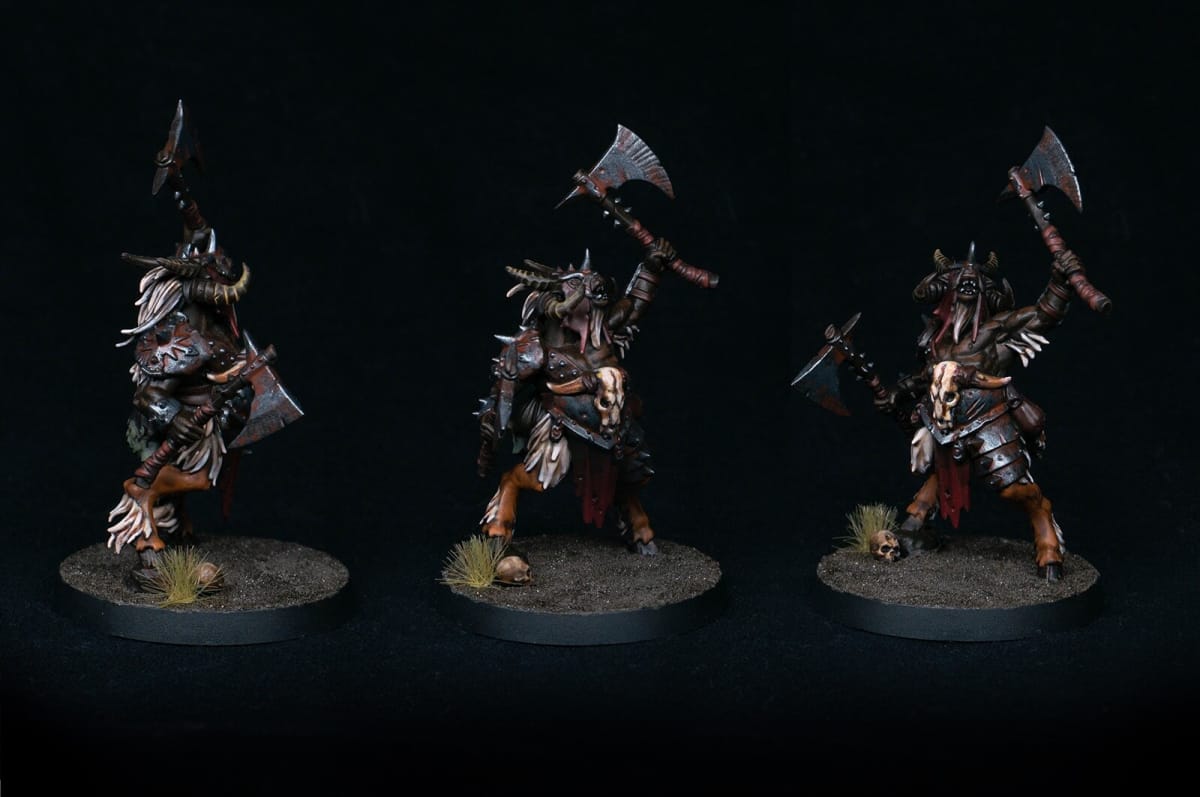
10. And with that we’re done. This beasty boy is ready to ruin some civilizations. Hopefully you’ve had fun reading this guide, and get to see that you don’t need a million little pots of paint to complete a "bit better than tabletop ready" miniature.
If you’re looking to push this guy further, you can always add more highlights, especially to the metal. Everything can be painted over, and don’t be afraid to mess up.
For more of my Warhammer painting projects, you can follow my work on Twitter.
Have a tip, or want to point out something we missed? Leave a Comment or e-mail us at tips@techraptor.net
