Warcry is a great skirmish game set in the Warhammer: Age of Sigmar universe, and the way that it has re-contextualized some of the factions is super interesting. That said, if you're mostly into the main wargame, then it could be a bit confusing for you. This Warhammer: Age of Sigmar Warcry Iron Golems guide will show you how to make the most of the faction.
Who are the Iron Golems?
The Iron Golems are weaponsmiths and blacksmiths, hoping to produce arms and armor for Archon’s hordes.
As a warband, they have lots of options and are incredibly tough. They lack huge amounts of damage dealing but are a very forgiving faction to play, which makes them a great beginner warband.

You can buy all the Warcry Products from our Tabletop Sponsor, Firestorm Games.
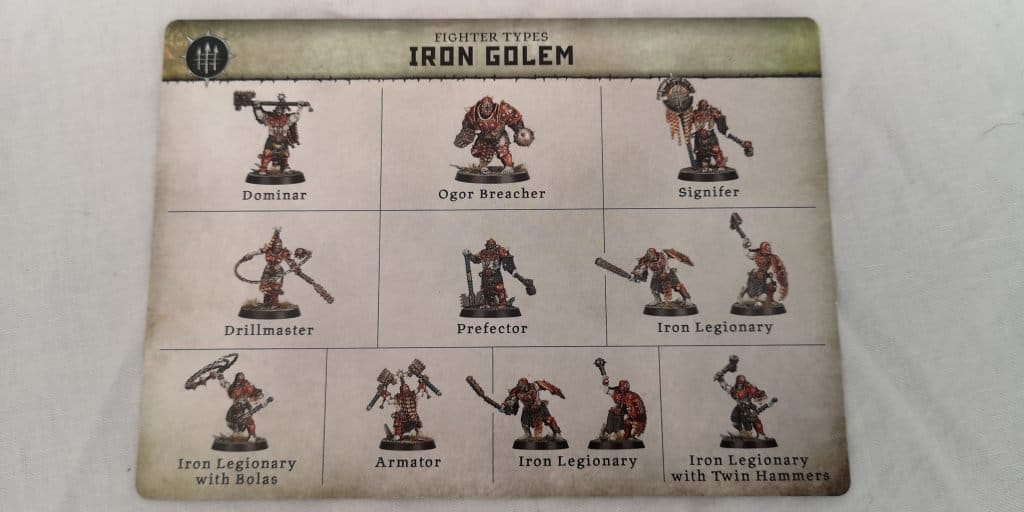
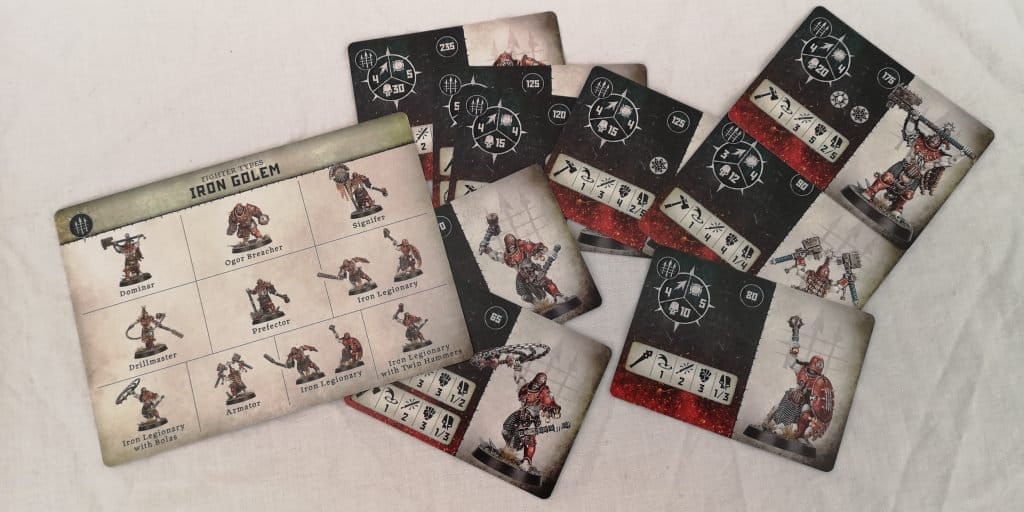
Iron Golem Fighter Types
The Iron Golems have access to the following fighters:
- Dominar - A well-rounded fighter, but not a standout leader. 4 Toughness and 3 Attacks makes the Domiar very average. Strength 5 and the Spine Crushing Blow ability give him a high strength, but that is never better than high attacks. 5 Crit Damage and 20 Wounds and a rune ability that means they can make a bonus move or attack action if they take down an enemy this activation makes them reasonable, but not incredible. Great for holding objectives and awkward for your opponent to try to take down with line fighters.
- Ogor Breacher - 30 wounds and Toughness 5 gives the Breacher incredible staying power. A 6 Strength, with 4 normal and 8 Crit damage would be great, but 2 Attacks sours it. The Living Battering Ram rune can be a cheap way to give some extra wounds to a tricky enemy. 235 points mean that although you'll want to take 1 just for it sheer tenacity in sticking around, 2 would be a huge waste of points.
- Drillmaster - The Drillmaster is the MVP of the Iron Golems. 5 Move and 4 attacks across both their 1-inch and 3-inch attacks mean they can threaten a decent range on the board. The quad ability, Whirlwind of Death can be devasting if timed correctly, but your opponent will see if coming, so can take some timing to pull off. 125 points is a bargain for the Drillmaster.
- Prefector - Average stats for a higher-end fighter. The same points as a Drillmaster for fewer attack dice, less movement, but 1 more Crit damage and the Spine-Crushing blow rune means another Drillmaster is always a better choice.
- Signifier - Similar stats to the Prefector, only with 1 less crit damage, but is the only fighter that gives you access to the Stand Defiant rune, which adds 1 to the toughness of all fighters within 6 inches. This can be fantastic for holding objectives and for increasing the survivability of your fighters as the defender in some battles.
- Armator - 4 attacks, but only 1 standard damage and 4 Crit and a move of 3 don't make the Armator sound amazing, but at only 90 points, they're great for holding objectives and making your opponent have to come to them.
- Iron Legionary with Shield and Hammer - The line fighter of the Iron Golems. Low attacks and damage, but 5 Toughness won't be worrying your opponent, but they can harry your opponent's fighters and are great for blocking access to your better fighters.
- Iron Legionary with Twin Hammers - Taking the twin hammer options is 10 points cheaper than the Shield and Hammer variant. They get one more attack dice and 1 less Toughness. Price-wise they're a solid investment.
- Iron Legionary with Bolas - 15 points cheaper than the Shield and Hammer variant, but with 3 attacks and a max crit of 2 means they're hard-work to do damage with. 2 attacks with their 3-inch range gives them an option but doesn't make them incredible. Their low points cost is their selling point and having a few gives you options, but also a fairly disposable fighter to protect your other fighters.
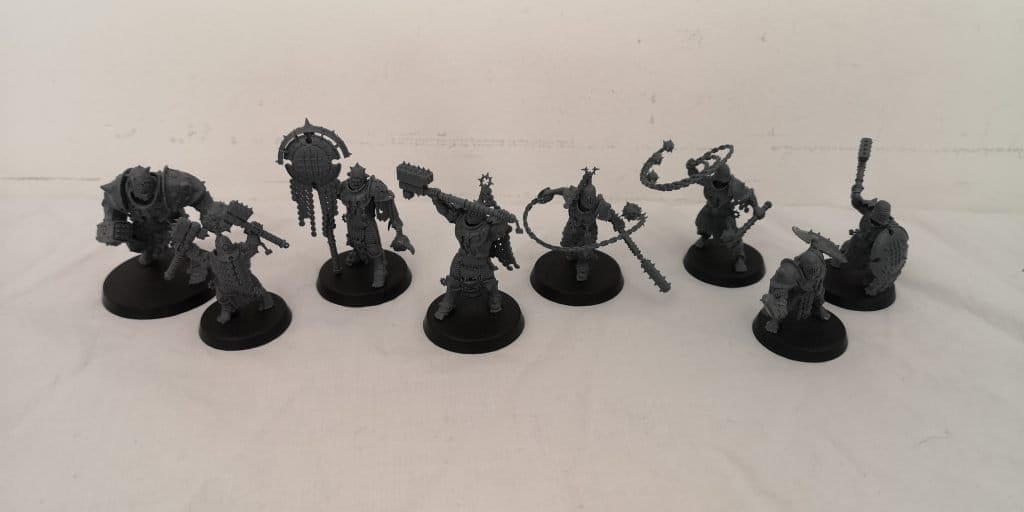
How to build out of the box
You can get the Iron Golems in their own boxed set here.
The Iron Golems get a couple of fighter options out of the box, which are not just cosmetic. This does mean that 2 sets are required if you want to have access to all the options for a campaign, or if you want multiple copies of a fighter for your warband.
The sprues let you build.
- 1x Dominar
- 1x Ogor Breacher
- 1x Drillmaster
- 1x Armator
- 2x Iron Legionaries with Hammer and Shield
- 1x Prefector or Signifier
- 1x Iron Legionary with Twin Hammers or Iron Legionary with Bolas
The fixed miniatures give you 785 points. If you max out for points you can get them to 980, or at a minimum, 970.
How you build the two options is up to you and what you want to do with your warband.
Prefector vs Signifier
The Prefector and Signifier have almost identical stats, the only difference is that the Prefector has the Spine Crushing Blow rune, that the Dominar also has, and does an extra damage on their Critical. The Signifier is 5 fewer points and has access to the Stand Defiant rune, the only warrior to give access to this Rune, which lets you add 1 Toughness to all friendly fighters within 6 inches.
Twin Hammers vs Bolas
The Legionaries with Twin Hammers and Bolas have almost identical stats, the only difference is the Twin Hammers rolls 3 dice for their 1-inch range attack, and the Bolas rolls 2 dice for the 1-inch range attack but also has access to a 3-inch range attack. The Bolas Legionary is 5 fewer points, but it will come down to what options you want for your Legionaries. Rolling more dice is always good, but range can be incredibly effective for chipping away at opposing fighters.
General Tactics
Regardless of your warband composition, the Iron Golems are tough, which leads a lot of general’s to assume they’re great at charging into attack. They can certainly hold their own in combat, but with average movement and amount of attacks, where they excel is as resisting damage with their high toughness, and being able to hit high toughness enemies. This makes them perfect for defensive operations, making their enemies come to them.
They can hold objectives well, only having to move to deal with ranged threats. Playing the scenario with the Iron Golems is key, as well as effective deployment which we will discuss below. Positioning is key for the Iron Golems. Make sure your warriors always have support and restrict enemy movements with placing.
Force your opponent to engage your Iron Golems, and use their abilities to maximize damage and their toughness to survive your enemy’s attacks.
All of the fighters have access to the Throw Bolas ability, which is easy to spam rather than waste any doubles. They can make great use of the universal abilities, especially Respite, which will keep them on the board for longer.
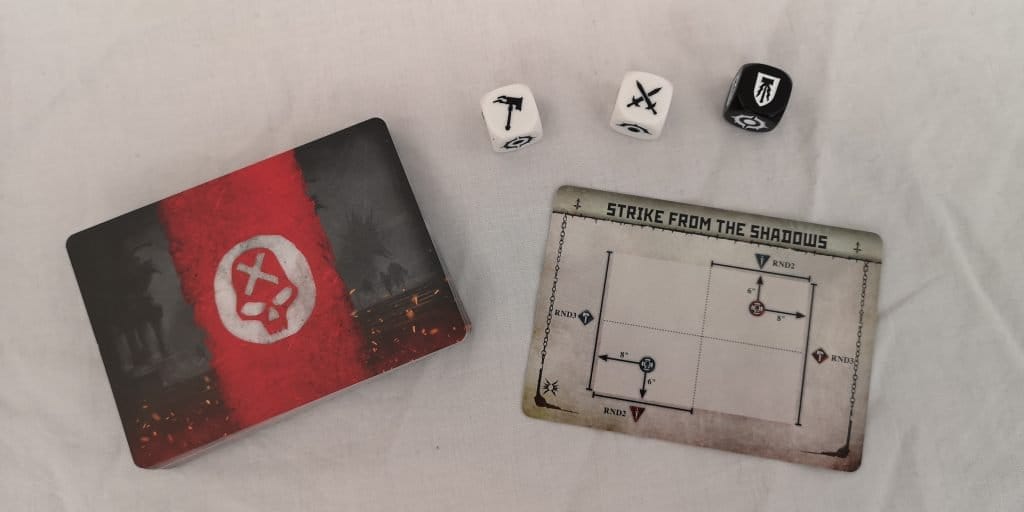
Deployment Tactics
For this section, we're only looking at the balanced options for each of the decks. Using all the cards is harder to predict and plan for, but great for open friendly games.
Using only the balanced deployment cards, Shield is deployed 15 times out of 18 on the table. Depending on the mission, it's a good idea to have your central block of fighters in Shield. In defender missions, you can really control the Battlefield with a solid shield baseline.
Hammer appears in Round 2 onwards 10 out of 18 times and Dagger 8 of out 18 times. Having a Drillmaster or 2 and Bolas armed Iron Legionnaires can be used for some great flanking attacks.
Putting a majority of your fighters in Shield gives them great odds for starting on the table. Just under 1/2 means, you will already have a solid block on the table. If you have a Signifier, put them in here, along with your Armator, and force your opponent to come to them.
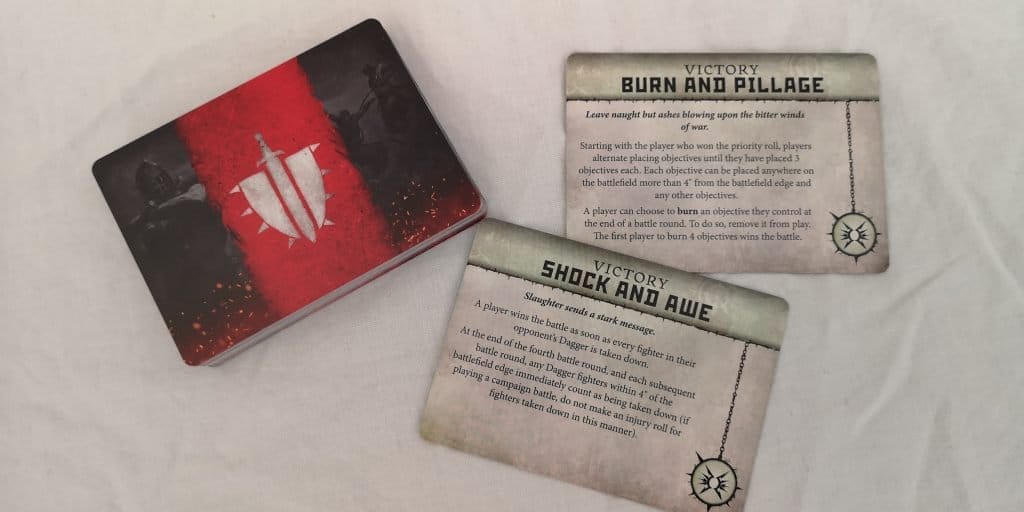
Mission Tactics
Out of the 18 balanced missions, 6 are combat based, requiring removing either the leader or different deployment groups. 9 are objective-based and 3 are mixed, movement/survival-based. The Iron Golems are great for holding objectives and for having to remove single enemies. Their higher Toughness also gives them great odds against lighter warbands. They do have a hard time removing several enemies and movement isn't their strong point.
Goblin Gaming provided copies of the WarCry products used to produce this article.
Have a tip, or want to point out something we missed? Leave a Comment or e-mail us at tips@techraptor.net

Adam is a Tabletop Specialist for TechRaptor. He started writing for TechRaptor in 2017 and took over as Tabletop Editor in 2019 and has since stood down… More about Adam