This V Rising Soul Shard Bosses Guide will tell you how Soul Shards work, how to get them, and how to defeat the deadly bosses that protect these powerful and rare items.
Quicklinks: What Are Soul Shards? | How to Get Soul Shards
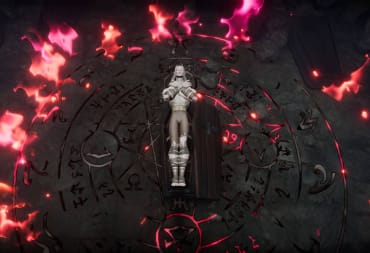
Gorecrusher the Behemoth (Level 78) | The Winged Horror (Level 78) | Solarus the Immaculate (Level 80)
What Are V Rising Soul Shards?
Soul Shards are incredibly rare items that can be used to build special structures in your castle. Once you've built them, you can get powerful buffs that boost your stats.
What Do Soul Shards Do in V Rising?
Soul Shards can give you and friendly players a powerful 2-hour buff after you interact with them.
V Rising Soul Shard Buff List
- Soul Shard of the Behemoth - Increases Garlic [Resistance] and Holy Resistance by 50, Movement Speed by 5%[,] and grants 20% increased Resource yield.
- Soul Shard of the Winged Horror - Increases Silver [Resistance] and Fire Resistance by 50, Spell Power by 10[,] and Spell Critical Strike Rate by 5%.
- Soul Shard of Solarus - Increases Sun Resistance by 50, Primary Melee Attack Speed by 5%[,] and Physical Power by 10.

How to Get V Rising Soul Shards
You can get a Soul Shard by defeating its associated boss. Once you've done that, you'll have to carry the Soul Shard back to your base where you can build it as a physical object that can be activated to provide the associated 2-hour buff.
Here's an important warning: carrying a Soul Shard will inflict the "Soul Shard" Debuff on you which makes you unable to use Vampire Powers, Mounts, or use Cave Passages. Furthermore, your Movement Speed is reduced by 15% and you take +25% more damage. You don't want to carry these things around carelessly, and it's probably best to hurry home.
Some servers -- especially PVP servers -- will have the "Unique" Soul Shard setting. This means that there is only one of each Soul Shard in the game; therefore, there are only two ways to get a Soul Shard on these servers:
- Be the first player to defeat one of the Soul Shard Bosses.
- Steal the Soul Shard from another player.
Can There Be More Than One of Each Soul Shard in V Rising?
Yes, there can be more than one of each Soul Shard in V Rising. This depends on the "Soul Shards Amount" server setting. If the setting is "Unique," there is only one of each Soul Shard in the world and you might have to steal it from another player. If the setting is "Plentiful," then the Soul Shard Bosses will drop a Soul Shard every time they're defeated.
How to Find Soul Shards in V Rising
You can find Soul Shards in V Rising by building the Eye of Twilight, a Decoration found in Production > Dominance in the Build Menu. This item will show you where you can find the Soul Shards.

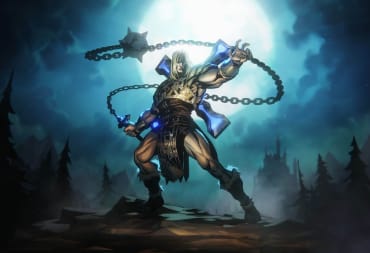
V Rising Cursed Forest Bosses Guide - Gorecrusher the Behemoth (Level 78)
Where to Find Gorecrusher the Behemoth
You can find Gorecrusher the Behemoth in the Lair of the Behemoth in the southeastern area of the Cursed Forest. All you need to do is follow the lower horizontal road to the right and you'll get near it. Be mindful of Night Lurkers and other enemies along the way!
What Do You Get for Beating Gorecrusher the Behemoth
- Basic Ability (Illusion) - Wisp Dance
- Soul Shard of the Behemoth
How to Beat Gorecrusher the Behemoth
Gorecrusher the Behemoth is a challenging fight befitting the protector of a Soul Shard. Do not go into it lightly.
Here's what you can expect in the first half of the fight:
- Gorecrusher swings in melee three times.
- Gorecrusher smashes a large area in front of him. This attack then explodes into a multi-pronged attack of exploding earth.
- Gorecrusher roars, glows red, and then glows blue. He swings three times in melee. Getting hit by these attacks will Stun you.
- Gorecrusher charges you and knocks you into the air with his horns. You'll be Stunned when you land.
Reducing him to half health will add some more attacks to his arsenal, and some of these new moves are quite troublesome:
- Gorecrusher leaps into the air and smashes the ground when he lands.
- Gorecrusher charges you three times in a row.
- Gorecrusher becomes transparent and ethereal. He also spawns an ethereal Wolf and Bear and inflicts the Trippy Shroom debuff on you for 15 seconds. You cannot harm Gorecrusher while he's ethereal, and he will remain ethereal even if you kill the Wolf and Bear quickly.
- The Wolf and Bear will stick around even after Gorecrusher returns to physical form. It is essential that you kill them.
- This is a good opportunity to heal if you can kill the adds in time.
- Gorecrusher glows whitish-blue and starts spawning Wisps that do damage and inflict the Weaken debuff on contact; otherwise, the balls of energy be destroyed when they hit a wall or after they have flown around for a short time.
- Attacking Gorecrusher in this form will spawn a Gorecrusher Spirit. You cannot kill the Gorecrusher Spirit, but you can temporarily knock it down; it will regenerate to half health in a few seconds.
- My testing shows that it is unlikely a second Gorecrusher Spirit cannot be spawned, but I wouldn't rule it out as a possibility.
- Spawning the Gorecrusher Spirit is entirely avoidable as long as you don't attack him when he's spawning Wisps. If you do attack him and cause the Gorecrusher Spirit to spawn, it's a good idea to leave the cave and head halfway down the ramp to reset the fight. The Gorecrusher Spirit will despawn and you can start the fight again.
- It's a good idea for at least one player to have a Defensive Skill like Ward of the Damned (under Unholy) -- you can use this to block some of the Wisps and remove them from the field. Skills like this can also protect you against Gorecrusher's other attacks, so it's a good idea to have at least one of them equipped.
The second half of the Gorecrusher fight is where the real battle happens. There is no useful advice I can give you beyond "try not to get hit" and "don't attack Gorecrusher when he's spawning Wisps" -- this battle is all about dodging the deadliest attacks and whittling down his health as best you can.
Recommended Gear & Skills for Gorecrusher the Behemoth
As a Soul Shard Boss, Gorecrusher requires the absolute best gear you can muster. That means a full set of Bloodmoon Armor, one of the three endgame accessories (Shard of the Frozen Crypt, Nightstone of the Beast, or Jewel of the Wicket Prophet), and Sanguine weapons.
I strongly recommend taking at least one defensive Skill such as Ward of the Damned -- it's difficult to avoid every attack from Gorecrusher and it would be helpful to have a way to protect yourself if you can't dodge in time. Furthermore, you can use defensive Skills like this to absorb the Wisps in the latter half of his fight.
Finally, don't forget to bring at least one stack of Blood Rose Potions. Using a Potion of Rage and Witch Potion as well would be a good idea -- you may as well take every advantage you can get.
How to Beat Gorecrusher the Behemoth Solo
Beating Gorecrusher the Behemoth solo is going to be a challenge, to say the least. You're going to need to focus on avoiding damage as much as possible while chipping away at his health.
Since you won't have backup, you're going to probably need several attempts to beat Gorecrusher. Do not be afraid to retreat and let the battle reset if you need to.

V Rising Cursed Forest Bosses Guide - The Winged Horror (Level 78)
Where to Find The Winged Horror
The Winged Horror sits atop a mountain; there is no way to reach this location until you get the Bat Vampire Power. That means you'll have to defeat Nightmarshal Styx the Sunderer in the Cursed Forest before you can battle this boss.
What Do You Get for Beating The Winged Horror
- Ultimate Ability (Frost) - Frost Vortex
- Soul Shard of the Winged Horror
How to Beat The Winged Horror
First and foremost, one of the biggest threats from The Winged Horror is the debuffs it can inflict on you. Each of these debuffs can last 5 minutes, so it is absolutely essential that you bring a debuff-purging ability such as Power Surge (under the Chaos tree).
- Desolate Frost (5 minutes) - The frost of the Manticore reduces movement speed by 5%.
- You will get this debuff if you are hit by any Frost-based attack.
- Raging Fire (5 minutes) - The flame of the Manticore is said to burn forever.
- Causes damage over time.
- You will get this debuff if you are hit by any Chaos-based attack or if you touch any of the Chaos flames.
- This debuff appears to override the Desolate Frost debuff; you cannot have both debuffs at the same time based on my testing.
With that established, the first part of the fight is pretty tricky, especially with these debuffs looming over your head:
- The Winged Horror will charge at you, flanked on either side by balls of Chaos energy. It will knock you into the air if it hits you directly.
- The Winged Horror will swipe with its claw and send out a wave of Frost spikes, each of which will split into two Frost spikes.
- If you stand near the Winged Horror's tail, it will whip its tail and send out a wave of Frost spikes.
- If you approach the Winged Horror, it may leap into the air backward to put some distance between the two of you.
- The Winged Horror will fly straight up and shoot a Chaos breath attack directly below it. This will spawn several Chaos orbs in a circle around the initial attack location, each of which will travel a short distance and then ignite Chaos flames on the ground. These flames will stick around for a long time, and it is highly likely that The Winged Horror will repeat this attack again once the flames start to burn out -- you should expect to have to deal with these flames throughout the entire battle.
If you thought the arena was a mess before this fight, you're going to have a bad time when you reduce The Winged Horror's health to half -- it really picks up its attacks and adds even more ways to shrink the safe space on top of the mountain:
- The Winged Horror will look side to side. It will then spin around and send out a circle of Frost spikes, each of which will split into two Frost spikes after a short distance.
- The Winged Horror will flap its wings and send out two simultaneous waves of Chaos balls.
- The Winged Horror will send out a large wave of Chaos balls. These will explode into Chaos flames on the ground after traveling a short distance.
- The Winged Horror will spawn a circle of Frost energy that will remain on the ground for some time.
Make no mistake, this is a fight of attrition. You're going to be constantly taking damage from the debuffs, so you'll need to rely on healing when and where you can to survive this battle.
Recommended Gear & Skills for The Winged Horror
As with the other Soul Shard Bosses, you're going to want to bring the best gear you can. You should have a full set of Bloodmoon Armor, one of the three endgame accessories (Shard of the Frozen Crypt, Nightstone of the Beast, or Jewel of the Wicket Prophet), and Sanguine weapons.
Equipping the Power Surge Skill (under the Chaos tree) is an absolute requirement -- the debuffs that The Winged Horror can inflict are something you're going to need to be able to deal with and this is your best option. It may be wise to take a second defensive Skill, too, in order to defend against or avoid the many projectile attacks.
As always, you're going to want to buff yourself with potions as much as you can and bring at least a full stack of Blood Rose Potions.
How to Beat The Winged Horror Solo
Fighting The Winged Horror solo will be highly challenging. I strongly advise you stick to ranged damage -- the risk of getting hit with his melee attacks is simply too high.
Save your Skills for defensive uses and focus on using your weapon's ranged attacks to take this guy down. Don't expect to win this fight on the first try -- there are a lot of attack patterns to learn here.

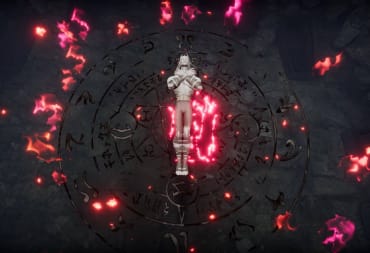
V Rising Cursed Forest Bosses Guide - Solarus the Immaculate (Level 80)
Where to Find Solarus the Immaculate
Solarus the Immaculate can be found in the Fortress of Light, a massive building in the eastern part of Silverlight Hills. This building and its grounds are protected by Heavy Holy Radiation, so you're going to need a Holy Resistance Flask -- not a Holy Resistance Potion -- to protect yourself. That means you'll need to defeat Willfred the Werewolf Chief before you can fight this battle.
Since this is Silverlight Hills, you should also expect to face high-level human enemies along the way, regardless of which route you take. You can, however, use Bat Form to land right in the courtyard and avoid most of these fights.
What Do You Get for Beating Solarus the Immaculate
- Ultimate Ability (Unholy) - Summon Fallen Angel
- Soul Shard of Solarus
How to Beat Solarus the Immaculate
Make no mistake, Solarus the Immaculate is undeniably the toughest boss fight in V Rising by far. It will require the best equipment and every advantage you can muster.
Here's what to expect in the first of four phases (!) in this fight:
- Solarus charges at you and leaves a wake of Holy bolts on the ground behind him, spreading out in a "V" pattern.
- Solarus puts his sword in the ground, shooting out two interweaving waves of Holy bolts.
- If you're close to Solarus, he'll swing his sword sideways and then follow it up with a vertical slash. The vertical slash will spawn a sawblade that travels straight ahead; it will then split into two and head back towards him, crossing over in front of him and disappearing behind him.
Once you drop Solarus below half health, you'll begin the second phase of the fight -- as usual, this introduces some new mechanics:
- Solarus will head to the center of the platform and summon a Divine Angel to assist him. You cannot avoid the Divine Angel spawning.
- The Divine Angel has several special attacks.
- The Divine Angel will swing twice with her spear if you're in melee range.
- The Divine Angel will fly at you with her spear out.
- The Divine Angel will send a blinking, spear-shaped bolt of Holy energy in a straight line.
- The Divine Angel will shoot four large blobs of Holy energy.
- Once the Divine Angel is below half health, she will spread her wings and send out an intense, cascading wave of Holy bolts.
- If the Divine Angel gets low on health before you start Solarus' third phase (where he shields himself), the Divine Angel will protect herself with a shield and heal. She is effectively unkillable until you lower Solarus' health.
- The Divine Angel will despawn if you leave the platform.
- If you leave the platform while the Divine Angel is spawning, it may not despawn properly when you leave. You'll have to step back onto the platform to aggro it and then leave again to get it to despawn.
- The Divine Angel has several special attacks.
- Solarus will stand in the center of the platform and spawn two vortexes that send out waves of Holy bolts.
If Solarus gets low on health, he will create a shield to protect himself and start healing back to full health, starting the third phase of the battle.
- Solarus is invulnerable while shielded. He also spawns vertical beams of Holy energy that fly around the arena.
- If Solarus fully heals, the shield will remain. He will continue to fight you and will be completely invulnerable while the shield is active. The only way to remove the Shield is to kill the Divine Angel.
- Killing the Divine Angel turns it into a Fallen Angel which will then start attacking Solarus. You can damage the Fallen Angel, but it's best to leave her alive as she will distract Solarus during the fight.
Once the Divine Angel breaks Solarus' shield, it starts the fourth phase of the fight. Solarus gains a permanent golden glow and adds some new and upgraded attacks.
- Solarus' melee combo will add additional swings. The final vertical slash will spawn two sawblades which split into two each at the end of their run, causing a total of four sawblades to return towards him.
- Solarus will continue to spawn vertical beams of Holy energy that will move about the arena.
- If you get too far away from him, Solarus will leap into the air and land, causing a massive explosion of Holy energy.
- The Fallen Angel will continue to fight Solarus, but it won't really do any significant damage. It will, however, serve as a useful distraction.
- The Fallen Angel can die. Solarus will not summon another Divine Angel if the Fallen Angel dies.
- If you kill Solarus before the Fallen Angel dies, it will despawn on its own.
Solarus spawns so many projectiles that V Rising may very well qualify for the Bullet Hell genre. It will almost certainly take you several attempts unless you have a large team of players working with you.
In summation, here's the basic sequence of how to beat Solarus:
- Reduce Solarus' health to half.
- Once he spawns the Divine Angel, avoid attacks and continue to damage him until he activates his shield.
- After his shield is activated, kill the Divine Angel to break it. The Divine Angel will turn into a Fallen Angel.
- With his shield broken, Solarus can now be killed. Avoid damaging the Divine Angel -- it serves as a useful distraction -- and focus on damaging Solarus until you kill him.
Recommended Gear & Skills for Solarus the Immaculate
Solarus is the toughest boss fight in the game, so you're going to need to bring your best. That means you'll need a full set of Bloodmoon Armor, Sanguine weaponry, and one of the three endgame accessories (Shard of the Frozen Crypt, Nightstone of the Beast, or Jewel of the Wicket Prophet).
Solarus throws out a lot of projectiles, so at least one defensive Ability is recommended here. It would not be a bad idea to bring two, but you may want to have one offensive Ability -- use your discretion to choose which is best for your playstyle.
Finally, potions -- I recommend bringing at least one stack of Holy Flasks (to cover multiple attempts) and at least three stacks of Blood Rose potions. You should also have at least one stack of Potion of Rage and one stack of Witch Potion.
How to Beat Solarus the Immaculate Solo
Fighting Solarus the Immaculate solo is going to be the most challenging thing you can do in V Rising's PVE.
Accept the fact that you will probably not win this fight the first time. There are a lot of attack patterns to learn here -- if things are going badly, retreat and try again until you have a good understanding of each phase.
Outside of that, your best bet is to do damage from range. Going into melee will be extremely challenging and it's probably not the best strategy.
That's the end of our V Rising Soul Shard Bosses Guide -- you're now better equipped to fight the toughest bosses in the Early Access version of the game. Check out our other guides below!
Have a tip, or want to point out something we missed? Leave a Comment or e-mail us at tips@techraptor.net
One of my earliest memories is playing Super Mario Bros. on the Nintendo Entertainment System. I've had a controller in my hand since I was 4 and I… More about Robert N