Tunic has a lot going on for it. You're a cure fox out on a difficult adventure to try to unlock a magical seal and cleanse the world of a strange curse that has befallen it. At this point in the game, you might have already beaten the final boss but are looking for more to scratch at past the surface. You might not be aware, or you might have stumbled upon one, but there are 20 Secret Fairies that can be found around the world of Tunic, each has a secret way to unlock and rescue. In this Tunic Secret Fairy Guide, we'll start by giving you hints to the fairy locations, but if you're just wanting the locations you can find them here too.
What are the Secret Fairies in Tunic?
The secret fairies are a special collectible in Tunic that you'll need to dig deep into the secrets of the instruction manual to discover and solve. If you've had a keen eye throughout your adventure there's a chance that you might have stumbled upon a fairy or two but with 20 out in the world, it might take some time to round them up.
If you want to learn more information about the Secret Fairies you'll need to turn to pages 47 and 48 of the manual that talks about the Fairy Spring. Page 48 also contains a checklist of all of the Secret Fairy locations in the game and where to find them.
If you're familiar with the Sacred Cross and how many of the other secret door puzzles work in Tunic you'll recognize the symbols on Page 47 and 48. Tapping out this pattern is called the Seeking Spell. If you use this spell shining lights will appear and guide your fox towards the nearest Fairy puzzle to solve.

What does Page 48 show?
What you see on Page 48 of the instruction manual is a checklist of all of the different locations that Fairies can be found. The fairy locations that are in the local language are all located in The Overworld so be sure to make the most of the Seeking Spell. The Seeking Spell can also be used elsewhere to help you pinpoint exactly where the Fairy will spawn but the rest of the puzzle you'll need to figure out yourself.
Below the break will be a list of each Fairy and how to unlock them so be warned before scrolling down too far!

The Numbers listed below and in the order of left column, then right column running from top to bottom.
- From the Fox Statue in front of the Sealed Temple in The Overworld head North-East towards the Forest Fortress entrance. In the square crossroad before the Forest Fortress you'll see a purple flower and other white flowers. Create a pathway between them with your Dpad to unlock a fairy.
Up - Left - Down - Left - Down - Left - Down - Left - Up - Right - Down - Right - Right - Down - Right
- Travel to the island in the southern center of The Overworld (On your map it's the island with the golden path to its right.) Follow the path indicated on page 52 from the large Pink Flower to save this Fairy.
Up - RIght - Down - Left - Down - Left - Down - Left - Down - Left - Up
- At the Overworld travel to where on the map the word "Belltower" is on the West tower. You'll see a dark pattern on the wall, trace it with your dpad to have this fairy appear. The pattern continues around the wall so make sure you get it all.
Up - Right - Up - Left - Down - Left - Up - Left - Up - Right - Down - Right - Down - Right - Up - Left - Up - Right - Down - Right - Down
- At the Overworld travel to underneath the bridge on the far right. Inside will be a room with a pool that sheds light on the wall. The pattern is actually a path for you to trace with your dpad. I recommend using a controller as it will allow you to use the controller as the pattern on the wall spins.
Right - Up - Left - Up - Right - Down - Right - Up - Right - Down - Left - Down - Right
- In the Fairy Shrine you'll see the normal kind of iconography on the wall, though it's obscured by rock formations. Complete the picture and from the circle follow the path with your dpad/arrow keys and a chest will appear. Open this chest to free a soul.
Down - Right - Up - Right - Up - Right - Up - Left - Up- Left - Up - Right - Up - Right - Up - Left - Down - Left - Down - Left - Down - Right - Down - Left - Down - Right - Down - Right - Up - Right
- In the entrance hall in the Sealed Temple there is a line pattern on the ground. These patterns are mirrored, start from the left side of the pattern and trace it with your dpad for this fairy to appear.
Up - Right - Up - Left - Up - Right - Up - Left - Up - Right - Down - Right - Up - Up - Left
- Travel to the Quarry through the back path from the top of the mountain to get on top of the Quarry shrine. You'll see stacked rocks here, starting from the triple stacked rock tap out the pathway to have this fairy chest appear.
Up - Right - Down - Left - Up - Right - Up - Left - Down - Left - Up - Right - Right - Down
- At night time travel to the East Forest via the teleporter. Backtrack towards where you first fall into the East Forest but teleport dash up the pillars to get to the ledge where you previously opened a chest. Here you'll see a fox spirit moving in a peculiar way, follow their movement to make the fairy chest appear.
Up - Down - Up - Down - Left - Right - Left - Right - Down - Left - Up - Right
- Travel to the large hallway of the Great Library and you'll see a large rug in the center of the room. Trace out the pattern on the carpet with your dpad and this fairy chest will appear.
- In The Overworld travel underneath the left most bridge on the beach and head North. You'll enter the room with the hourglass. Follow the pattern on the back wall to unlock a new area with a 3D rotating bridge puzzle. Enter the path of the puzzle while standing at the top to have a fairy chest appear.
Left - Up - Right - Up - Right - Down - Right - Up - Right - Up - Left - Left - Left - Up - Right - Up
- In the Overworld head to the compass directly to the South of the entrance to the East Forest. If you interact with this compass you'll get four lines of text. Using the compass on page 34 of the Instruction Manual you're able to discern which symbol represents north, south, east, and west. Once you know which directions they face transcribe them into Up, Down, Left, and Right.
Left - Right - Down - Up - Up - Down - Right - Left - Up - Right - Down - Left - Up - Down - Right - Left
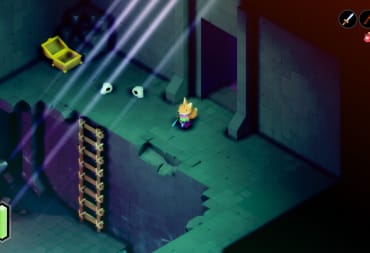
- This Faerie can be unlocked in the Old House. On the wall is a blanket with a pattern on it. Where the Gold line intersects you need to press the direction twice.
- Head to the far North-East of the Overworld, and climb down the ladders next to the waterfall. There is a hidden path to go behind the waterfall. Inside this cave you'll find a chest with money in it but you can travel even further North-West through a secret passage to a room with a single enemy. Don't do anything to draw attention to yourself but watch the pattern that the enemy walks on the path. Tap out this pattern to make the fairy chest appear.
Down - Down - Right - Up - Right - Down - Left - Down - Right - Up - Right - Down - Down
- From the Fox Shrine in The Overworld travel South towards the two statues of the Heir covered in moss. The one on the right, with the head, will have a winding staircase down that leads to a dead end. Use a firecracker to open a doorway and head inside to see a floating golden cube. Tap out on the dpad/arrow keys the path the gold cube follows, it's a lot of rights and ups. At the end of the sequence, this fairy chest will appear.
- Travel along the beach and get under the bridge on the right in The Overworld. Head north to find a room with an invisible maze that leads to a chest with money in it. This room has another secret though! Use your dpad to trace out the invisible pathway to earn this fairy.
Up - Left - Down - Left - Up - Right - Down - Right - Up - Right - Down - Left - Up - Left - Up
- From the Old House in the Overworld head south towards the small pond that had an Instruction Manual Page on it. You'll see there's a collection of tiles in the different cardinal directions. Tap the directions in the order of the numbers that appear.
Down - Left - Left - Down - Up - Right - Down
- Travel to the lone tree in the far South-West of the West Garden. You'll see flowers on the ground. Press the directional keys in the numerical order of the flowers you see.
Left - Down - Right - Left - Up - Down
- In West Garden go to the large open platform just North-West of the second Fox Shrine statue you encounter. In this arena you'll see a pattern on the floor, starting from the far right enter in the Dpad commands tracing the line.
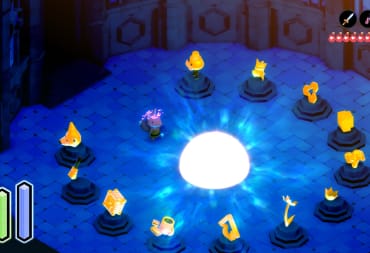
- Travel to the Fortress of the Eastern Vault and head to the Fox Shrine that's inside the Fortress proper. Travel to the room directly West of the Fox Shrine and you'll see candles placed around the dropped Obelisk. Tap the directions in the order of the numbered candles for this fairy chest to appear.
Right - Left - Down - Right - Up - Left
- In the lower East Forest you'll find a broken Golden Obelisk. Around the world you'll find a number of the pieces for this Golden Obelisk. Putting them together you can create what type of path you need to draw with your button inputs. You can check out our Tunic Golden Obelisk Guide for this solution.
What are the rewards for collecting the Secret Fairies in Tunic?
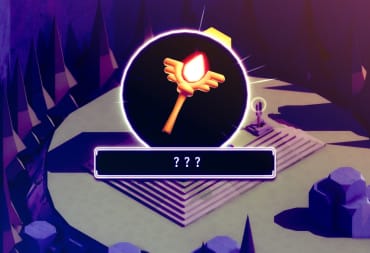
At various points you should revisit the Secret Gathering Place, this is the Fairy Spring that is located behind the Waterfall directly to the East of the Overworld entrance to the Dark Tomb.
- For collecting 10 Fairies you'll be rewarded with pages 54 and 55 of the Instruction Manual
- For collecting all 20 Fairies you'll earn one of the Secret Treasure collectibles
Have a tip, or want to point out something we missed? Leave a Comment or e-mail us at tips@techraptor.net

Andrew has written Video Game and Entertainment news, reviews, and guides for 10+ years. As Senior Content Manager, he assists in creating and editing… More about Andrew