One of the interesting structures you might come across if you find yourself in the North of the map just on the edge of the chilling Hebra Mountains is the North Lomei Labyrinth. This Labyrinth includes a ground, sky, and even depth section to complete to obtain a powerful armor piece. In this Tears of the Kingdom North Lomei Labyrinth guide, we'll explain how to clear each section of the Labyrinth and the easiest way to do it.
The reward that you obtain from completing this Labyrinth is one part of three. By traveling to and completing each of the three Labyrinths; South Lomei Labyrinth in the South West, Lomei Labyrinth Island in the North East, and North Lomei Labyrinth in the North West you'll be able to obtain all three armor pieces giving you a resting defense of 12 and a huge boost to your stealth abilities.
How to get to North Lomei Labyrinth in Tears of the Kingdom
Getting to North Lomei Labyrinth is pretty easy. If you've unlocked the North-West region of the map then you'll have access to the Pikida Stonegrove Skyview Tower which you can head North-East from, but I'd actually recommend using the Skyview Tower that's in the direct North, Thyphlo Ruins Skyview Tower. The reason that I recommend using this Skyview Tower is that there's a Wing Zonai launching pad directly South-East from when you launch.
You can use this launching pad to create a Wing that you can control, and attach a few free rockets to it to not only get yourself to the North Lomei Labyrinth, but your main goal will be to actually reach the portion of North Lomei Labyrinth in the sky first. Once you reach the North Lomei Castle Top Floor you can activate the shrine for easy teleportation later, and then drop down to the ground floor.

TOTK North Lomei Labyrinth Solution
The Hard Way
The first part of this quest has you traveling through a labyrinth avoiding Gloom. At the doorway into the labyrinth, there's a note from a researcher who mentions that they plan to drop nuts and acorns as they make their way through the path. The hard way to find the North Lomei Labyrinth Solution is to just head into the labyrinth and follow the trail of items. I would highly recommend not picking up any of these items as you go through because you don't want to lose your trail and get lost along the way.
The Easy Way
The easy way to clear the labyrinth is to find somewhere that you can use Ascend and rise to stand on top of the Labyrinth. From there you just need to drop down to where there's a star on the below map and you'll be able to walk right in to the final room and activate the Dragon Ring and complete a Shrine.

Once you complete the North Lomei Labyrinth you'll receive the following message:
For you who conquered this labyrinth of the land, I, the ruler of owls, have unlocked a door.
The door that the voice is referencing is the one you unlocked already at the North Lomei Castle Top Floor.
North Lomei Castle Top Floor Terminal Locations
The North Lomei Castle Top Floor is different as it's harder to get on top of the Labyrinth. Instead, you'll float through the labyrinth being careful to watch your stamina so you don't fall back to land. Upon opening the door you'll be informed that there are four terminals located around the labyrinth. Use the map below to see the location of each of the terminals marked with a Star icon.

Once you've activated all four terminals a new Dragon Ring will activate on the roof of the North Lomei Castle Top Floor. Use your Paraglider to get to the top immediately. After activating the Dragon Ring you'll receive the following message:
You who have traversed this maze, mark well my words
I have pulled apart the bars in the labyrinth of the land that obstructed your path below ground
From high above, to far below... Prove your courage by diving into the depths of the earth.
The final way shall open to you.
Use the jump platform to drop down all the way into the Depths for the final part of the North Lomei Labyrinth quest.
Tears of the Kingdom North Lomei Labyrinth Boss Battle and Reward
In The Depths follow any of the small passageways to fight Flux Construct III. To defeat this Flux Construct you'll need to locate his primary cube, this is the one that's glowing, and separate it from the rest of his body. When you do it will fall to pieces and you'll get your chance to deal prolonged damage on the cube. During the whole fight this cube will be swapping places with other cubes, if it's not in a good location for you to grab chances are you can wait a few seconds and you'll get another chance. This boss fight has three different forms:
- Humanoid Form - In this form, he will recreate himself in front of you and slam down for high damage. Your aim here is to simply grab the Core Cube and pull it away from the body.
- Cube Form - Here the Flux Construct will become a 3x3 cube and roll after you, he will also make larger jumps towards you so be ready to run and jump away at a moment's notice. Much like the Humanoid Form, your goal here is to get his Core Cube and separate it from his body
- UFO Form - The Flux Construct will rise into the sky and become a flat platform. In this form, his Core Cube will be hidden above and you won't be able to reach any of his blocks. Wait until he throws 5 blocks at you. Stand on top of one when it's on the ground and use Recall to ride it back up to his UFO body. Hop on top and start wailing on his Core Cube
After defeating the Flux Construct III the disembodied voice will reach out to you once more:
You who have traversed this labyrinth of the Depths...
This trial was a test of your talents. In overcoming it, you have shown yourself to be strong of body, skill, and mind.
In my name as the ruler of owls, I commend your achievement and offer a fitting reward.
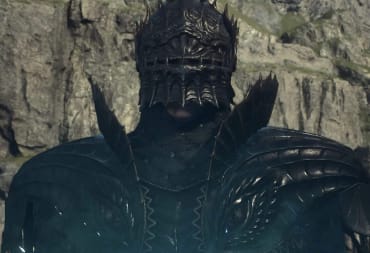
Armor wreathed in otherworldly evil, hidden away since days of old... Take it now.
Approach the chest that has now appeared in the middle of the room to obtain the Evil Spirit Greaves. This leg armor is modeled after Ganondorf's look in The Legend of Zelda: Ocarina of Time. It offers 4 defense and as an added bonus offers up the Stealth Up ability.
Have a tip, or want to point out something we missed? Leave a Comment or e-mail us at tips@techraptor.net

Andrew has written Video Game and Entertainment news, reviews, and guides for 10+ years. As Senior Content Manager, he assists in creating and editing… More about Andrew