Our Survival: Fountain of Youth Starter Guide will tell you everything you need to know to survive this game set on a deadly Caribbean island!
Quicklinks: Starting a New Game | What Items Should you Take from the Ship?
HUD Explanation | Statuses, Disease, Pests, and Equipment
Understanding the Journal | Starter Guide Walkthrough | F.A.Q.
In Survival: Fountain of Youth, you take on the role of a marooned sailor in the Caribbean. You'll start with nothing more than a couple of tools and your wits -- you'll have to Craft the items you need, find Food, and explore the massive island to find your way home. Read on to learn about the basics of the game!
Starter Guide | Bird Region Walkthrough >
Starting a New Game
When you start a new game of Survival: Fountain of Youth, you'll have several options available. Here's a quick explanation of what they are:
- Skip Intro and Tutorial - This skips the intro sequence on the ship and saves you from having to do the tutorial actions.
- Protip: When you need to block the wild animal at the ship's bow, stand on the staircase -- for some reason, it's easier to block from there.
- Max Number of Faints - How many times you can Faint. Not even Living Water will regenerate your Faints. If you run out and lose all of your health again, you'll die for good and your save will be deleted.
- Unlimited - No limit on Faints.
- Limited (Recommended) - 8 Faints (Easy difficulty), 6 Faints (Normal Difficulty), or 4 Faints (Hard Difficulty). (Source)
- One - You can Faint one time and one time only, period.
- Difficulty - The Difficulty Setting determines how much damage you take, how quickly you heal from Disease, and more -- each Difficulty Setting is explained when you highlight it.
- Game Case - This allows you to choose to begin the game with some pre-crafted equipment.
- Alternative Spawn Point - This is a selection of alternate spawn points. It's not recommended to adjust this setting the first time you play the game.
What Items Should You Take from the Ship in Survival: Fountain of Youth?
Whether you complete the tutorial or skip it, the first major choice you'll have to make in Survival: Fountain of Youth is which two items to take from the Old Chest before jumping overboard You should take the Iron Axe and the Iron Flint from the ship in Survival: Fountain of Youth.
If you're playing on a harder Difficulty Setting, you may only be able to take one item and you should take the Iron Axe. If you're playing on an easier Difficulty Setting, you'll be able to take a third item; in that case, you should grab the Leather Backpack.

You should always take the Iron Axe. You'll need wood before you need anything you'd have to cut with a knife, and it doubles as a weapon to protect you from wild animals. The firestarter is a good second item since it will last for weeks before breaking with daily use and fires are a necessity for warmth and protection. Finally, the Leather Backpack will let you carry more stuff in the first few weeks, speeding up your progress.
Here are the options available to you, should you wish to choose a different item:
Leather Backpack
Bag which will allow me to carry more items.
- 0.4 Weight
- 384/960 Durability
- Will Break in 26.7 Days
- Adds 22 Weight capacity
Navy Coat
Equipment which will protect me from bad weather and animal attacks
- 0.5 Weight
- 192/480 Durability
- Will Break in 13.2 Days
- Sun Protection +100%
- Wind Protection +100%
- Rain Protection +25%
- Cold Protection +100%
- Armor +15
- Decreasing Wound Chance -5%
- Decreasing Poison Chance -5%
Iron Flint
Firestarter will help me to ignite fire for warmth and to craft survival items.
- 1.0 Weight
- 240/400 Durability
- Chance of Ignition 60%
- Tool Class Firestarter
Improved Fishing Rod
Tool which will allow me to catch fish, so I won't have any problems with food.
- 1.0 Weight
- 140/220 Durability
- Catch Chance 70%
- Tool Class Fishing Rod
Iron Spear
Useful weapon which will allow me to defend myself against enemies on island and to hunt
- 2.0 Weight
- 112/450 Durability
- Damage 40
- Throw Damage 90
- Melee Range Long
- Throw Range Long
- Stamina Drain 10/sec
Iron Axe
Useful tool for building, cutting down trees and also weapon for protection
- 2.5 Weight
- 245/700 Durability
- Damage 50
- Throw Damage 75
- Melee Range Medium
- Throw Range Short
- Stamina Drain 17/sec
- Tool Class Axe
- Tool Efficiency 175%
Iron Knife
Useful tool for harvest from plants and also weapon for protection
- 0.5 Weight
- 210/600 Durability
- Damage 25
- Throw Damage 37
- Melee Range Short
- Throw Range Short
- Stamina Drain 7/sec
- Tool Class Cutter
- Tool Efficiency 200%
Bag of Provisions
Food kit for survival on the island
- 10 Loaf of Bread
- 0.2 Weight
- 300/300 Durability
- Spoils in 20.8 Days
- Food +20
- Water +2
- 10 Red Apple
- 0.3 Weight
- 200/200 Durability
- Spoils in 13.9 Days
- Food +2
- Water +20
- 10 Smoked Meat
- 0.4 Weight
- 600/600 Durability
- Spoils in 41.7 Days
- Food +35
- Water +10
Pistol with Ammo
Firearm kit for protection from animals and hunting on the island
- Pistol
- 1.5 Weight
- 200/200 Durability
- Damage 1510
- Shot Range Medium
- Stamina Drain 0.5/sec
- Ammo Type Bullet
- Bullet Charge
- 0.2 Weight
- 20/20 Durability
- Damage Bonus 45
- Ammo Type Bullet
Bag of Medicine
Medicine kit for protection from illnesses and restoring health
- 2 Clay and Egg Ointment
- 0.2 Weight
- Cures 4 Ranks of Wounds Disease
- Cures 4 Ranks of Burns Disease
- Wound Treatment 1d12h
- Burn Treatment 1d12h
- Health Regen +10 (1 Hour)
- 2 Powder from Snakes and Spiders
- 0.2 Weight
- Cures 4 Ranks of Poison Disease
- Cures 4 Ranks of Indigestion Disease
- Protection from Pests 1d12h
- Poison Treatment 1d12h
- Indigestion Treatment 1d12h
- Health Regen +10 (1 Hour)
- 2 Sweating Potion
- 0.1 Weight
- Cures 4 Ranks of Flu Disease
- Cures 4 Ranks of Overheating Disease
- Water +20
- Flu Treatment 1d12h
- Overheating Treatment 1d12h
- Health Regen +10 (1 Hour)
- 1 Medical Kit
- 0.2 Weight
- Health Regen +65 (4 Hours)
Survival: Fountain of Youth HUD Explanation

- Character Statuses - This shows any buffs or debuffs you have and any effects you are exposed to (such as a burning hot sun or chilling winds).
- Tracked Goal(s) - This shows your currently-tracked objective.
- Health - The standard health bar. If this goes to 0, you Faint and your maximum Health is reduced by 10.
- Food - A representation of your hunger. If this gets too low, you'll start losing Health.
- Water - Your hydration. If this gets too low, you'll start losing Health.
- Energy - How tired you are. If this gets too low, you'll start losing Health.
- Stamina - Your short-term Energy, expended when running and performing certain actions. This bar is only visible when your Stamina is not at 100%.
Aside from these basic stats, you also have Survival Abilities and Skills that you can enhance to power up your character -- check out our Survival Abilities and Skills Guide to learn more!
Statuses, Disease, Pests, and Equipment
As the name implies, Survival: Fountain of Youth is a survival game. It has a fairly robust system of buffs, debuffs, and other status effects, so let's go over them real quick.

Character Statuses
As shown on the HUD in the previous section, you can be affected by different statuses. These can include environmental effects which feature a status bar -- if the bar fills, you will suffer from a Disease. For example, allowing the Burning Sun bar to fill up will result in you getting Sunburn.
Diseases
Diseases are a subset of Character Statuses that introduce negative stat penalties and other debuffs. Diseases can be treated with rest and/or Medicine; click on the Disease in the Statuses menu to see recommended treatments.
Pests
Pests are small creatures such as Scorpions and Spiders. If you get too close, they will jump on you and attack, causing a small amount of damage and potentially inflicting a Disease on you.
You can see some Pests on the ground, most notably in the Grotto Cave. Kill them before getting too close.
More importantly, Pests can randomly spawn and attack you anytime when it's dark. Don't work at night, in caves, or in shaded areas unless you're carrying a Torch to keep them away!
Equipment
Equipment is the tools and armor that will help make your life a little bit easier. You have quite a few slots where you can equip stuff that you find or Craft:
- Head - For hats and helmets.
- Chest - Chest and upper body protection.
- Legs - Lower body protection.
- Feet - Protection for your feet.
- Belt - Adds additional slots to the Weapons hotbar.
- Bag - Increases your max carry Weight.
- Bandolier - A holster for your ranged weapon's ammo.
- Weapons - A hotbar where you can equip tools and weapons. You don't have to equip all tools to use them for gathering, but you will have to hold a Hammer for Building.
- Ammo - Storage slots for ranged weapon ammo.
- Special Resources - Special items (such as Living Water) get stored in these special slots.
Equipping clothing or armor doesn't just reduce the damage you take from hostile wildlife -- it also provides you protection from the elements. Wearing sufficient clothing, for example, can totally prevent sunburn.
Understanding the Journal
The final point to go over before we go into the Starter Guide's walkthrough is the Journal. The Journal has six sections:
- Goals - A list of your current objectives. You can also view completed objectives.
- Unique Items - Books, parchments, and other trinkets you've found that tell you more about the story.
- Expedition History - A recounting of your journey up until the current point.
- Bimini Civilization Story - This shows you the Chronicles you've found and the stories they tell.
- Books Read - This tracks the Skill Books that you've read.
- Event Log - This shows everything of note that has happened to you, such as completing Steps in a Goal, weather changes, or taking damage. This also shows you your lifetime stats.
That's it for the basic game mechanics -- now, let's move on to the Starter Guide Walkthrough!

Survival: Fountain of Youth Starter Guide Walkthrough
Our Survival: Fountain of Youth Starter Guide Walkthrough begins on the ship. If you choose to play the tutorial, you'll have to complete a few Goals and do some risk-free combat before you can go to the Captain's Cabin. If you skip the tutorial, you'll start in the Captain's Cabin.
The First Choice
The first tough choice you'll have to make is taking 2 items from a chest by the broken window. (The number of items you can take depends on the difficulty; you can actually get anywhere from 1-3 choices.) Take the Iron Axe first and the Iron Flint second. If you're playing on an easier difficulty and can choose a third item, I recommend that you take the Leather Backpack.
Once you have everything, jump out the window and you'll wash up on the beach.
Stranded on the Beach
When you wake up on the beach, your stats aren't in the greatest shape. You have no supplies other than the items you grabbed from the chest in the Captain's Cabin. It's time to get moving!
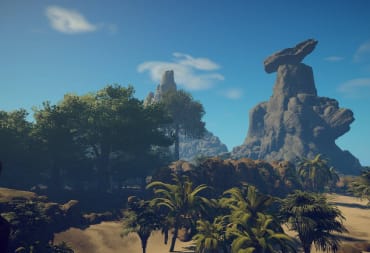
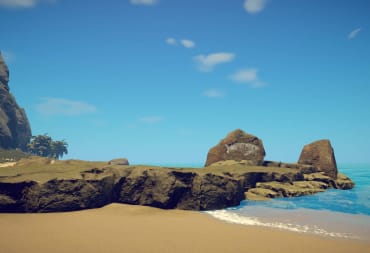
First, look up and to your right -- pay special attention to the tall rock with a large horizontal rock on top of it:

That is the location of the Grotto, an ideal location for our first base. Before we go there, though, we're going to gather some resources.
With the ocean behind you, head to the left along the beach (away from the Grotto Cave). You'll find Rope from the Ship by a big rock. Pick it up, then move along the beach to the left and collect the following items if you see them:
- Small Sticks
- Narrow Leaves
- Yellow Leaves
- Green Coconuts
- Ripe Coconuts
You will also see some Crabs moving along the beach. This is a good opportunity to practice throwing your Iron Axe and killing them -- you can cook them for Food when you get a base set up. Whether you hit or miss, you'll have to run to your Iron Axe and pick it up to use it again. (Don't throw it somewhere you can't reach it, and don't forget to pick it up!)
There are two red crates right on the shore a little way to the left. One has a Red Apple and one has a Loaf of Bread. Collect these -- you're not in any position to pass up free Food! If you follow the rocks on the left (while staying on the beach), you can find another red crate with another Loaf of Bread.
Do not leave the beach. Once you're satisfied with the items you've found, follow the shoreline to the right (keeping the ocean on your right) and you'll start making your way to the Grotto Cave.
To the Grotto Cave
The Grotto Cave is an ideal location for your first base (once it's been cleaned up a little bit, anyways). Start heading towards the big rock with a horizontal boulder on top and then move towards these flowers:

This is Chamomile, a useful ingredient for making Medicine. Take note that there may be a Short-Eared Dog nearby, a sort of raccoon-like creature. If you see it, throw your Iron Axe at it to kill it.
More importantly, this will be our first lesson in gathering. Interact with it by pressing E and you'll see a menu pop up. Click on the Chamomile once, then press space to harvest it. Some time will pass and you'll harvest a Chamomile. Head back to the beach and continue moving along the beach and around the tall stone mountain.
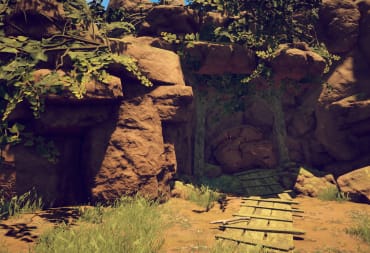
As you go around the bend, you'll see a massive skeleton on the beach. Look to your left and you'll see the Grotto Cave!

Cleaning Up the Grotto Cave
The Grotto Cave will be our first base location, but it's not exactly safe -- there are 2 to 3 Scorpions roaming around inside.

Throw your Iron Axe to safely kill all of the Scorpions from a distance. Collect the Scorpion Carcasses; they can be used to make Medicine later.
Next, walk around the cave and collect any leaves you see. If your inventory gets too full, drop some items on the ground. (You'll be able to pick up any dropped items within a reasonable timeframe, so you won't lose anything.)
Open up the Crafting menu. Select the Primitive Bed of Leaves, place it next to the Campfire with Stones, and build it.
Next, turn around and face the mural in the cave. Place 1 Box Made of Branches for storage. Don't put anything away just yet.
Making a Cave into a Home
You now have a bed, some storage, and a safe shelter. Let's get a little warmth and light going.
Look toward the back of the cave. You'll see a small blob on the ground -- this is a piece of Jatoba Gum, an excellent Firestarter. Pick it up, then interact with the Campfire to light it.

Now that we have a fire going, we're going to do a little Crafting. Interact with the Campfire again and make the following items:
- 4 Mapping Charcoal x2 (giving you a total of 8)
- Roasted Crab, if desired
- Roasted Short-Eared Dog, if desired
Once these items are cooked, it's time to eat and drink. Make sure to eat and drink enough to fill up your bars, but don't try to max them out -- you're going to have a hard time finding Food and Water in the early game.
Eat the Red Apple, or Craft a Green Coconut into Coconut Water to restore your Water Stat. Eat some of the cooked Food, Ripe Coconuts, or the Loaf of Bread to restore your Hunger. If you get Indigestion, Craft the Chamomile Juice Medicine to cure it.
Once your Hunger and Health are restored, interact with the Primitive Bed of Leaves to find out how much time is left until daytime.

Make sure there is enough fuel in the Campfire with Stones so that it burns throughout the night, then go to sleep.
The Second Day
Day two begins! Now it's time to look at that mural. Interact with it, and grab the notes and the bottle.

Reading all of the notes will tell you a bit of lore and play a cutscene. Your next Goal will then begin -- finding the Spyglass on the other side of the island. Before we get there, though, we're going to need to do some resource gathering and mapping.
Mapping It Out
We're going to go on a short walk and start revealing the Map for the Island of Hope. Put everything in your inventory into the Box Made of Branches except for your Iron Axe, the 8 pieces of Mapping Charcoal, and the Rope from the Ship.
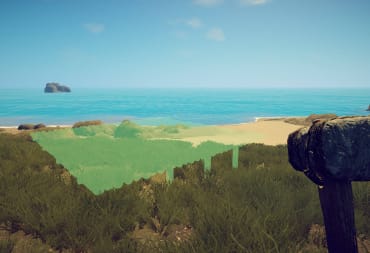
Walk outside, bring up the map, and press the space bar to begin the Mapping process. When you're done, you'll have a tiny portion of the Map revealed:

You can only Map short distances when you're at sea level -- you'll have to get to higher ground to map larger areas with each Mapping attempt.
Head East on the map until you're roughly here:

Go into the Map and complete the Mapping task again to reveal a little more.
See that gap in the rocks up ahead in the above image? We're heading that way. Walk into the canyon and you'll see some prickly branches on the stone road in front of you. You can interact with them to collect Small Sticks, but don't do that for now.
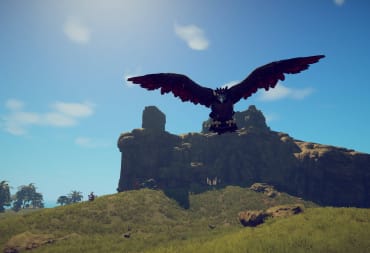
Our goal is the massive tree in the distance -- a Cartographer Tree. Cartographer Trees can be climbed with rope, giving you a high perch from where you can map a large area.

Perform the Mapping task one more time in the canyon so that you can easily navigate home, then start making your way toward the Cartographer Tree.
When you make it to the Cartographer Tree, interact with it and you'll consume the Rope from the Ship to make a rope ladder. Climb up the rope ladder. When you get to the top, you'll see a prompt that says "Great Place for Mapping." Press the button prompt (or go into the Map normally) and perform the Mapping Task one more time and you'll reveal a massive area:

The above image shows just how powerful a Cartrographer Tree is -- you've covered way more area with just one Mapping Charcoal!
Collecting Critical Crafting Items
Now that we can see more of the Map, it's time to climb down. Carefully walk down the ladder until you're on the ground.
Once you're on the ground, open up the Map and collect the following resources using the Map:
- 2 Big Branch
- 4 Long Stick
- 6-8 Liana
If it's too late in the day, return back to the Grotto, sleep, and then head back into the forest to get these items.
The Big Branch, Long Stick, and Liana will open up a bunch of Crafting recipes that will allow you to make better stuff and useful tools such as the Wooden Spear.
There is also a fair amount of Food items (such as fruit trees) in the area around the Cartographer Tree. Consider getting a little bit of Food, too, if you have the Weight capacity.
Take these items home and rest and recharge. You'll also want to keep an eye out for Stone Piles (typically found in or near the mountains on high ground) so you can make some more useful tools -- your Iron Axe won't last forever and you won't have any way to repair it anytime soon.
Continuing Your Adventure
We're at the end of our Survival: Fountain of Youth Starter Guide! You now know how the basics of Cooking, Crafting, and Mapping. You're now much better equipped to find that Spyglass on the other side of the island!
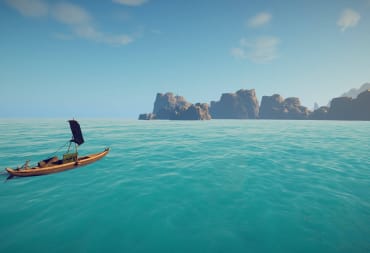
Soon, you'll be hunting down Common Logs so you can build a Boat. You might even want to Build a house somewhere else on the island! For now, though, you have the knowledge to freely explore and survive. Don't worry if you get stuck -- you can check out our other guides below to learn more about the game. Have fun!

Survival: Fountain of Youth F.A.Q.
What is Survival: Fountain of Youth?
Survival: Fountain of Youth is an open-world survival crafting game set in the Caribbean Islands in the early 1500's. You've joined Ponce de Leon on his quest to find the Fountain of Youth and your ship has sunk -- it's up to you to survive, find the rest of the crew, and uncover the mysteries of the Bimini culture!
Is Survival: Fountain of Youth Multiplayer?
No, Survival: Fountain of Youth is not multiplayer.
Where is the Survival: Fountain of Youth Save File?
You can find the Survival: Fountain of Youth fave file in:
C:\Users\USERNAME\AppData\LocalLow\Odinsoft\Survival Fountain of Youth\saves
Where "USERNAME" is your Windows username.
What Happens When You Die in Survival: Fountain of Youth?
If your Health reaches 0 in Survival: Fountain of Youth, you will Faint and gain the "Near Death" status which reduces your maximum Health by 10. Depending on your game settings, you may only have a limited number of total Faints. Regardless, your maximum Health will never be reduced by any more than -50. If you have no Faints left and your Health runs out again, you will permanently die and your save file will be deleted.
Can You Fast Travel in Survival: Fountain of Youth?
Yes, you can fast travel in Survival: Fountain of Youth. You can use a Boat to move between multiple Docks, even on the same island. There is no other way to fast travel without a Boat.
Starter Guide | Bird Region Walkthrough >
That's the end of our Survival: Fountain of Youth Starter Guide. We have lots of other guides below -- check them out to learn more about the game!
Have a tip, or want to point out something we missed? Leave a Comment or e-mail us at tips@techraptor.net
One of my earliest memories is playing Super Mario Bros. on the Nintendo Entertainment System. I've had a controller in my hand since I was 4 and I… More about Robert N