Salt and Sacrifice, despite looking very similar to its predecessor Salt and Sanctuary on a surface level, features a number of noticeable gameplay changes that change up how you need to play. It can be a little daunting to figure certain things out from the get go, so we’ve put together a few tips in this Salt and Sacrifice Starter Guide to help you out during the first few hours of the game.

Decide Your Salt and Sacrifice Play Style Early
Salt and Sacrifice has a lot of equipment that you can potentially use, ranging from balanced “vanguard-type” weapons and greatblades, to throwing axes and bows. However, while you can use the very basic Tier 0 variants of each gear type, the only way to properly use higher tier gear is by unlocking their respective nodes in the skill tree.
Because of this, it’s best to think of how you’re going to build your character early. While it’s nice to try out a variety of weapons, you’ll realistically only be able to use the higher tier of a few types. Additionally, trying to unlock multiple types of weapon nodes will also lead to your main stats being spread out, reducing the effectiveness of most weapons (though dual scaling-type weapons might benefit from this).
Check out our Salt and Sacrifice Character Creation Guide for a look at some of the starting upgrades and equipment each class starts with, along with an explanation of every stat type. You can use this as a base to plan out potentially builds ahead of time.
Salt and Sacrifice Material Gathering is Important
Unlike Salt and Sanctuary (and most other soulslikes), your main healing items in Salt and Sacrifice — Hearthen Flasks — are not an infinite resource that always refill at shrines. Instead, they only refill if you have enough Valley Herbs, red plants scattered through each area. 1 herb equals one Hearthen Flask, with flasks being crafted once you rest at a shrine.
This also applies to ammunition, which uses Irona Ore. Thankfully, while there are a number of ranged weapon types, the same ammo resource is used for all of them. Additionally, it’s possible to craft ammo while not at a shrine by holding the interact button (square on PS4/5, B for Xbox controllers, and C when using a keyboard). This is very slow, taking 4 seconds per ammo, but can be helpful in a pinch.
Irona Ore is less plentiful than Valley Herbs, but it can eventually be bought via a vendor that unlocks as you explore Ashbourne Village. They cost 100 silver each, making them a worthy investment over simply grinding ore deposits.
Keep Track of Salt and Sacrifice's Locked Doors
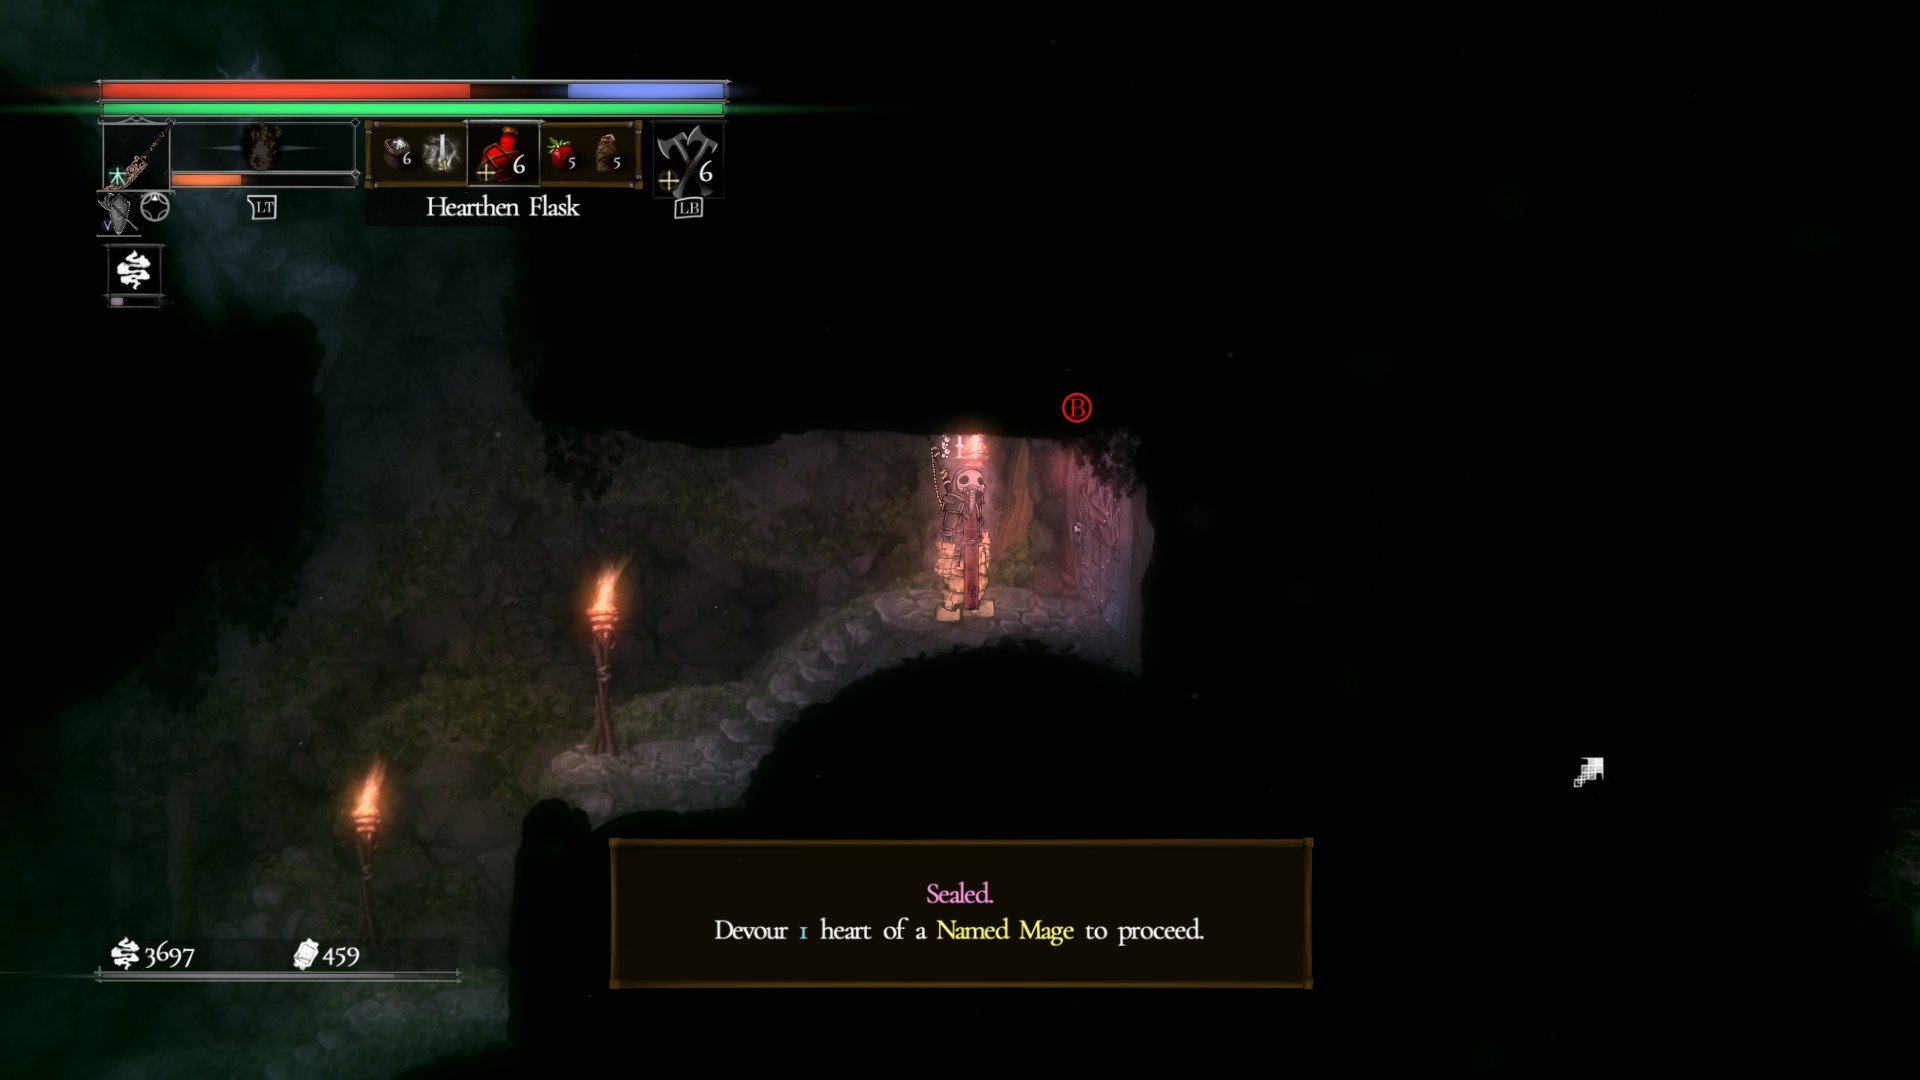
Progression in Salt and Sacrifice is primarily gated by Mages, the giant beings that roam each map. This is due to the red doors that can only be unlocked once you’ve killed enough named mages. Most of the time you first encounter one of these doors, you’ll be lacking the required amount of named mage kills to get through.
Thankfully, interacting with one of these locked doors will tell you how many more mages you need to defeat before it can be opened. It’s worth making a note of the doors you’ve encountered and revisiting them as soon as possible once the unlock condition is met. Many lead to new areas, characters, or helpful items.
Make Use of Enemies During Mage Hunts
Things can get rather chaotic during your first mage hunt, but that chaos can actually be used to your advantage. As you’re chasing a mage throughout the map, a number of new enemies with glowing blue eyes will spawn. Both these and the regular enemies in the area are aggressive towards mages and their minions, making them good meat shields.
It’s often best to let the mage fight through mobs, taking damage along the way. Not only does this clear the area out (and leave behind extra items), it also speeds up your hunt, something that can be welcome when grinding for specific equipment.
The Grappling Hook Can Be Used Against Mages
As a small addition to the previous tip, it’s also worth mentioning that the grappling hook (obtained shortly after defeating the first main boss in Ashbourne Village) can be used to deal extra damage to mages.
After hitting mages enough times — high damage weapons like greatblades seem best for this — they’ll eventually be staggered, showing one flashing eye. Once this happens, jump up and then grapple to stab them in the eye. This can then be followed up by an aerial attack to get in some more damage.
Unlock New Shortcuts Before Returning to Camp
Each of Salt and Sacrifice’s areas feature a number of shortcuts that reduce backtracking. These can come in the form of extendable ladders or extra grapple points, and should be found as soon as possible.
The main reason for this is that each main area only has one starting point. There are no additional teleport points, regardless of which shrine you returned to camp from. Without shortcuts, you’ll end up spending more time retracing your steps than visiting new locations.
This mainly applies to directly after boss fights, since it can be tempting to go back to camp straight away and level up. Instead, you should travel a little further into the area, as there’s usually a shortcut to unlock not that far away.
Have a tip, or want to point out something we missed? Leave a Comment or e-mail us at tips@techraptor.net
