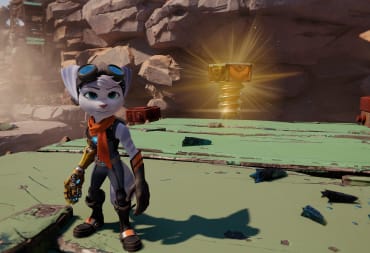
Ratchet discovers while on Savali that records of lombax history are spread across the planet in objects called lorbs. Armed with this information, you'll be soaring across the landscape in search of these tapestries. There are 12 lorbs to find in Ratchet & Clank: Rift Apart, and once you've collected them all, you'll be receiving a Mad Max type of outfit called the Wasteland gear. It will give you a 20% bonus damage resistance to indigenous creatures.
Where to find the mission in Ratchet & Clank Rift Apart
As you explore Savali, you'll find an outpost in the center of the map. Talk to the monk scholar who acts as a quest giver for Ratchet. You'll then be tasked to find all the lorbs in the area. In exchange, he'll give you the armor pieces you crave.
Lorb 1 in Ratchet & Clank Rift Apart

This one is a gimme. The first lorb will be waiting for you by the quest giver on the right side. It's on a slightly higher platform.
Lorb 2 in Ratchet & Clank Rift Apart

Straight after you save the monks from the most southern isle, ride the railing down to the main landscape. Turn right and right again to find a wall jump challenge. As you traverse to the end, make sure you hit the buttons on the walls to break the barrier surrounding the lorb on the other side.

The last section will need either a double jump or a hover to get enough height for the last button. If you fail to hit the buttons by the end, there’s a convenient portal that will take you to the start of the challenge.
Lorb 3 in Ratchet & Clank Rift Apart

On the eastern side of the map, you’ll find the next lorb on the top of the hill. You’ll have to fight off enemies in order to obtain the collectible.

You’re in the right area if you see large mushrooms around red-leaved trees. It’s also nearby the fight in which you had to protect your new robot buddy from incoming waves. Go to where you protected her and the lorb is on the right side.
Lorb 4 in Ratchet & Clank Rift Apart

This lorb is found behind a wall of crates on the most southeastern section of the map. Look out for friendly purple dinosaurs with tusks and you know you’re in the right place. If they don't appear, you'll also find a pocket dimension in the area as well.

Once you see either, drop down and keep moving forward. You’ll see it by the right of the pocket dimension. Be aware that there are troublesome dinosaurs waiting for you. Dispatch them with a powerful weapon and then take out the crates between two pillars.
Lorb 5 in Ratchet & Clank Rift Apart

This one is on a moving UFO-like vehicle in the northern section of the world.

This one is hard to catch up to normally, so try to cut it off around a corner. Swingshot your way up to it with the L1 button when you’re close enough.
Lorb 6 in Ratchet & Clank Rift Apart

In the north, you’ll find a large red leaved tree surrounded a pool of water. If you look behind, you’ll see a cave full of monsters.

The lorb is inside it, but you’ll have to take out a wave of enemies to do it. Use the Negaton Collider and Lightning Rod to dispatch them quickly.
Lorb 7 in Ratchet & Clank Rift Apart

This one is pretty easy to find. It is on the western section of the map. It looks like a shrine and it’s being protected by a bunch of Nefarious’ goons.

There should be a white and orange spaceship to the left. Take them all out and pick up the lorb.
Lorb 8 in Ratchet & Clank Rift Apart

For this collectible in the western area, you must disengage the shields by speeding through the green buttons. Follow the wired trail until you find the first button in some metal wreckage.

Make sure each one is turned blue in a quick pace in order to gain access to the lorb.
Lorb 9 in Ratchet & Clank Rift Apart

You’ll find this one in the middle of the map on an elevated rock. It looks tricky at first, but it’s actually fairly easy.

On the left hand side, you’ll see a ramp. Go up with your hoverboots and reach the lorb on top.
Lorb 10 in Ratchet & Clank: Rift Apart

This is in a rocky area in the slightly southeastern section of the map. To get to it, go past a path of wrecked ships and then once you’ve gone through a rocky overpass, start to climb up on the right side.

Once you’re all the way up, thanks to some handy double jumping, you’ll find a red mushroom you can bounce on. It should be glowing in blue. Jump on it, use the warp gate, and you’ve reached the lorb.
Lorb 11 in Ratchet & Clank Rift Apart

This lorb is on the southern isle of Savali. Cross the precarious bridge to get to the area and mind the gaps! Once you’ve crossed, you’ll see a warp gate on the right side.

Continue to shift from one to the next. Now that you’re higher up, you’ll see a metal rail you can ride on the left. Get on it. You'll find the lorb at the other end.
Lorb 12 in Ratchet & Clank: Rift Apart

The last orb is in the southern area of the map; you should see the yellow building on the left side of the screen. There's also a wrecked lab on the right side from what it looks like.

At first glance, it looks like a tricky puzzle, but all you have to do is shoot the red points and they will all eventually all the pillars will turn blue. Your lorb will appear in front of you.
Where to redeem the mission in Ratchet & Clank Rift Apart
If you find all 12 lorbs, you’ll be given a full set of wasteland gear from the Monk Scholar. When combined, this clothing will give Ratchet a 20% damage resistance from indigenous creatures. Also, Ratchet will look like he’s from Mad Max. If you have trouble finding him, he’s in the centre of the map where the blue objective marker is.
Have a tip, or want to point out something we missed? Leave a Comment or e-mail us at tips@techraptor.net

The British “Canadian” Chris Penwell has been a video game journalist since 2013 and now has a Bachelor’s degree in Communications from MacEwan University.… More about Chris