Pokemon Legends: Arceus is a game where half of the fun is exploring the landscape to see what you can find. With plenty of wild Pokemon to encounter and tons of little secrets here and there, it's no wonder GameFreak decided to really test your exploration skills with a few of their in-game requests.
One of the biggest and most involved challenges is a request to discover 107 ghostly wisps across all six maps of the game. Directly tied to the lore of the Ghost/Dark-type Spiritomb, Uncovering all 107 wisps is no easy task. Luckily, this guide will show you where every single wisp in the game is, along with some tips and tricks on how to hunt for them!
Pokemon Legends: Arceus - Request #22 Eerie Apparitions in the Night.

You can't start hunting for the wisps until you advance into the story a bit, by beating the first Pokemon Lord, Kleavor, in the Obsidian Fieldlands. After that, you will get a cutscene from a young girl named Vessa, who will tell you all about these wisps and give you the odd keystone. She then has you go on to collect one automatically, so you can't miss it.
After the first wisp, Vessa will task you with Request #22, Eerie Apparitions in the Night. Requests are optional quests found in Pokemon Legends: Arceus, and without a doubt, this one is probably the longest in the game. Your goal is to capture a total of 106 more wisps for Vessa, whom you can return to receive rewards for every ten wisps you give her.
The rewards are as follows:
- 5 Wisps - Oval Stone
- 10 Wisps - Rare Candy
- 20 Wisps - Seed of Mastery
- 30 Wisps - Dusk Stone
- 40 Wisps - Exp Candy L
- 50 Wisps - Linking Cord
- 60 Wisps - 5 Grit Pebbles
- 70 Wisps - Reaper Cloth
- 80 Wisps - 3 Seed of Mastery
- 90 Wisps - 2 Exp Candy XL
- 100 Wisps - 3 Grit Rock
Pokemon Legends: Arceus - Wisp Hunting Basics

So hunting wisps is surprisingly easier than it looks, though it will take some time. Also, depending on where you are in the game, several wisps may be inaccessible to you unless you progress through the main storyline first. You will eventually need access to all six in-game locations.
Here are some pointers to help make fulfilling the request easier.
- With the exception of the seven located in Jubilife Villiage, every other location has 20 wisps to find.
- Wisps are easier to spot at night, even from further distances away due to their purplish glow. You should consider hunting for them at night as during the day they disappear unless you get super close to them. The trade-off is that most nocturnal Pokemon are super aggressive, but they can be avoided most of the time if you're quick and careful.
- Consider waiting to grab wisps until you have access to some of the Pokemon that help you travel, most notably Wyrdeer, Basculegion, and especially Sneasler. Basculegion and Sneasler are essential to gathering most of the wisps in the game, as a lot of them are found on steep cliffs or hidden islands across multiple maps.
- You can use Braviary to traverse the landscape faster and search for wisps from the sky, and to access areas the aforementioned travel Pokemon can normally get to.
- It's easiest to get all wisps on a map at once, so you don't have to pull your hair out grabbing wisps on multiple trips.
- If you see a wisp but plan on leaving a map eventually, leave a sticker or ping for it on your minimap on the Arc phone.
The tips above will make wisp hunting much easier and faster, but be ready to invest time into hunting down all of the wisps. Most maps take an hour to two hours to complete.
Pokemon Legends: Arceus - All 107 Wisp Locations

Well, here is the main event, the locations of all 107 wisps in the game.
The lists below will be accompanied by a map showing all wisp locations on there, with a description of the area they are found in. The description will include some landmarks, objects to look out for, and if you need a Pokemon to access it. It will end with the region it's in, or the closest landmark it's near.
So let's get started in collecting all of the wisps in Pokemon Legends: Arceus.
Jubilife Village - 7 Total

- Automatically obtained when you start the quest and are handed the Odd Keystone
- Behind the Team Galactic Headquarters.
- Behind the Shed near the Jubilife Farms.
- In the Alleyway between the buildings opposite the farm.
- Behind the house next to the crafting house, close to the water wheel.
- Behind the Training Grounds Dojo.
- Near the boat and rock on Prelude Beach.
Obsidian Fieldlands: 20 Total

- Directly Southwest of your camp on a rock. Aspiration Hill.
- Northeast, past the Alpha Rapidash on a hill. May require Wyrdeer or Sneasler to access. Horseshoe Plains.
- South on a Cliff face overlooking the southern mouth of the river. Requires Basculegion and Sneasler to access. Grueling Grove.
- Along the southern side of the northing river, near the Worn Bridge. Requires Sneasler and Basuclegion to access. Worn Bridge.
- On an alcove overlooking the northern entrance to the Deertrack Run. May Require Wyrdeer or Sneasler to access. Deertrack Run.
- Directly Above the Heights Camp. Requires Sneasler to access. Heights Camp, Deertrack Heights.
- To the West of the Heights Camp, on the Hill overlooking the Western side of the map. Windswept Run.
- On the tiny island in the middle of Windswept Run. Requires Basculegion to access. Windswept Run.
- On the western bank of Windswept run, on a raised alcove leading to the cliffs surrounding Lake Verity. Requires Basulegion to access. Windswept Run.
- On the Northeastern cliff face overlooking the island in Lake Verity. Requires Basulegion and Sneasler to access. Lake Verity.
- Near the mouth of the waterfall on a rock. Requires Basculegion and Sneasler to access. Obsidian Falls.
- Southeast of the Heights Camp, overlooking the river to the east on a hill. Obsidian Falls.
- Directly northwest of Tidewater Dam, on a cliff between it and Natures Pantry. Requires Wyrdeer or Sneasler to access. Natures Pantry.
- Overlooking a steep hill in Sandgem Flats. Requires Sneasler to access. Sandgem Flats.
- Located on a hill in the Southern Part of Ramanas Island. Ramanas Island.
- The Southern-most portion of the map, where the mouth of the river leads to an invisible barrier, directly south of Ramanas Island. The Heartwood.
- On a cliff slightly southwest from the Grandtree Arena. Requires Wyrdeer or Sneasler to access. The Heartwood.
- On a hill overlooking Tidewater Dam. The Heartwood.
- On a hill east of Tidewater Dam, overlooking the river. Requires Wyrdeer or Sneasler to access. The Heartwood.
- On a steep hill south of Obsidian Falls. Requires Sneasler to access. Oreburrow Tunnel.
Crimson Mirelands: 20 Total

- On the eastern bank of the river to the North of your starting camp. Cloudpool Ridge.
- Further north of the first Wisp, also on the eastern bank. Requires Wyrdeer or Sneasler to access. Cloudpool ridge.
- In a corner of the forested area, south of the Brava Arena. Cloudpool Ridge.
- On a hill overlooking the forested area, east of the third wisp. Requires Wyrdeer or Sneasler to access. Cloudpool Ridge.
- On a hill overlooking the Diamond Settlement. Requires Wyrdeer or Sneasler to access. Diamond Settlement.
- At the southern mouth of the river leading to Lake Valor. Lake Valor.
- On a hill next to a breakable rock. Solaceon Ruins.
- On a hill face next to a singular tree. Requires Wyrdeer or Sneasler to access. Bolderoll Slope.
- Along the western bank of the river, on a small alcove. Requires Basuclegion and Sneasler to access. Bolderoll Slope.
- Across the river on a hill east of the Scarlet Bog. Requires Basculegion to access. Cottonsedge Prairie.
- On a steep hill east of the river, in the middle of the Cottonsedge Prairie. Requires Wyrdeer or Sneasler to access. Cottonsedge Prairie.
- On the west side of the river on a steep hill, overlooking the Scarlet Bog. Requires Wyrdeer or Sneasler to access. Scarlet Bog.
- The far eastern section of the map, on a steep hill overlooking the Droning Meadow. Requires Sneasler to access. Droning Meadow.
- Between two hills directly southwest of the starting location. Golden Lowlands.
- On a hill overlooking the wooden bridge and sections of the Gapejaw Bog. Golden Lowlands.
- On a hill overlooking the Gapejaw Bog, near the bank of the river. Requires Wyrdeer or Sneasler to access. Gapejaw Bog.
- Directly south in the center of a pond, on the western side of the river Requires Wyrdeer or Sneasler to access. Holm of Trials.
- South on an accessible section near the border of the map. Requires Basculegion, Wyrdeer or Sneasler to access. Holm of Trials.
- East on a raised platform in the middle of a pond, near the Alpha Sligoo. Requires Basculegion to access. Holm of Trials.
- The southernmost section of the map, at the mouth of the river behind Ursa’s Ring. Requires Wyrdeer or Sneasler to access. Ursa’s Ring.
Cobalt Coastlines: 20 Total

- On the hill to the right of the starting camp. Can be accessed with Wyrdeer or Sneasler. Crossing Slope.
- Directly south of the first wisp, on another hill behind a berry tree. Requires Wyrdeer or Sneasler to access. Crossing Slope.
- East of Aipom Hill, on the southern tip of the barrier that overlooks the bay. Requires Sneasler to access. Aipom Hill
- On the tiny island in the middle of the pond. Bathers Lagoon.
- On a small rock island south of Deadwood Haunt. Requires Basculegion to access. Deadwood Haunt.
- On the island North of Tombolo Walk, on top of a brown stone. Requires Basculegion and Wyrdeer to access. Tombolo Walk.
- On the tip of the ring finger in Sand’s Reach, overlooking the stone arches. Sand’s Reach.
- On a rocky island west of Sand’s Reach. Requires Basculegion and Wyrdeer to access. Sand’s Reach.
- On the large island with a single tree in the center of the bay, on the tip of the rocky outcropping. Tranquility Cove.
- On the lone rock facing the bay, near the Machoke Alpha. Requires Sneasler to access. Castaway Shore.
- On the cliff face directly north of Castaway Shore. Requires Sneasler to access. Veilstone Cape.
- Directly on top of the mountain ridge. Requires Sneasler to access. Veilstone Cape.
- On the cliff face east side of Turnback cave. Requires Sneasler to access. Spring Path.
- On a cliff face far west in the Spring path. Requires Sneasler to access. Spring Path.
- On the far north tip of the hill, near some trees, just above the beach. Ilepsey Shore.
- On a small island in the north, West of the Molten Arena. Requires Basculegion to access.
- On a small island in the far Northeast corner of the map, behind Firespit Island. Requires Basculegion to access.
- Island northeast of Firespit Island, requires Basculegion
- On the island with two trees, directly east from Seagrass Haven. Requires Basculegion to access.
- Overlooking the Volcano on a small walkway leading towards it. Requires Basculegion to access. Firespit Island.
Coronet Highlands: 20 Total

- On top of the slope to the north of the camp, overlooking the river. Heavenwood Lookout.
- Directly above Wayward Cave, on the islands between the two waterfalls. Requires Sneasler to access. Wayward Cave.
- Inside Wayward Cave, past the Alpha Crobat and to the north of the pool of water. Wayward Cave.
- On the western bank of the river leading to Wayward Cave. Requires Basculegion or Sneasler to access. Wayward Wood.
- On a two-stone pillar inside the Ancient Quarry, requires Sneasler to access. Ancient Quarry.
- On a hill overlooking a clump of trees, east from the river. Requires Sneasler to access. Fabled Spring.
- On a cliff on the west side of the river. Requires Sneasler to access. Fabled Spring.
- At the mouth of the waterfall on the west side near the water. Requires Sneasler to access. Fabled Spring.
- At the far western corner of Bolderoll Ravine. Requires Sneasler or Wyrdeer to access. Bolderoll Ravine.
- Next to a gravestone in Stonetooth Row. Stonetooth Row.
- East on the cliffside overlooking Moonglow Arena. Requires Sneasler to access. Moonglow Arena.
- On the mountainside overlooking Sacred Plaza. Requires Sneasler or Wyrdeer to access. Sacred Plaza.
- In the center of some circular ruins. Sacred Plaza
- On one of the four hilltops near the alpha Rhyperior. Requires Sneasler to access. Primeval Grotto.
- On the hill directly above the Primeval Grotto. Requires Sneasler to access. Primeval Grotto.
- Pm a cliff overlooking the large pathway, just south of the Celestica Trail. Requires Sneasler to access. Celestica Trail.
- On a jutting-out cliff next to a single tree. Requires Sneasler to access. Celestica Trail.
- On a hill next to the cliff face of the Sonorous Path, slightly southwest from the mountain camp. Requires Sneasler to access. Sonorous Path.
- On the rock in the middle of the pond in the Clamberclaw Cliffs. Requires Sneasler and Basculegion to access. Clamberclaw Cliffs.
- On the far east corner of the map, between two trees overlooking the valley where the Alpha Bronzong is located. Requires Sneasler to access. Clamberclaw Cliffs.
Alabaster Tundra: 20 Total

- On a cliff near the first encampment to the right. Requires Sneasler to access. Whiteout Valley.
- On a snowy cliffside, facing the mouth of the valley. Requires Sneasler to access. Whiteout Valley.
- On the far western portion of the map, hidden under a hillside that can spawn a Blissy. Requires Wyrdeer to access. Avalanche Slopes.
- On top of a lonely hill in the center of the map, near an ice cave. Requires Sneasler to access. Avalanche Slopes.
- On top of the mountain edge that separates the Avalanche Slopes and Icebound Falls. Requires Sneasler to access. Avalanche Slopes.
- On a cliff overlooking the Hibernal Cave. Requires Wyrdeer or Sneasler to access. Bonechill Wastes.
- Along the ice, to the southwest of the Avalugg Lord’s sleeping spot. Bonechill Wastes.
- In the forested area to the east of the Avalugg Lord’s sleeping spot, on top of a jutting-out rock. Hearts Crag.
- On a cliff face to the east, overlooking the twin waterfalls and Snowpoint temple. Hearts Crag.
- On an icy rock next to the Avalugg Lord’s sleeping spot, overlooking the bridge to the Pearl Settlement. Avalugg’s Legacy
- In the icy cavern in Avalugg’s Legacy. The entrance to the cavern is directly southeast of the Bonechill Wastes wisp (the location above is marked in the map). Go in and head right, if you come into a room with Hisuian Zorua it should be in the far corner. Requires Sneasler. Avalugg’s Legacy.
- Behind a hut in the Pearl Settlement, in the far back near the cliff to the hot springs. Pearl Settlement.
- On a small snowy hill to the north of the Snowpoint temple, very north of the map. Requires Sneasler to access. Snowpoint Temple.
- In Snowpoint Temple, to the left after the first puzzle door. Snowpoint Temple.
- On the mouth of the eastern side of the waterfall around Lake Acuity. Lake Acuity.
- In a cave blocked by a rock, at the base of the waterfall leading to Lake Acuity. Lake Acuity.
- On a snowy hill to the west of the stairway through Glacier Terrace. Requires Sneasler to access. Glacier Terrace.
- On a snowy hill southeast of the Snowfall Hot Springs, just under the cliff face. Snowfall Hot Springs.
- In between the cliffs in the Arena Approach. Arena Approach.
- On a cliff directly south of the Avalugg Lord arena battle. Requires Sneasler to access. Icefall Arena.
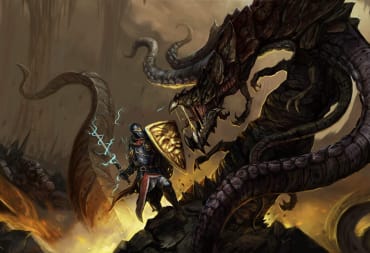
Pokemon Legends: Arceus - Accessing Spiritomb

Once you collect all the wisps and report back to Vessa (who only shows up at night) she will ask you to come to the Crimson Mirelands at the Shrouded Ruins in the far north. You need to go there at night, where a cutscene will play in front of a strange statue that looks like Spiritomb's base. Vessa will speak to you for a moment, before revealing she has the 108 wisp and disappears.
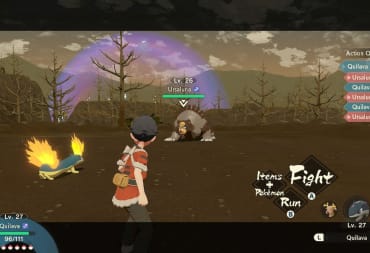
After the cutscene ends, you will complete the Request and receive a reward of Twice-Spiced Radish. You then simply approach the statue to investigate it, then a level 60 Spiritomb will attack.
It is here you can capture the Spiritomb for the first time. After this encounter, it becomes a rare spawn in this location in the Shrouded Ruins, and can spawn as a Shiny or Alpha version of itself.
And there you have it, the request is complete, Spiritomb is now catchable, and all of the wisps in the game are found. Pokemon Legends: Arceus is still full of little secrets to discover, and hopefully this guide will help you in solving this quest so you can find more hidden things on your own journey.
Have a tip, or want to point out something we missed? Leave a Comment or e-mail us at tips@techraptor.net

A longtime player of games, creator of worlds, and teacher of minds. Robert has worked many positions over the years, from college professor to education… More about Robert