If you’re here, you’re already interested in Monster Hunter World: Iceborne mods and may already even have learned to mod using Stracker’s Loader. Fear not, because there’s more to learn! This Monster Hunter World: Iceborne visual mod guide will give you a basic starter 101 in Stracker's Loader modding in MHW: Iceborne. Read on to learn more!
If you're enjoying this article, feel free to check out our MHW game page, where you'll find plenty of other coverage on the base game. We also have an excellent feature based on the upcoming board game adaptation of the game's Iceborne DLC.
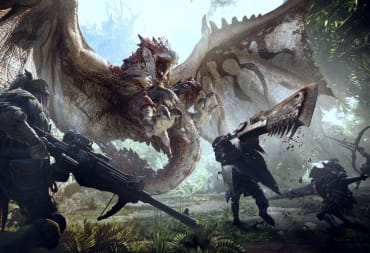
Monster Hunter World: Iceborne Visual Mod Guide

In case you haven’t noticed yet, modding for Iceborne is in a little bit of a weird spot right now. The arrival of the expansion caused some issues, making modding in the normal way impossible. But fret not, Stracker’s Loader is here to help!
First off, make sure you’ve run the game at least once since Iceborne's launch, maybe even have a save character. If you’re worried about any reprimands or save corruption, rest assured that your save data is located entirely on your computer and nowhere else! Furthermore, to this day there still haven’t been reports of people getting their characters or accounts banned from the game. Considering how saves are locally saved, that would be an incredibly difficult thing to do, even with an anti-cheat.
If it helps to have a small peace of mind, I've gone the trouble of finding instructions to help locate your save data.
Where are the save data and configuration files for the game located?
Steam Cloud Save Data Location – *We do not recommend removing or altering save data in this folder*
C:\Program Files (x86)\Steam\userdata\[YOUR STEAM ID HERE]\582010\remote
Config.ini / graphics_option.ini / graphics_option_preset.ini
C:\Program Files (x86)\Steam\steamapps\common\Monster Hunter World
Take a copy of this 'remote' folder and place it wherever you like! Personally, I like to place a copy of it in a 7zip or Winrar file, then name it appropriately. In either case, this will be your backup, though you should not really have any need for it in almost any case.
Secondly, download the Stracker’s Loader mod. If you use Vortex, Nexusmods’ own mod manager, it’ll take care of placement for you. If you don’t, then you simply have to place these two files in the main directory of the game, next to the game’s executable.
And that’s it! The .dll file you pasted is a recurring trick used for modding many games through the years (including Payday 2) where it automatically launches the tool with the game, even when launched from Steam!
Installing mods in Monster Hunter World: Iceborne
This step is quite easy, even easier if you’ve modded Monster Hunter: World before Iceborne launched. Previously, you were simply required to drop any files in the NativePC folder. Thanks to Stracker’s Loader, you don’t have to do anything differently! Whatever mod you install, drop it in the NativePC folder. Unless it came in its own NativePC folder, in which case you simply paste it in the main directory and press Yes to merge the two folders of the same name.
However, unlike pre-Iceborne, deleting the NativePC folder is pretty much safe now, as Stracker’s Loader applies its content to the game’s resources upon loading. Meaning that, if nothing is present in NativePC, nothing gets overwritten and pretty much an unmodded game launches!
It does bear noting that, again, Vortex takes care of most of this for you. You simply have to press the Mod Manager Download button on the mod you want on the Nexusmods website, and Vortex takes care of everything. Additionally, if two installed mods have a conflict—say they replace the same file—then Vortex will offer you the choice as to which one gets priority.
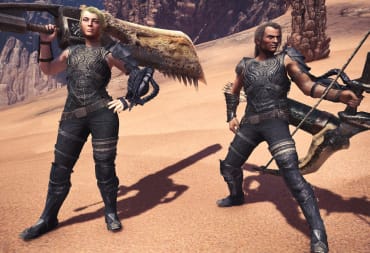
Changing the visual design of armor

Now we’re getting into journeyman territory. Say you really like a mod but don’t like how it visually replaces an armor set you’re particularly fond of. No worries, because the Wild Kitsune mod has you covered! In the comments section, you can find some basic instructions on how you can make the mod replace a different piece of waist armor.
Thankfully, these instructions also apply to pretty much all the other armors, but particularly the ones that are replacing layered armor. The instructions are as follows:
First you need to extract the mod files somewhere else before dropping them into NativePC—say your Desktop. If you use Vortex, you can simply right-click the installed mods and press Open In File manager. Since Vortex uses the hardlinks system to facilitate modding for the game, the actual files are not stored in the game’s folder, but in a separate folder unique to Vortex.
Now before you continue, open up a new window in your browser and head to this page. This GitHub page lists all the Armor IDs of all the armors available. You’ll find that these listed IDs correspond with two things. For starters, as you explore the mods folder structure, you’ll run into a folder named something similar to ‘pl106_0000’ or such.
Take note of the first three numerical digits and ignore the last four, which should always be four zeroes. These initial three numbers indicate what armor will be visually replaced. Change those three digits to the digits that correspond to the IDs on the aforementioned page, in particular the Model Path column. Double-check and confirm before changing so you can get a hang of recognizing this pattern!
Once you’ve changed the first three digits of this folder, you’ll need to do it a few more times but this time to the files in the folders, depending on how many armors the mod replaces. Before we get there, we first need to go in the folder we’ve just changed the name of.
As you go in, you might see folders named arm, body, helm, leg, wst or any amount of these. These folders hold the files for the arms, upper body, head, lower body/legs, and waist armor pieces. As you go in one, you’ll find a folder named "mod," within which you’ll see file names such as ‘f_wst106_0000’ or the like. Recognize that format?
Exactly; do the same as we did with the folder earlier! Replace the first three numerical digits with the three digits of the Armor ID you’d like to have replaced instead. Do this for every file you see, and for every file in any of the previous armor piece folders we just mentioned. Make sure the three-digit number is consistently replaced to the same one.
What about weapons?

Frankly, doing the same for weaponry is surprisingly similar. The link you have to open for a list of the weapon models is here instead. Take note that in a rare few cases, you'll find that there are weapons that exist out of two models that are merged together—in particular, the weapons from the Empress crafting tree. This means that, while you can replace the weapon model, you'll find an extra model attached to it still. If you find it particularly unsightly, you can head over to this mod and use their empty models to replace those separate parts as well, using the earlier provided instructions. Be sure to rename the files and folders appropriately!
And that’s it! Stracker’s Loader will now visually replace the modded item over the piece you desire! Note however that these visual mods only replace the looks for you! Your friends or random players you run into won’t see these changes. If however, you want to transmog your armor to a different set while also having that specific change visible to your teammates, you can use the MHW Transmog mod for that instead.
Having that said, I’d like to thank zStatykz, the mod author of the Wild Kitsune mod, without whom’s excellent yet succinct instructions I would’ve never stumbled upon this very applicable solution. The modding scene has stepped up to the plate, and many mod authors have worked tirelessly to update their old mods to be compatible with the Iceborne launch.
Have a tip, or want to point out something we missed? Leave a Comment or e-mail us at tips@techraptor.net

Former Staff Writer at TechRaptor.