In this Len's Island Ancient Caves Area Guide, I'll tell you everything you need to survive the first dungeon and detail all of the cool loot you can find within.
What Are The Ancient Caves?
The Ancient Caves are the first dungeon in Len's Island and will probably also be your first taste of combat. It is also an abundant source of the following resources:
- Stone
- Coal
- Iron Shards
- Light Stone
- Dark Essence
- Salvaged Metal
You can dive right into The Ancient Caves and start exploring, but the deeper sections are especially tough; you may want to Craft a Torch and some better weapons before you decide to explore too deep.
As you might expect, this guide is going to be filled with spoilers. If you'd like to unravel the mystery on your own, it's probably a good idea to stop reading here.
There's one more thing before we get started -- The Ancient Caves are massive. This is not going to cover absolutely every area in the zone; rather, it will tell you the most direct and straightforward path that will allow you to unlock the first boss fight (and score some good loot in the process).
Where Are The Ancient Caves?
The Ancient Caves can be found roughly southwest of your starting raft; refer to our map of the game's overworld for an exact location.

Len's Island The Ancient Caves Area Guide - First Runestone / V Runestone
We'll get this Len's Island The Ancient Caves Area Guide started with finding the first of five Runestones that will unlock the boss fight with the Voidboar.
Once you walk through the entrance, you can head down and to the left to get some resources if you'd like. Otherwise, jump and air roll over the broken wooden bridge. You can permanently repair this bridge from the opposite side if you have Wood and Fiber, but it's not strictly necessary right now (or at all, really).
Continue to the right, killing enemies and destroying any of the nests you encounter. You'll soon encounter an underground river; this is where you'll make your first major turn. Head straight down from here.

After a short distance, you'll encounter a Brazier right in the middle of the cave. This is where you're going to make a left turn.

Continue heading left; use the upper wall (and the cliff's edge) as a guide. You'll soon reach this point:

If you'd like, you can jump over the gap. You'll have to fight some enemies, but there are resources and Salvaged Metal at this little diversion. Otherwise, continue straight down. You'll come to a wooden bridge in short order.

You're going to want to head down and to the right. Optionally, you can head off to the left for another diversion with more resources and Salvaged Metal.
Get ready for a big fight! After you get off the bridge, head down and to the left until you find an area with a Brazier and multiple nests. Destroy the nests as fast as you can and then clean up the remaining enemies.

After you've finished off the enemies and destroyed the nests, continue straight down. You'll notice the terrain changing from caves to what looks like man-made structures -- this is The Forgotten City, the second half of The Ancient Caves.
Beware: this area of the map has traps, and this is where you'll encounter your first. It should be noted that enemies can be harmed by traps, too -- you can step on the pressure plate and roll out of the way, letting any pursuing enemies take the hits instead of you. Dodging traps will become a critical skill as you progress further into The Ancient Caves and, eventually, The Forgotten City.
You will also likely face tougher, larger enemies here for the first time. Carefully fight them and you'll find the down-arrow Runestone pretty much right at the entrance.

You'll also notice a glowing box above you -- this has Light Stone, the rarest resource in the game (and a necessary component for activating the runestones)
How Len's Island Runestones WorkThe Len's Island runestones can be activated with one Light Stone. Once activated, you can click on them and immediately teleport back to the surface at any time. |
Once you've activated the down arrow runestone, do not head any deeper into The Forgotten City -- instead, we're going to turn back around and open up an alternate route. Head back the way you came until you reach the previous Brazier.

We're not heading back quite yet -- this time, we're going to go to the right. You'll encounter some stairs; head down them and continue moving right, gathering resources and killing enemies as desired. Your next stopping point will be a wide-open area with a Lantern in the middle of the cave.

There is another detour opportunity here -- you can head south and find quite a few resource stones (and a lot of enemies). If you have the food to spare, head straight down and clear out that area.
Otherwise, head to the right and slightly up until you encounter some platforms in the void.

This platforming section can be a bit tricky, but it's definitely doable. Don't worry if you fall off -- you'll be teleported back to the ground and lose a small amount of health as a penalty.
After you've crossed this section, head north and cross over the wooden bridge that spans the river. Continue heading straight up and you'll encounter another bridge that has to be repaired with Wood and Fibers. Repair the bridge.

If you do not have the resources on hand to fix this bridge right now, that's okay; head back the way you came and use the runestone to teleport back to the surface (or walk back).
If you do have the resources to repair the bridge, cross over it and you'll find one of the Braziers you encountered right after you entered. From here, it's time to move on to the second runestone.

Len's Island The Ancient Caves Area Guide - Second Runestone / Torch Runestone
On to the next part of our Len's Island The Ancient Caves Area Guide! With one Runestone done, it's time to move on to the second.
Return to the Brazier seen in the image above either by using the repaired bridge or backtracking. This time, we're going to head down the stairs to the right.
Travel down the stairs to the right, then head up once you reach the bottom. You'll soon come up to some stalagmites (spiky rocks).

Continue heading to the right. Stick close to the cliff's edge, but give yourself a little bit of room to move if you have to fight. Keep going until you encounter a small wooden ramp next to a lantern.

Continue to head straight down until you encounter some wooden scaffolding.

There are a bunch of enemies in the pit below, but you can avoid them by continuing straight down. If you're in need of resources, you can divert to the left to fight some enemies and do a bit of mining. Otherwise, continue straight down.

And we're there! We've found the second Runestone! Now, it's time for our Len's Island The Ancient Caves Area Guide to move on to the next area and get the third runestone.

Len's Island The Ancient Caves Area Guide - Third Runestone / Pickaxe Runestone and The Forgotten City
Moving in in our Len's Island The Ancient Caves Area Guide, we're going to head straight south of the Lightbulb Runestone. You'll encounter a bridge in just a few moments.
A word of warning: you will have to enter The Forgotten City and stay in there this time. This area represents a step up in difficulty with some tougher enemies -- make sure you have plenty of food and are prepared to fight. If you're not, turn around and resupply yourself before going further.

You'll be in a city-like area on the other side of the bridge. Importantly, you're going to fight some of the larger enemies, possibly for the first time. Clear the immediate area out and proceed slowly and safely.
Once you're ready, cross the bridge and head straight down until you encounter another bridge with a pressure plate on it. There will be even more enemies ahead, so move cautiously.

Head over the bridge and continue heading straight down. You'll encounter quite a few enemies along the way, especially as you approach the buildings. Kill the enemies and destroy their nests. Make sure to take some time to loot the buildings; buildings will often contain valuable loot and it's always worth it to peek inside.
Once the area is clear, you're going to head to the left.

Continue heading to the left, cross over a bridge, and you're there -- easy as pie!

Thus far, it hasn't been all that hard. Unfortunately, this is where the difficulty is going to seriously ramp up.
As before, you should consider exiting the cave and resupplying if you're running low on food. Otherwise, it's time to go further into the depths.

Len's Island The Ancient Caves Area Guide - Fourth Runestone / A Runestone and 'The Dungeon Crossing'
If you head straight down, you'll see a set of three stairs. Be careful heading into this area -- once you reach the bottom, you'll read "The Dungeon Crossing" and you'll have a seriously tough fight on your hands.
As soon as you step onto the platform, forcefields will go up and four nests will activate. Additionally, several of the larger enemies will already be on the field. Focus on destroying the nests first and foremost, then finish off the rest of the enemies.
If you cannot get past this area, I recommend that you upgrade your Work Bench to Level 3 and craft the sword and shield from the Knight Set -- these will make it a much more survivable fight. Once the area is cleared, continue heading straight down and you'll eventually reach a Brazier and some stairs.

Head down the stairs and continue to the right, fighting enemies and looting along the way. Pretty soon, you'll reach this point of The Ancient Caves:

This is an important crossroads. Before we continue on to the fourth Runestone, we're going to make a small diversion and pick up one of the best axes in the game.
Head straight down and you'll encounter another set of stairs -- this is our next destination to pick up the Forged Axe. If you'd prefer to just get to the next Runestone, skip past this next section.

Len's Island The Ancient Caves Area Guide - Finding the Forged Axe
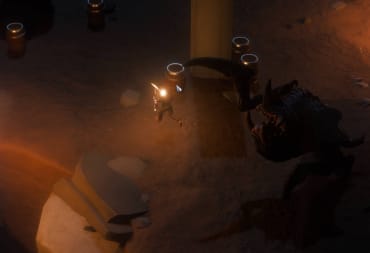
Now's as good a time as any to find the Forged Axe in Len's Island. You're going to have a fight ahead of you -- and you're also going to encounter a new type of enemy. Proceed down the path and you'll eventually encounter an underground structure surrounded by trees.
This new enemy looks kind of like a floating bug. Stand in front of it and it will blast you with a lightning beam. Stray too close and it will fire off a lightning nova. These little buggers hurt a lot, so be exceedingly careful when fighting them. Once they're defeated, you can pick up your prize:

The Forged Axe is arguably one of the best axes in the game. There are plenty of other options that you can Craft, but this will carry you all the way through The Ancient Caves (and anywhere else in the early game, really).
Once you have the Forged Axe in hand, backtrack to the crossroads area.

Len's Island The Ancient Caves Area Guide - Fourth Runestone / A Runestone Continued, 'Electric Avenue,' and the Forged Hammer
Return to that staircase you passed by and head straight up. You'll face a mix of enemies here including the nasty new creatures that can shoot lightning. Once they're defeated, you'll come to an intersection.

Head directly to the right and you'll encounter a massive torch and the entrance to the next segment of the city. Watch out for the pressure plate!
A little further on, you're going to encounter another challenging fight at Electric Avenue. I hope you like lightning!

Electric Avenue is a fight with three of the larger enemies and four of the little zappy buggers. There are some pressure plates towards the top right; you can make use of these to damage the enemies while you run around the arena.
Once they're all dead, the force field will drop and you'll be able to proceed. But more importantly, you'll also be able to pick up a pretty cool hammer:

The Forged Hammer is a slow but hard-hitting weapon that can do a fair amount of damage. You might be tempted to equip it right away and you can do just that -- there's a toolbox directly to your right.
Between the Runestone and the Toolbox is a pile of rubble -- this is probably the most important thing you can rebuild in this area. This is an elevator that will open up a shortcut to the surface. For the low price of 350 Stone and 100 Limestone, you will be able to return to this point from the surface.

If you can repair the elevator, do it now. If you can't, I strongly recommend that you take the Runestone back home, gather up the materials you need, and immediately repair the elevator. The next section is probably the toughest one yet; if you fail, you'll appreciate being able to avoid running through all of The Ancient Caves to get back to this point.
This Entrance to The Forgotten City will take you to point #14 on our Len's Island Map of the overworld. It's certainly worth repairing it, so get it done and get ready for the fifth and final Runestone.

Len's Island The Ancient Caves Area Guide - Fifth Runestone / Tree Runestone
The next part of our Len's Island The Ancient Caves Area Guide will take you through what was once a bustling metropolis. Instead, all you'll find is enemies and abandoned buildings.
Fight your way straight up through the city center. You can stop to loot buildings if you'd like, but it's not strictly necessary.

Once you reach the point in the above image, continue heading straight up. You'll have to fight your way past some lightning enemies, but you'll get to enjoy some of the most beautiful underground scenery in the game.
A short distance later and you'll find that the terrain hooks downward with a staircase.

Take the staircase down. You may encounter an enemy or two along the way as usual. Head to the right until you reach another Brazier.

Further up is a broken bridge; you'll need 200 Stone and 50 Limestone to repair it.
As for the next part of the map, there's good news and bad news. The good news is that the next area is relatively small. The bad news, however, is that it is jam-packed with enemies.

Len's Island The Ancient Caves Area Guide - Fifth Runestone Continued and 'The Corrupt Passage'
The Corrupt Passage is arguably the deadliest area we've covered yet in the Len's Island The Ancient Caves Area Guide. First, there are a hell of a lot of enemies (and spawners!) to destroy. Secondly, it is literally pitch black -- you won't be able to see anything without a torch, so make sure you have one equipped before you even head in.
Once you're all set, head straight up and over the bridge. You'll have to fight a fair few enemies before you reach this jumping puzzle:

Two important notes about this section: first, the pillars are pressure plates, so you're going to have to move through this area very quickly. Secondly, you will face a large number of enemies on the upper cliffs -- make sure you're at full health and ready to fight before you go up there. It may be a good idea to clear out the entire area around the pillars, too, just in case you have to jump down and retreat.
Once you've cleared out the immediate area, head straight up and walk up the ramp slightly to the right.

Continue to follow this path and you'll soon see the fifth and final Runestone. Unfortunately, this area is also filled with enemies and spawners. As usual, you should destroy the spawners first, followed up by the enemies.

Once you've activated the Tree Runestone, head back. There's not much noteworthy treasure in the side paths in this area, so it's best to immediately return to the light. Cross back over the bridge you've rebuilt and head back down to the Brazier from earlier.

Len's Island The Ancient Caves Area Guide - Where to Find the Voidboar Boss, 'Watch Your Step,' and the Storm Pickaxe
Now that you're back at the Brazier, it's time to wrap up this Len's Island The Ancient Caves Area Guide. Head past the Brazier and follow the stairs down and to the right.
Progress along the path. You'll soon come to what looks like an innocuous cliff -- do not hastily jump off.

The bottom of this cliff is your final challenge before you can get to the door holding the boss. "Watch Your Step" challenges you to defeat a bunch of enemies in an arena absolutely inundated with pressure plates.

If you've made it this far, this fight should be a cakewalk for you. Disable the spawners, take down the enemies, yadda yadda. Emerge victorious and you'll soon find yourself in front of the boss door.

If all five symbols are lit up, you've successfully activated all of the Runestones and can open the door. If one of them is missing, go back through this guide and figure out which one you need to get.
Once you're ready, proceed through the door and get ready for your toughest fight yet! You can read our Voidboar Boss Fight Guide for some tips on how to beat it. After you defeat the Voidboar, you can loot the area and you'll get your hands on over 30 Scrap and the Forged Pickaxe. Finally, head beyond the boss arena.

The final area of The Ancient Caves is The Sun Alter. This looks like it's going to be the place that will take you into the next zone; unfortunately, it is blocked off for the Early Access launch version of Len's Island.
On the upside, you can use the titular stone to easily teleport you back to the surface. You'll also find a fair few chests full of Light Stones. Enjoy the loot!
Have a tip, or want to point out something we missed? Leave a Comment or e-mail us at tips@techraptor.net
One of my earliest memories is playing Super Mario Bros. on the Nintendo Entertainment System. I've had a controller in my hand since I was 4 and I… More about Robert N