Kena: Bridge of Spirits the gorgeous new Adventure title from Ember Lab is now available to play and there's a lot to find. In this game, you play as Kena, a spirit guide, who is looking to find what's the cause of the corruption plaguing the land and to do that you need to explore, assist people with their problems, and find all kinds of useful collectibles along the way. In this Kena: Bridge of Spirits Rot and Hat Guide we'll go through each section of the game listing where all of the Rot and their fashion pieces can be found. This guide contains all 100 Rot locations.
In this guide, the locations will be listed in the order that you visit the regions. If there's a pre-requisite for finding a Rot such as access to arrows we'll make sure to specify. From the map you can tell how many of an item you do, or do not have, but it's going to take some searching to find specifically what you're after.
Kena: Bridge of Spirits Rot and Hat Guide - Ruins
Rot Locations - Total: 8
The Rot in the ruins aren't missable and are all required for story progression.
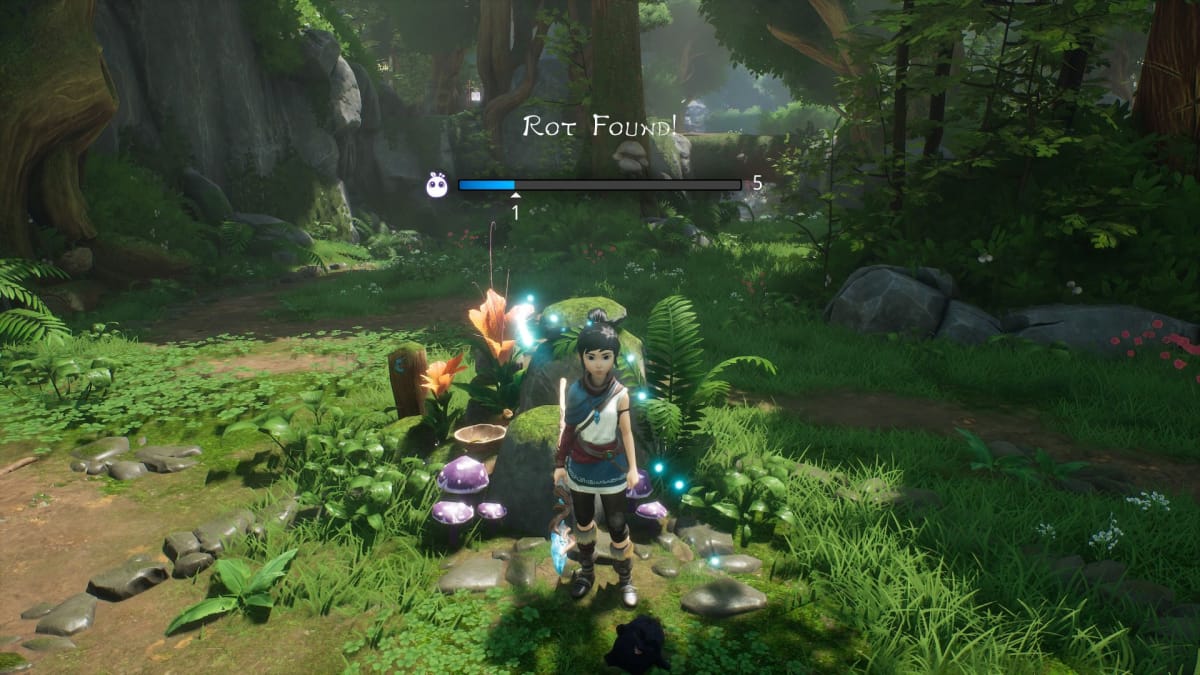
- Continuing from the first one the next clearing you come to will have a Rot hiding in the center.
- From here head up the cliff to the right and you'll see a glowing rock hiding one.
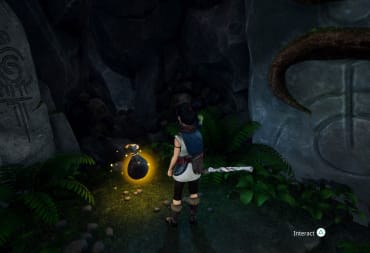
- From the second rot walk across the wooden bridge and there will be a Rot hiding in a lantern.
- Instead of following Beni and Saiya to the left after Rot #3 go to the right down the hill, you'll see a deadzone and another place to stand and chime with. Raise the stones and go behind the waterfall for another Rot.
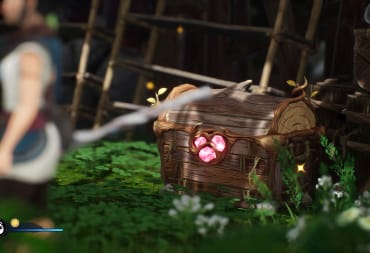
- Follow Beni and his sister through the stone ruins and you'll find a treasure chest. Open it for another Rot.
- After defeating the boss Sprout you will gain three more Rot.
There are no Hats in this location
Kena: Bridge of Spirits Rot and Hat Guide - Village
The Village is the central hub of Kena: Bridge of the Spirits and because of that, you'll spend a lot of time leaving and returning here with new weapons and powerups. All of the Spirit Mail found elsewhere in the world connects to opening up houses in this village.
Rot Locations - Total: 24
Openly Available
- Directly across from the Hat Cart is a glowing pot in a shelf. Use your pulse to awaken this Rot.
- From the central shrine of the village, where you talk with the old man, take the path to the right and follow it down to the water. There will be a Rot under a rock in the middle of the path.
- After crossing past Adira's barrier make your way up the large house to the south. When you're at the top level and the bridge is blocked by corruption there's a light that's lit extra bright. Use your pulse to have a Rot appear.
- After crossing past Adira's barrier make your way south and you'll see a glowing rock with purple butterflies. Destroy it with the bomb powerup and you'll get another Rot.
- South of the Archery Range Warp Point (To the East of the center of the village) there's an archery game. Win all three rounds for the Rot to appear
After obtaining Spirit Mail
- Can be found behind the house related to Village Spirit Mail #1
- You'll find a Rot inside the house that you're able to access after getting Village Spirit Mail #2
- You'll find a Rot inside the house that you're able to access after getting Village Spirit Mail #3
- Return to the gateway that you first opened with Village Spirit Mail #3. Go to the backyard where you had to fight some enemies and jump up the wall to where the ranged enemies were trying to hit you. From there look to your left and jump onto the roof, there's a pulse location for an archery game.
- Can be found behind the house related to the Rusu Mountain Spirit Mail #1
- Can be obtained by completing the first Cursed Chest in the house that's unlocked using Forgotten Forest Spirit Mail #1
- Can be found inside the house related to the Forgotten Forest Spirit Mail #2
- Can be found at the pond you gain access to from Storehouse Spirit Mail #1. The frog pond will have three pulsing crystals. Shoot the middle, right, and then left crystal.
- Defeat the Kappa at the Village Onsen opened with Village Heart Spirit Mail #1. Once purified return to the top and wade through the water to the other side. There will be a lantern with a Rot hanging on it.
- After obtaining the Village Heart Spirit Mail #2 cleanse the docks area in the West village. Use the grapple flower to get to the center platform and inspect the fishing basket. A Rot will drop out wearing a fishing hat
Story Related
- For defeating Warrior you earn three Rot
- For defeating Maskmaker you earn three Rot
- For defeating Hunter you earn three Rot
Hat Locations - Total: 21
Openly Available
- Pot - Open the chest to the left of the hat cart
- Clover - To the right of the hat cart in a chest
- Dinosaur - After crossing Adira's Barrier follow the bridge towards the large gate of the storehouse. You'll come across three pedestals for statues. You can find one statue just up the hill to the left, the second statue in the vegetable field next to the Forest Tear location, and the third statue is down some stairs to your left. Once you return all three you'll get this hat.
- Cat - Continue heading towards the storehouse, after you cross the final bridge take a left and jump over some platforms next to the river. At the end is a chest with a cat mask.
- Baseball Cap - Make your way to the small island directly to the right of the center of the village (also South of the Archery Range Warp Point). Around the side of the house, there will be a chest with the Baseball Cap inside.
- Mask - After obtaining the Dash ability you'll find this through the gate closest to the shrine in the top left. Continue through this area until you have to fight three invisible enemies, once that battle is over walk into the house and open the chest for this mask.
- Samurai - After getting the Dash ability head through the gateway near the docks in the South-West. Follow this normal path until you get to a plateau where you need to trigger a bomb and then slide and jump onto the platform. Instead look for a way to go higher, shortly after you get to a hidden shrine with multiple animal statues you'll see a chest with a Samurai hat in it.
After Obtaining Spirit Mail
- Yellow Mushroom - Complete Village Spirit Mail #1
- Ladybug - Complete Rusu Mountain Spirit Mail #1
- Unicorn - Can be obtained by completing the third Cursed Chest in the house that's unlocked using Forgotten Forest Spirit Mail #1
- Frog - Can be found at the pond you gain access to from Storehouse Spirit Mail #1. The frog pond will have three pulsing crystals. Shoot the middle, right, and then left crystal.
- Zajuro's Mask - After getting the bomb power-up travel to the village. Go North and take the right exit out of the shrine area. Use your bomb to make a bridge to a new area, kill the enemies and a Forest Tear will appear. Break the corruption in front of the second house up the steps and go inside for a chest.
- Star - After cleansing the area you get access to with the Fields Spirit Mail #1 go into the house on the left and you'll find a chest in here. The house on the right has a chest with crystals.
- Fishing - After obtaining the Village Heart Spirit Mail #2 cleanse the docks area in the West Village. Use the grapple flower to get to the center platform and inspect the fishing basket. A Rot will drop out wearing a fishing hat
- Toshi's Mask - You'll find Toshi's Mask inside the house that you're able to access after getting Village Spirit Mail #2
- Bunny - You'll find the Bunny hat inside the house that you're able to access after getting Village Spirit Mail #3. You'll see it on your way up but it's covered by corruption. After destroying the Deadzone Heart at the top of the house walk back down.
- Dog - After you've cleared the area for Village Spirit Mail #3 climb to the top of the building directly to its East. From the top of that building you can take the bridge over to the now cleansed area. After crossing the bridge take a left and you'll see the chest with the Dog Mask.
Story Related
- Mushroom - Received for clearing the Deadzone from the center of the village
- Maskmaker - You obtain this hat after defeating Maskmaker
- Warrior - You obtain this hat after defeating Warrior
- Hunter - You obtain this hat after defeating Hunter
Kena: Bridge of Spirits Rot and Hat Guide - Taro's Tree
Rot Locations - Total: 7
Openly Available
- After fighting a large number of enemies including another sprout (the same fight as before you get the Bow hat) clear away the corruption to the left and there will be a Rot in a stone pillar
- If you're following the path from South to North in Taro's Tree get to the bottom of the second circle on the map and turn East. There will be a branch you can pick up that will reveal a Rot.
- To the east of Taro's Tree warp point, where the path does a loop, you'll see a hanging vase. Shoot it with your bow and it will drop a Rot.
- After acquiring the bow travel back to the fallen tree. Take a path to the right and onto a fallen stump and you'll see a grapple flower on the ledge above you. Follow this path to get to another Rot
- From the Taro's Tree Warp Point head North West and you'll find a location with three rocks you can overturn. Flip over the middle one for another Rot.
- As you head north from the fallen tree you'll pass by a running river, follow it upstream to a little rock that can be uncovered. On the map you'll be just north of the illustration of the fallen tree
- As soon as you cross into the Taro's Tree region you'll find an area with a Forest Tear. There will be a pile of leaves to the right of it. Hit the leaves with a transformed Rot and inspect the log.
Hat Locations - Total: 4
Openly Available
- Bow - After fighting a large number of enemies, including another Sprout, before you progress get the Rot to clear away the corruption in front of the house. Inside is a chest with the Bow hat.
- Fox - Head up the winding path to the right behind the large felled tree (on your map it's to the East and is a little dead-end area.) Partway up you'll find the hat cart and with it unlock the Fox hat.
- Butterfly - Walk north of the big fallen tree after acquiring the bow. At the point where you can see a waterfall flowing look across the gap and you should see a grapple flower. Head over to find the chest that this hat is in
Story Related
- Taro - Earn this hat by defeating Corrupt Taro
Kena: Bridge of Spirits Rot and Hat Guide - Rusu Mountain
Rot Locations - Total: 13
Openly Available
- When you first arrive at Rusu Mountain instead of taking the normal walking path swim towards the ruins and waterfall. There's a way to get out of the water to the left. Once back on dry land have the Rot pick up the rock for another to appear.
- After fighting the first large wave of enemies on your way up the mountain look to the right of the arena and there's a toppled stone. You can find a Rot here.
- Follow the path up the mountain, past the sliding area, but once you're at the top jump onto the slide but hop onto the ledges to the right. From there continue hugging the right wall until you reach a glowing stone with a Rot in it.
- On the path to Rusu's house you'll end up jumping over a series of rocks avoiding falling onto a slippery hill. Once you've gotten to the top of the hill look down and to the right, you'll see a ledge you didn't pass by when climbing. Slide down the hill and angle towards that ledge. Here you'll find another Rot.
- At the end of the 'tomb raider' climbing sequence, after you've gotten to the grassy path turn around and you'll see is a ledge you can use to climb even higher. Follow this path and you'll find another Rot.
- After getting your bow go down the hill to the right and then take a left in the training areas. Find the training targets to the north, where you need to shoot the painted whirlybird to send three into the air, and look to the right. You'll see a blue urn hanging from the tree. Hit it with an arrow and it will drop a Rot.
- After cleansing Rusu's house head inside and walk to the left and inspect a glowing drawer for a new Rot.
- After defeating the Wood Knight look at Rusu's house and turn around so you can see the pathway through a stone formation. Walkthrough and there should be a Rot holding a flower running around, emit a pulse to collect it
- There is a Rot on the little island next to the broken bridge next to where you first arrived at the Rusu Mountain. Returning here with a Bow will allow you to grapple to the flower on it.
- One of the vegetable patches has a glowing seed with purple butterflies around it, use the Forest Tear here and a gourde will appear. Use pulse to obtain the Rot.
Story Related
- For defeating the Wood Knight Boss you'll get 3 new Rot.
Hat Locations - Total: 4
- Birds Nest - Once you're at the point where the kids are talking about a broken bridge that the Rot might be able to help with look to your right to see a hidden away ledge. Hop over to it and follow the path around to find the Cursed Chest. Inside this chest you'll find the Bird's Nest Hat.
- Whirly Bird - Find the Hat Cart at the top of Rusu's mountain, it's near all of the archery exercises.
- Feather - After defeating the Wood Knight look at Rusu's house and turn around so you can see the pathway through a stone formation. Have the Rot move the gear on your right and then shoot the gem to lower the platform above. Hop over the platform and stand on the gondola, shoot the gem nearby to get it to move. In the next area shoot the flower to grapple to it and chain it with the other flower to get to the chest on the other side. Here is where the Feather hat is.
- Rusu's Mask - At the top of Rusu's mountain complete the archery test closest to the Hat Cart three times. Each time you succeed the challenge will get a bit harder.
Kena: Bridge of Spirits Rot and Hat Guide - Forgotten Forest
Rot Locations - Total: 14
Openly Available
- To the South-east of the Great Tree Shrine (the big treehouse) take the gondola to the bottom and slide off the roof and look to your left. You'll see a blue vase hanging from a tree, hit it with your arrow for a Rot.
- Looking at the Sacred Tree Warp Point head to the West until you get to a bridge running over shallow water. Walk upstream and you'll see a crystal you can shoot out of your reach. Once you hit it two more platforms will appear allowing you to continue. You'll see a Meditation Spot, but look to your right and there's a rock you can lift. Here you'll find another Rot.
- North of the Water Shrine you'll see a log jutting out with a symbol carved onto it. Stand on the symbol and use your Pulse to have four targets appear in the sky. Shoot them all down for another Rot.
- From the Water Shrine transform the Rot and then move it up the passageway we unlocked. At the top, just past where there was a barrier, look to the right and you'll see a stack of leaves with purple butterflies. Hit this with the transformed Rot and you'll be able to get one more.
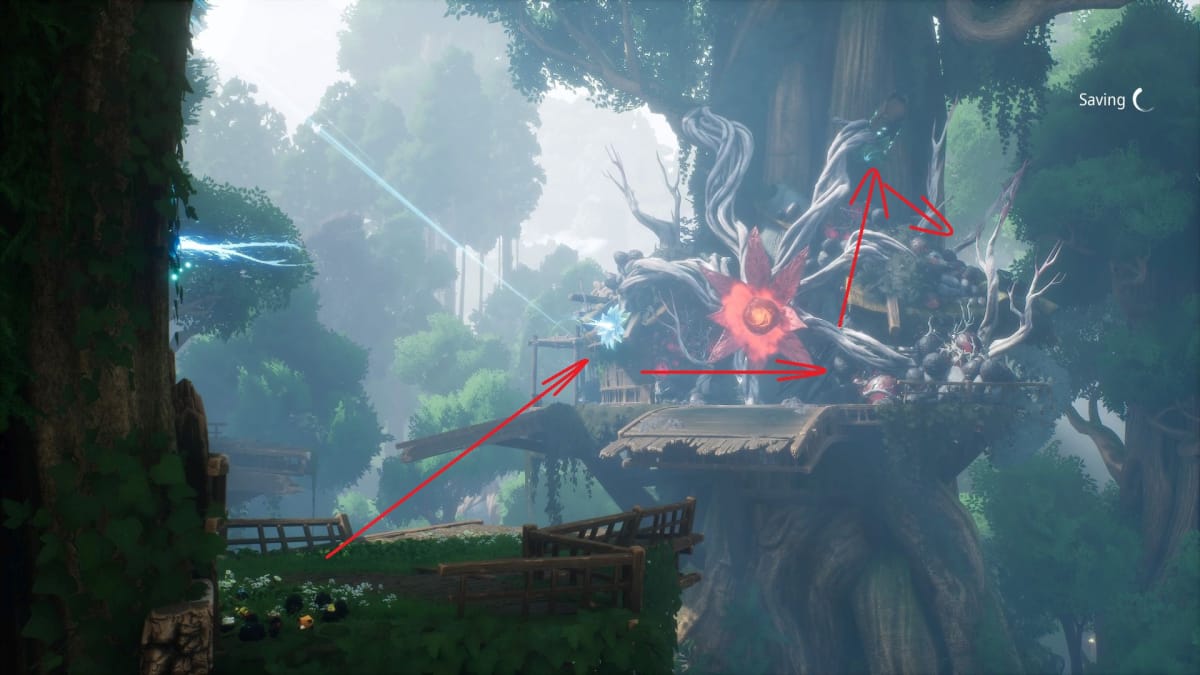
- Climb the trees until you get to the Great Tree Shrine. Look up and to the right and you'll see another grapple flower high above. Follow this patch to get another Rot.
- Once you're inside the Lantern Cave hug the right wall to find a rock with a Rot hidden underneath it.
- Following the Lantern Cave path after you've unlocked the second Forest Tear in a row, they should be close proximity, there's a pile of leaves that you can destroy. Then lift the log underneath for this Rot.
- From the Hat Cart jump into the water and head to the right hugging the wall. You should end up swimming into a cave that has a lit stone at the end.
- Get to a position where you can look at the Hat Cart. To the right of it is a waterfall, jump behind the waterfall to find a chest with a Rot in it.
Story Related
- Defeat the Sprout Captain and progress the story to earn three more Rot
- Defeat the Shrine Guardian and progress the story to earn three more Rot
Hat Locations - Total: 6
Openly Available
- Acorn - This hat is acquired when you discover the Hat Cart in the western part of this region. It's near the top fork of the river
- Sibling's Mask - Just south of the Water Shrine you'll see a chest sitting on a stump. Circle around the tree it's next to counterclockwise and use the grappling flower to get to the first level of the treehouse. You can then time a jump right to make it to where the chest is and the Sibling's Mask
- Deer - After unsealing the four shrines you'll head south to where there's another gateway to pulse unlock. To the right of the gateway is three small pedestals with Owl sigils on it. Find the three Owl statues lying nearby and return them to get this hat.
- Taro - From the Sacred Tree warp point in the south of the Forgotten Forest follow the road East. When you get to the split keep going East, it should be just around one of the bends. This is the first Cursed Chest that has a time limit to it so be prepared for some quick combat. You'll earn Taro's Hat.
Story Related
- Pinecone - After defeating the Shrine Guardian and completing the rainy sequence look for a side path with a chest on it.
Kena: Bridge of Spirits Rot and Hat Guide - Storehouse
Rot Locations - Total: 3
- After obtaining the bomb powerup destroy the rocks to the left that have purple butterflies around them. Inside is a hidden Rot.
- Progress through the Storehouse until you slide down and get to a new area with new enemies. Explode those enemies and shoot their cores. Once they've been defeated look for a grapple flower near the entrance and use it to get to a chest. This has a Rot in it
- When you get past the floating platforms and are able to activate the power on the left side of the gate instead keep following the path higher. After making your way through a hidden bombable passage there's a sigil on the floor you can pulse. After shooting all targets a Rot will appear
Hat Locations - Total: 1
- Beetle - After making it past the slide and new enemies progress forward where you bomb the temple. On the second highest temple platform you can turn around and enter a passageway with two crates and a chest. The Beetle hat is here.
Kena: Bridge of Spirits Rot and Hat Guide - Fields
Rot Locations - Total: 25
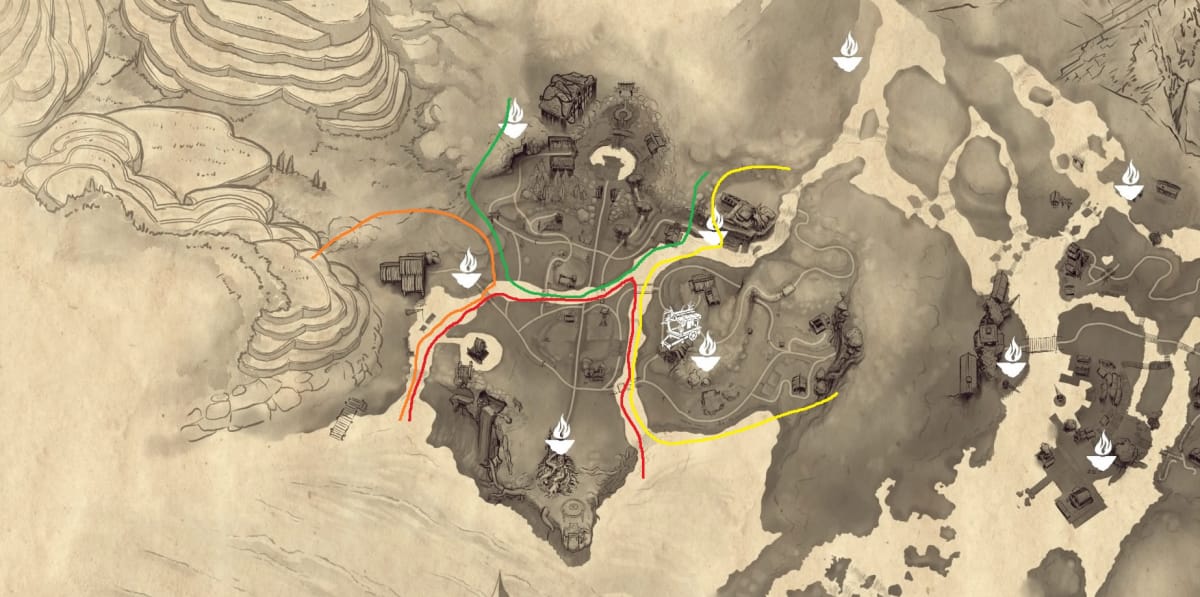
Field South Region - Where Tower Entrance Is
- From the Tower Entrance use the rocks on the right side of the tower to get onto its scaffolding. Follow this path to a large unpowered floor switch. Use your bombs to open, and then pulse the three crystals in this area and stand on the switch to create a set of steps. Fight the enemies below and find the glowing stone to get this Rot.
- After clearing the Rot from the field (same process as the Rot above) you'll be going through the Tower you'll leave the cave and go down a cliffside path until you reach a gondola. On the far side of the gondola is a log that can be raised.
- To the west of the Fields, you'll see a structure surrounded by water on your map. Come to this building and defeat all of the enemies. Use the rocks behind the house, and rocks to the side to jump up and flower grapple to the top floor. There's a chest here with Rot in it.
- Follow the road north from the Tower Entrance Warp until you get to a crossroad. There will be a house that's boarded up to your right. Walk-behind it and use the flat stones to get up on the hill behind it. Climb on the bombable rocks and you'll see a grapple flower in the boarded-up house. Inside is a chest with a Rot.
- After clearing the Deadzone Heart from the raised platform to the North of the Tower Entrance there's a sigil on the ground. Use pulse to have targets appear, shoot them all for another Rot.
- From the Tower Entrance to get to get over to the island to the North, there are a few broken bridges and one working bridge. Look under that bridge to find another Rot.
- Head west from the Tower as if you were making your way to Rufus' Barn. When you get to the platforms over the water shoot the target to get the platform to spin around. Keep riding the platform and get off at the second possible location. There is a Rot in a chest here.
- Circle around the right side of the Tower Entrance and activate the rocks the same way you would to get to the second level of the Tower. Instead, look to your left and you'll see where there are more rocks to bomb to get under the floorboards. There's a Rot right here.
Field West Region - Where Rufus' Barn is
- After defeating Vine Knight use a bomb on the rocks that are under the cover of the broken shed. Follow this path up into the rafters to find a Rot.
Field North Region - Where broken buildings are
- On the northern island of the Fields area, there's a vegetable patch to the right of the one working bridge. Defeat the enemies, create the Forest Tear, and water all of the plants in the field. In the middle, a pumpkin will grow with a Rot inside.
- North of the bridge is another broken-down house. This one has a few weak enemies around it. After you defeat them climb to the top of the house for another Rot.
- On the northern part of the Fields area head to the North West and look for a breakable boulder right next to a fenced cliff. A Rot is hiding within.
- From the house in the northern part of Fields with the Forest Tear head, East and you should immediately spot a breakable rock. Break it, destroy the attack that appears, and collect the Rot.
Field East Region - Where large house and gateway to Storeroom is
- Travel to the big house on the hill in the eastern part of the Fields. Use the transformed Rot to open the doorway to the house across the road on the right. Once inside use the grapple flower and inspect a crate for a Rot to appear.
- Return to the gateway between the Fields and Storehouse. Enter the building directly to the left of the gate and you'll find the Cursed Chest inside. This is a timed challenge but with only simple enemies. Inside you'll find a Rot.
- Return to the gateway between the Fields and Storehouse. Go to the vegetable field and shoot the target to spawn a Forest Tear. Water the field to the South and a gourd will grow with a Rot inside.
- Make your way up the hill from the rock that Ox Rufus breaks, there will be a pulse point. Shoot all the targets for a Rot.
- After breaking the rock head up the mountain until you get to a sliding section. After that when you're in the cave turn left to find a Rot under a beam
- After getting out of the cave, past the rock that the Ox breaks, you'll come to a split path. Take the left and you'll find a Rot here you saw before sliding down into the cave
- After getting out of the cave, past the rock that the Ox breaks, you'll come to a split path.
Story Related
- For freeing the Ox Rufus you'll get three Rot
- You earn three Rot for defeating the Stone Guardian
Hat Locations - Total: 10
Field South Region - Where Tower Entrance Is
- Autumn - From the Tower Warp Point walk around the Tower counter-clockwise. There will be two sets of fallen rocks here that can lead you to a climbing point. You'll be able to see the paint under it. Here is where a chest with the Autumn hat will be.
- Sunflower - From the Tower head west, near where the broken house is but veer further left. You'll be able to drop down into a slightly lower area. Turn around and you'll see a stone block that can be moved. Get it out of the way to reveal a chest.
Field North Region - Where broken buildings are
- Pumpkin - On the northern island of the Fields area there's a vegetable patch to the right of the one working bridge. Defeat the enemies, create the Forest Tear, and water all of the plants in the field. In the middle, a pumpkin will grow with a Rot inside that will give you the Pumpkin hat.
- Ox - On the Northern part of the fields travel to the house on the East that's on the water. Inside is a chest with this mask.
Field East Region - Where large house and gateway to Storeroom is
- Sun - You can unlock the sunhat by finding the Hat Cart in the Fields. It's on the Eastern part of the region near the large house on the hill.
- Cowboy - Complete the Cursed Chest next to the large house on the hill in the Eastern part of the region.
- Egg - Right next to the doorway back to the Storehouse there's a small shrine with three missing statues. The first statue can be found behind the shrine to the left, it will be in a field with some enemies. The second statue is behind the building to the right. The third statue is in the house that the shrine is facing.
- Pancake - Return to the door between the Storehouse and Fields and go behind the building to the left of it (where you found the second statue.) There's a chest tucked away here.
- Squash - Return to the gateway between the Fields and Storehouse. Go to the vegetable field and shoot the target to spawn a Forest Tear. Water the field to the South and a gourd will grow with a Rot inside.
- Halo - From the Forge Warp Point, after you've defeated the Stone Guardian, look up inside the house and you'll see a grappling flower. Attach to it and you'll find a chest and this Hat.
Story Related
- Adira's Mask - Obtained after defeated the Corrupt Woodsmith
Kena: Bridge of Spirits Rot and Hat Guide - Village Heart
Rot Locations - Total: 6
Freely Available
- After entering the main entrance to the Village Heart to the West you'll end up in water. Stand on top of the tilted rocks to get out of the water and look right and you'll see two Grapple Flowers, one over an archway and one past the archway. Chain between them to end up on the far platform where a Rot is.
- After you've made it through the watery area, then the dark passageway and you've climbed up to a higher level turn around immediately. There's a Rot symbol on the ground.
- After destroying the Deadzone Heart in the room with the pulsing fire room walk back and get in the now purified water. Swim to one of the tunnels where the fire was coming from and you'll find a Rot.
Story Related
- After destroying the Deadzone Heart in the room with the pulsing fire room you'll gain three Rot.
Hat Locations - Total: 3
- Hana's - In the watery area with the broken T-block that you can rotate swim to the shore and use the roots to climb to the platform above. Once you're up a level look to your right to find the Cursed Chest. The challenge here is to defeat a Wood Knight while he spawns additional enemies. Inside the chest is Hana's Mask
- Crown - After destroying the Deadzone Heart in the fire room walk back and get in the now purified water. Swim around to the tunnel where the fire was coming from and you'll find a chest with the crown in it.
- Stinky Fruit - From the Village Heart Warp Point walk towards the part of the village at the top of the elevator. As you pass through the archway go into the door on the right. From there use the grapple flower to get up higher for this chest.
Have a tip, or want to point out something we missed? Leave a Comment or e-mail us at tips@techraptor.net
