In this Ixion Chapter 3 Walkthrough Guide, we'll explore the Theta Crucis System, open up Sector 4, and remodel the interior of the Tiqqun!
< Ixion Chapter 2 Walkthrough | Ixion Chapter 3 Walkthrough
Ixion Chapter 3 Walkthrough - Getting Started
We're now in the Theta Crucis system -- and Ixion is about to get a lot tougher. This start system is enormously challenging from the get-go due to a massive Space Weather cloud that renders two-thirds of the solar system inaccessible, at least at the start of your operations in the area.
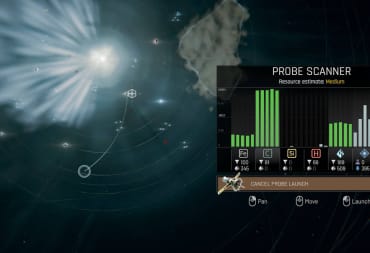
Fortunately, the Tiqqun should have been well-prepared upon entering this new system. Let's get to work! Kick things off by sending out a Probe to secure some Ice and Carbon:

Make sure that your Mining Ships are set to collect Ice and Carbon (C)!
After you've launched the Probe, we're going to want to turn on the EVA Airlock in Sector 3 so we can start balancing out the Hull Integrity again -- a new star system means we've suffered even greater damage to the Hull.
If you haven't done it already, start Researching whatever you need to unlock Tier 4 of the Tech Tree. To do this, you'll need everything in Tier 3 Researched.
A short time after starting, you'll get a Request popping up. Things are about to get a little weird:

Crew Members have started the "Cult of the Hull," an odd religious group that appears to deify the Tiqqun and the guy who created it. There are no downsides to allowing this movement to propagate as far as I can tell, and it can give you some potentially useful bonuses to Stability.
Next, we're going to launch another Probe to secure more essential materials:

This will get us access to Silicon (Si) and some Iron (Fe), which will be helpful for the upcoming Building we'll have to do.
Preparing to Explore
Now, it's time to address exploration. The Space will slide closer to the Tiqqun every time you complete an event at one of the planets in the starting area. While you could upgrade Mining Ships and Cargo Ships to be somewhat resistant to the storms, there are no such upgrades for Science Ships.
So, what do you do? The moving Space Weather will keep moving as you complete objectives, and there are some on the other side of it. This is our plan:
- Complete a few events near the starting area
- Recall all ships to the Tiqqun
- Fly the Tiqqun through to the opposite side of the Space Weather
- Complete events on the far side of the Space Weather, causing it to continue moving through the system
- Complete any remaining missed objectives near the starting area
We'll have to do this in addition to the general objectives in Chapter 3, so let's get to work. Exploring the Destroyed Command Center will be our first objective.
While there's wreckage of the Etemenanki all over the area, the heavily-armored Command Center has managed to survive. The Destroyed Command Center has 35 Science available by default, and it's required to progress your main objective "Fate of the Etemenanki."
Let's kick things off with our first choice:
- Enter the Command center. (2 Cycles)
- Result - New option.
Completing the exploration of the Command Center will give a new option:
- Recover the Coordinates of the Exoplanet Remus. (4 Cycles)
- Result - 40 Science, New Options
Recovering these coordinates will introduce a few more options to explore:
- Investigate further into the Piranesi's Attack. (3 Cycles)
- Result - More information, no loot.
- Determine the Etemenanki's previous mission objectives. (3 Cycles)
- Result - 50 Science
You can go through all of these choices in whatever order you want, resulting in a total of 125 Science. Completing them will unlock "The Piranesi" Technology on the Tech Tree, which will be important for a subsequent objective.
With the Destroyed Command Center finished, you have some new objectives on deck -- there are now two main quests available:
The Ark of Humanity
- Have 4 Sectors unlocked (3/4)
- Awaken 2,000 Cryonic Pods (0/2,000)
- Store 500 Ice (176/500)
Prepare for the Piranesi
- Find a countermeasure for its attacks
- Build enough Batteries so that at least 4 Sectors will have back-up Power for 5 Cycles (0/4)
We also have a side objective "Test Colonization Protocols" to find a viable planet, but we'll worry about that later.
Most of these objectives are easy enough to handle, but one of these requirements is going to be rough. At this point in my game, I have around 1,000 Crew. Awakening 2,000 Cryonic Pods is going to triple my population. That means I need to ensure that there is enough Power, Food, and housing to support all of these people. The hard work we did building out Sector 3 for Population Storage is going to come to fruition soon.
We'll only be able to make a handful of choices on this side of the Space Weather before we have to recall all of the ships and move the Tiqqun through the storm. We can delay most of our objectives until we're on the other side, but it's a good idea to get our Battery power up to snuff for our first three Sectors.
It's also a good idea to grab some intel on locations for this side of the storm while we're here, so let's send out some Probes. Let's start with this location:

This is the Collapsed Food Production District. It's a good opportunity to collect some Food and a particularly special Stability bonus.
Next, shoot a Probe over this way:

This is the Reactor Wreckage. It's got a fair amount of Science, some of those Cryonic Pods we'll need, and some new Tech.
Our next stop is here:

This is the Industrial Zone Wreckage, which will get us a small amount of Resources and Cryonic Pods, plus a fair amount of Science.
Next up is this location:

This is CRUC-P-38, an excellent opportunity to snap up a hefty chunk of Science Points that we can put to good use.
Finally, we have to send just one more Probe over to here:

This is CRUC-P-42. This planet is a candidate for colonization, but we don't want to tinker with it just yet. Colonization involves a hefty chunk of resources, and we want to focus on building out the Tiqqun some more.
Completing the exploration at the Destroyed Command Center also silently reveals a few more places to explore, but we can't get to them just yet. You might not even have noticed them! Take a look:

These are all places we'll be getting to eventually, but first we're going to have to focus on batteries.
Unfortunately, the requirements of 5 Cycles of Power is a little much for regular Tier 1 Batteries. Tier 2 Batteries are better, but we're going to upgrade to Tier 3 eventually. That's why I think it's a good idea to upgrade to Tier 3 now, and kit out each Sector with two Tier 3 Batteries so we have plenty of Power.
Remember that Silicon we found? We're gonna need a fair amount to get the Power we need, so let's uncover some more:

This location will get us a lot more Silicon and a little more Ice. Make sure to dedicate at least one of your Mining Ships to collecting Silicon as its primary resource, to ensure that we have a steady flow coming in.
Next, we're going to want to Research "Recycled Materials" at the Electronics Factory. This will let us make 1 Electronics for 25 Silicon instead of 30.
Exploring CRUC-P-38 and Reactor Wreckage
Our next step is to explore CRUC-P-38. This will give us a quick boost to our Science. Send a Science Ship over that way. You should have at least 2 Science Ships, so the other one is going to go to the Reactor Wreckage.
Before we go over those Points of Interest, an important note: make sure to save your game before you leave them. That is the trigger for moving the Space Weather. You may find that something you wanted to mine or explore is cut off, so this will give you an opportunity to go back and fix things if need be.
CRUC-P-38 has a highly-corrosive atmosphere -- and a mysterious signal emanating from beneath a mountain. There is 44 Science available from the get-go, and you have four options available:
- Bore through the mountain. (4 Cycles)
- Result - Unlocks new choices.
- Perform topographical analysis. (3 Cycles)
- Result - Unlocks new choices.
- Ignore the signal and focus on sample collection. (4 Cycles)
- Result - 100 Science, disables other choices except "Leave P-38."
- Leave P-38.
- Result - Removes all other choices.
Selecting either "Bore through the mountain" or "Perform topographical analysis" will, unfortunately, cause a breach in the mountain facility, but there is a subtle difference between the two.
Either option will give you three new choices, but you won't be able to select them all. Picking "Bore through the mountain" will only give you one choice. Picking "Perform topographical analysis," however, will give you two choices. Select "Perform topographical analysis."
Once you do, you'll be advised that the mountain facility is breached. You now have three new choices to select from. You get different amounts of Science depending on whether you select something first or second:
- Investigate the Tank Room. (3 Cycles)
- Result - 120 Science (selected first), 60 Science (selected second)
- Investigate the Command Center. (3 Cycles)
- Result - 100 Science (selected first), 50 Science (selected second)
- Investigate the Field Operations Area. (3 Cycles)
- Result - 110 Science (selected first), 60 Science (selected second)
Here's what you should pick for CRUC-P-38:
- Perform topographical analysis
- Investigate the Tank Room
- Investigate the Field Operations Area
- Leave P-38
This will give you an additional 180 Science and prevent any unnecessary deaths.
Research "Advanced Production Line" in the Electronics Factory, too, to ensure that we can get Electronics as cheaply as possible.
Before we get too deep into Reactor Wreckage, you'll also want to make sure to mine the resources in this location as quickly as possible. Disable the other resource nodes to ensure that your ships get to them quickly:

The Space Weather will cover this area after you've explored a couple more Points of Interest, and we want to make sure that we collect all of the Carbon, Iron, and Silicon here before it becomes difficult to reach.
Start waking up more Workers in Sector 3, using the "Workers First: Cryopod Awakening Policy at the DLS Center. We'll need at least another 40 Workers, although 50 would be better. This will allow us to open up Sector 4 and do a bit of remodeling.
Now, for the Reactor Wreckage. The Reactor Wreckage is near the Destroyed Command Center and has 18 Science available by default.
Here are the available choices:
- Investigate the Thrusters. (3 Cycles)
- Result - 35 Science
- Inspect the Engine Room. (3 Cycles)
- Result - 40 Science
- Investigate the Engine Supervision Area. (3 Cycles)
- Result - 50 Science, 168 Cryonic Pods, new Event "Pirate"
- Leave the Ruined Propulsion Systems.
- Result - Disables other choices.
The Reactor Wreckage is a straightforward opportunity to get a total of 143 Science and some useful Tech. Go through each of these options.
We're also going to get moving on another important Tech: Storage. Start working your way through the Upgrades for Stockpile - Small so that you can build Stockpile - Large. Don't worry too much about the additional upgrades; focus only on getting to Stockpile - Large. We'll need it for Sector 4.
Once you're done with Researching Stockpile - Large, we'll need to move on to Battery - Tier 3. Research those while we progress with other objectives.
Opening Sector 4
Speaking of Sector 4, now's a good time to open up another chunk of the ship. Let's get going on that!

As usual, we're going to want to connect up Roads to all of the Supply Drops so we can collect them. Focus on cleaning up the junk in Sector 4 while continuing with your Research.
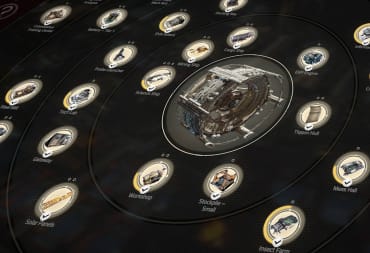
With four Sectors open (and the addition of at least 2,000 new Crew in the very near future), we're going to need to invest in some important new Tech. Make sure to Research these Techs, in order:
- All efficiency upgrades for the Fusion Station
- All efficiency upgrades for the EVA Airlock
- Train Station
- Hull Temple
- Health Center
- Algae Farm
We're going to need every advantage we can get to make sure we produce enough Food. But first, let's start Building in Sector 4, starting with four EVA Airlocks along the wall without the Sector Sign. (Make sure to turn off the Power on them for now!) We're also going to build a Battery - Tier 3 and a Domotic Quarter in the corner.
Here's what that looks like:

If you haven't figured it out yet, we're going to make Sector 4 specialize in space operations. That will free up some space in other Sectors, too.
A Very Good Boy
While this is going on, we're going to start exploring the Collapsed Food Production District. The Collapsed Food Production District has a ton of available choices, but you can potentially secure some very useful bonuses if you do things right.
Here are your choices:
- Investigate the Vegetal Zone. (3 Cycles)
- Result - 15 Science, 261 Food, 235 Crytonic Pods, "Personalized Instructions" Tech Upgrade for Crop Farm
- Investigate the Animal Pens. (3 Cycles)
- Result - 25 Science, 204 Cryonic Pods, new Choice
- Make a cautious approach towards the self-contained area. (3 Cycles)
- Result - 2 Crew Members killed, "Invasively breach the self-contained area" choice disabled
- Invasively breach the self-contained area. (2 Cycles)
- Result - 10 Science, "Make a cautious approach towards the self-contained area" choice disabled.
- Leave the wreckage of the Food Production District.
- Result - All other choices disabled.
Selecting "Investigate the Animal Pens" opens up a new option:
- Naomi Protocol: Provide a new home for the Dog.
- Result - A Dog moves into the Tiqqun.
After a short time, you'll get another odd Request, and this one can have some serious consequences: "Hot-Dog" gives you two choices:
- Respect Sanitary Protocols.
- Result - -1 Stability Penalty, +10 Food, also you're a monster
- Officially recognize the Dog as a member of the Crew.
- +1 Stability bonus
Bringing the Dog into the Crew gives you a shipwide +1 bonus to Stability, so you should absolutely do it once you're given the option.

Investigating the Vegetal Zone and Animal Pens is worthwhile, especially for the addition of a Dog. You may want to skip "Invasively breached the self-contained area," though, as a paltry 10 Science may not be worth tying up a Science Ship for 2 Cycles.
When the Collapsed Food Production District is finished, do not leave the area. Leave the Science Ship in orbit. Recalling the Science Ship will trigger movement of the Space Weather, and we're not ready for that yet.
With our other Science Ship, we're going to go through the Industrial Zone Wreckage, too. The Industrial Zone Wreckage is pretty close to the start of the level and has 20 Science available by default. You have three choices available from the outset:
- Explore the Industrial Zone. (2 Cycles)
- Result - 20 Science
- Investigate the Storage Area. (3 Cycles)
- Result - 97 Alloy, 2 Electronics, 188 Cryonic Pods
- Look for the source of the Yellow Particles. (4 Cycles)
- Result - New choices.
Selecting "Look for the source of the Yellow Particles" opens up two new choices:
- Open the Time Capsule. (2 Cycles)
- Result - 45 Science, Self-cleaning Lubricants upgrade unlocked for Waste Treatment Center, new choice
- Leave the Wreckage and the Time Capsule.
- Result - Disables other choices.
Choosing "Open the Time Capsule" will open up one more simple option:
- Leave the Wreckage.
- Results - Disables other choices.
Do not leave this location, either. Keep your Science Ships in orbit around the Collapsed Food Production District and the Industrial Zone Wreckage for now. When we remove them, it will cause the Space Weather to advance, and we want to wait until the last moment to do this.
Back to Building Sector 4
Back at Sector 4, we're going to add a bunch more Buildings:
- Docking Bay (with Power off)
- Probe Launcher (with Power off)
- Stockpile - Small (for Polymer)
- Stockpile - Small (for Electronics)
- Stockpile - Medium (for Food)
- Stockpile - Large (for Alloy)
- DLS Center
- Mess Hall
- A second Domotic Quarter
- Infirmary
You might have to dismantle some unused Buildings in other Sectors to ensure that you have enough Alloy to go around. Remember, you can always send out Probes to find more Iron if you're running low! )And speaking of Probes, don't forget to turn on Auto-Build for the new Probe Launcher in Sector 4.)
Here's what the next stage of Sector 4 construction looks like:

With the addition of a second Domotic Quarter and the Stockpile - Large for Alloy, we can officially shut down and dismantle the other EVA Airlocks in other Sectors and turn on the Power for the EVA Airlocks in Sector 4. We can also dismantle the Docking Bay in Sector 3 and the Probe Launcher in Sector 1.
Don't forget, you need to ensure that there are enough Workers available for all of these new Buildings in Sector 4. You'll need to ensure that there is a steady supply of Food and Alloy, too. Make sure to set up the appropriate amounts of materials in Resource Management and to move Workers over with Population Management.
Speaking of resources, your Power may be getting a little low at this point. It may be a good idea to consider using some of that Silicon we picked up earlier to add another Solar Panel and level things out a bit.
Now, we need to add a few more things to Sector 4: a Hull Temple, another Docking Bay, 4 Stockpile - Large, and one Stockpile - Medium. We're also going to move the Infirmary into a slightly more sensible space.
Here's what that looks like:

This allows Sector 4 to serve as overflow storage. If you ever come into a ton of resources, you'll be able to stuff them in here temporarily and move them around elsewhere on the ship.
The addition of another Docking Bay also activates Tier 2 Space Specialization for the Sector since there are 7 total "Space" buildings:

This gives a 20% bonus to Hull Repair efficiency, ultimately saving you resources in the long run.
Renovating Sector 3
Sector 4 is pretty much done now, but we still don't have the ability to support another 2,000 people on the Tiqqun. Our next stop is Sector 3, where we're going to have to do some more remodeling.
If you recall our Chapter 2 Walkthrough, Sector 3 was meant to specialize in population. This is where most of the people on the Tiqqun will live. We're going to reorganize things a bit and make it more efficient.
Here's what Sector 3 looks like for me at this point in time:

It's been getting the job done, but it could be better. Fortunately, we have a lot of free space, so we can rework things a fair bit. Let's start moving stuff around.
First, make sure you're Researching Algae Farm. We're going to need that soon for Sector 2.
Next, we're going to build the following in Sector 3:
- 2 Stockpile - Large
- 1 Stockpile - Medium
- 4 Stockpile - Small
- 1 Workshop
- 1 Battery - Tier 1
This will allow us to tuck all of our storage for the Sector in the corner. Make sure to dismantle any empty Storage - Small in the Sector.
Both of the Stockpile - Large will be used for Cryonic Pods. We'll probably only need one of them for the moment, but you may need to turn on the second one after you've collected all of the available Cryonic Pods from the nearby planets and space wreckage. The Stockpile - Medium is going to be used to store Food, to ensure that we have plenty on hand for our population in Sector 3.
As for the Stockpile - Smalls, these will be used for Alloy, Electronics, Polymer, and Waste. We don't have an active Waste policy in Sector 3, yet, so leave the Waste storage turned off for now.
Here's what Sector 3 looks like when this phase of construction is done:

Note that the bottom-right Stockpile - Small is facing to the side. This will be important for the next stage of Building.
Next, Research "Hacking Threat Analysis" under The Piranesi in Tier 4. We'll need this to complete our objective.
We're also going to want to Research "Nihei Quarter Protocol" under Crew Quarters in order to start producing extra Waste; we'll use this for additional Food production later.
For our next stage of Building in Sector 3, we're going to add the following:
- Health Center
- 2 Domotic Quarter
- Battery - Tier 3
- Mushroom Wall
- Hull Temple
We're also going to move our Buildings around. Remember, you can recover 100% of the Resources invested in a Building by dismantling it. So we can dismantle existing Buildings in the Sector and then rebuild them elsewhere, while only losing the benefits for a short time.
Here's what the next stage of Sector 3's facelift looks like:

This is looking much more like a proper city with the ability to support a lot of people!
Start moving some Non-Workers over from Sector 2 if you haven't already. We'll need to dismantle most of the housing in Sector 2 eventually, and we may as well get that going while we're finishing up Building here.
While this is ongoing, make sure to Research "Controlled Mitosis" and "Centralized Movement" at the Algae Farm so that we can maximize the number of Algae Plantations we can place for our Sector 2 renovation.
We're going to need a fair amount of Alloy for this next stage of Building, so dismantle the Colonization Training Center and a couple of the Optimized Quarters in Sector 2. Now, we're going to Build the following in Sector 3:
- 2 Additional Mess Halls
- Colonization Training Center
- 3 additional Domotic Quarters
We're also going to remove the Battery - Tier 1 that's off to the side and move around some Buildings again., to once again make better use of the space in Sector 3.
Over in Sector 2, we're going to Build 3 Domotic Quarters where the EVA Airlock used to be. This will make it easy for us to demolish all of the old Optimized Quarters later.
Demolish old Optimized Quarters as necessary to recoup some Alloy. Here's what Sector 2 looks like with this small renovation:

Getting Ready to Move the Tiqqun
Unfortunately, we're starting to run low on critical resources by this point. We're going to have to get moving soon, so we'll have to save the rest of the renovations for after we get to the other side of the Space Weather.
Build a Battery - Tier 3 in the corner of Sector 2 here:

With this construction underway, we only have to worry about one more Sector in terms of meeting our Power goal, and that's Sector 1.
Build one more Battery - Tier 3 in Sector 1 at this location, bearing in mind that you may need to trim some Roads:

It's going to take some time for each of the two new Battery - Tier 3 to charge. We want to ensure that we have at least 5 Cycles of Power available for all four Sectors before we make our move with the Tiqqun. If you have the Science to spare, Research the "Deoxidized Contacts" upgrade for the Battery - Tier 1 in the Tech Tree, and consider Researching further upgrades to charging speed if you feel like it.
With the little bit of time remaining, we'll want to ensure that we grab every useful resource we can in the remaining Sectors. If you've been judicious with managing your Probes, Mining Ships, and Cargo Ships, you'll probably have collected a lot already, but there still may be some things to be found:

Now, all that's left to do is to wait for our Batteries to ensure that there are at least 5 Cycles of operation for all Sectors.
Once we hit the magic number of 5.0 Cycles of Battery power, it's time to finally complete our missions at Industrial Zone Wreckage and Collapsed Food District.d
First, ensure that any remaining resources in Asteroids or Points of Interest are tagged as "Avoid." This will automatically recall and dock all of our Mining Ships and Cargo Ships.
As a final reminder, here's what the Theta Crucis system looks like before we pull the trigger:

Click on "Industrial Zone Wreckage" and select the "Leave" choice. Then, click on the assigned Science Ship and click the "Back to Tiqqun" button to recall it to the ship.
Wait for the Science Ship to dock at the Tiqqun before moving on to the next step.
Here's what the map looks like after one of the two remaining Points of Interest has been completed:

Completing the next event will expose the Science Ship to Space Weather and will almost certainly destroy it. There's no way that it can survive the ship unless you get tremendously lucky.
That's why we're not going to bring the Science Ship to the Tiqqun -- we're going to bring the Tiqqun to the Science Ship.

This is going to use a small amount of our saved Battery power, but it will save the Science Ship.
Let the game run for a few moments to get our Battery reserve back over 5.0. As long as we have at least 5.0, we're fine, so don't worry about getting them all 100% charged.
Once they're charged, pause the game. Click on "Collapsed Food Production District" and select the "Leave" option. Then, click on your remaining Science Ship and order it back to the Tiqqun. This will give it every possible moment to dock.
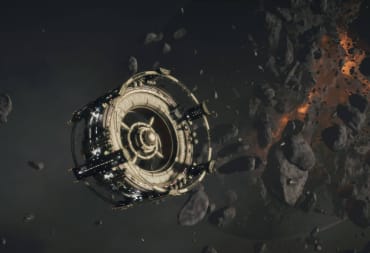
If you're successful, the Tiqqun will now be fully enveloped by the Space Weather:

As with all Space Weather, the Tiqqun is going to be taking damage over time while it's in here. It's not a good idea to stick around for any longer than we need to.
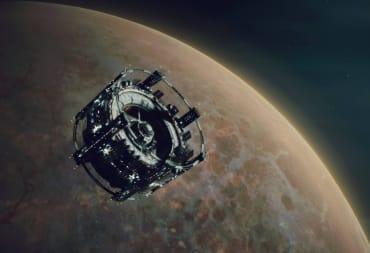
Move the Tiqqun to the Medical District Wreckage:

This will be a harrowing trip and the Tiqqun may take some damage, but you should be able to survive it.
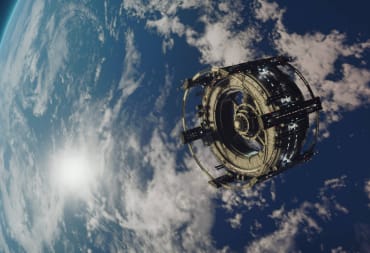
If your luck held, you'll have made it to the other side relatively unscathed:

Through the Looking Glass
Now we have a whole other chunk of the map to explore!
First things first, let's secure access to critical resources, starting with Ice (and a few bonuses):

I was running pretty low on Ice at this point, so getting my hands on more was super helpful.
Next, we'll need to lock down a supply of Iron to keep the Tiqqun's hull all patched up. (We'll also need to repair a fair amount of damage we sustained from moving through that nasty Space Weather!)

Now that we're here, it's time to get exploring, starting with the Medical District Wreckage and the Depressurized R&D District.
Before we get into each of these zones, move the Tiqqun to the Depressurized R&D District. You'll need the Tiqqun next to this Point of Interest in order to take advantage of it. We'll use both of our Science Ships to tackle this simultaneously.
The Medical District Wreckage is central to the far side of the Theta Crucis System and a good location for the Tiqqun to operate out of.
It has 19 Science immediately available and three choices once you send a Science Ship to it:
- Investigate the Medical District. (2 Cycles)
- Result - 20 Science, 270 Cryonic Pods
- Investigate the Research Facility. (2 Cycles)
- Result - 30 Science, 124 Cryonic Pods, new choice
- Leave the Wreckage.
- Result - Disables other choices.
Completing "Investigate the Research Facility" unlocks a new choice:
- Retrieve ZY6073. (1 Cycle)
- Result - All Crew killed, Science Ship taken over.
- Leave the Wreckage.
- Result - Disables other choices.
Completing the retrieval of ZY6073 now brings up two equally-horrifying options:
- Naomi Protocol: Let ZY6073 return to the Tiqqun.
- Result - New choice.
- Destroy the [Science Ship.]
- Result - Science Ship destroyed.
Bringing ZY6073 back onto the ship gives you another new choice via a Request at a Docking Bay.
- Use Sterilization Protocols to exterminate ZY6073.
- Result - 15 Science.
- Neutralize Zy6074 with the help of the Crew.
- Result - 12 Crew Members killed, 30 Science
I can't see any scenario where the paltry 15-30 Science is worth the trouble of bringing ZY6073 on board. You can get some achievements if you care about those, but I'd recommend saving beforehand, getting the achievements, and then reloading the save.
Ultimately, here's what you should do for the Medical District Wreckage:
- Investigate the Medical District.
- Investigate the Research Facility.
- Leave the Wreckage.
This will net you a total of 69 Science and 394 Cryonic Pods.
Completing an additional Point of Interest will cause the Space Weather to move further:

This also opens up access to several new Points of Interest, so let's go over them.
First, send a Probe here:

This will reveal CRUC-P-51.
Next, send a Probe here:

This reveals CRUC-P-41.
Our next target for a Probe is here:

This reveals CRUC-P-43.
And finally, send a Probe here:

This reveals CRUC-P-37.
We've now uncovered all of the Points of Interest that are available to us. Don't forget to send out Probes to find more resources as you go!
Now, for the Depressurized R&D District. It was home to unknown research laboratories; it starts with 28 Science immediately available.
- Search the Residential Area. (3 Cycles)
- Result - 188 Cryonic Pods, 20 Science.
- Search the Laboratories. (3 Cycles)
- Result - 50 Science, 820 Cryonic Pods, new choice
Searching the Laboratories first will give you a new choice:
- Locate the Techno-Supervisor's Quarters within the Residential Area. (2 Cycles)
- Result - 25 Science.
- Leave the Etemenanki Wreckage.
- Result - Disables other choices.
After locating the Techno-Supervisor's Quarters, you'll get a new choice:
- Open ORNE-8 Security Room. (3 Cycles, Docked Tiqqun)
- Result - 150 Alloy, 1 Electronics, "Orne-8 P.A." upgrade for Tech Lab
- Leave the Etemenanki Wreckage.
- Result - Disables other choices.
The "ORNE-8 P.A." upgrade for the Tech Lab reduces the cost of all further Research by 10%.
The extra 5 Science isn't worth the loss of 188 Cryonic Pods, so here's what you should do, in order:
- Search the Residential Area.
- Search the Laboratories.
- Move the Tiqqun to the Depressurized R&D District.
- Open ORNE-8 Security Room.
This will give you a total of 98 Science, 1,008 Cryonic Pods, and the ORNE-8 upgrade for the Tech Lab.
Later, you'll get a Request that gives you two choices:
- Launch the P.A. to assist with our research.
- Using UN technology is out of the question.
There appears to be no effect with either choice; it seems that this Request may be bugged. Choose "Launch the P.A." just to be safe. Research the ORNE-8 upgrade on the "Tech Lab" Tech Tree node as soon as possible; the earlier you get it, the greater its long-term benefit will be.
With that done, we need to do some prep for CRUC-P-42, the candidate for colonization. Train Colonists until you have a total of 90, which is the maximum you'll need in order to colonize this planet. (We'll launch a colonization mission shortly.)
We're also going to prep to start waking up crew from Cryonic Pods faster. Research the "Controlled Thermal Shock," "Group Decryonization," and "Post-decryonization Treatment" upgrades to accelerate the rate at which you can thaw Crew. (Don't start waking them up by the boatload just yet!)
Our next goal is to increase Power production further. Build another Solar Panel to give your ship a little more juice.
While this is ongoing, we'll explore the Habitation Sector Wreckage and the Destroyed Docking Bay at the same time.
The Habitation Sector Wreckage isn't too far away from the Medical District Wreckage, so it's a natural choice for early exploration. It's also a good source of Cryonic Pods.
Here are the choices available in this location:
- Recover the Floating Cryopods. (3 Cycles)
- Result - 795 Cryonic Pods, new choice
Completing the recovery of the floating Cryopods gives you a subsequent choice.
- Push deeper into the structure to reach the source of the unusual readings. (2 Cycles)
- Result - New choices.
This second step opens up several more choices.
- Proceed through the laser-cut piping. (1 Cycle)
- Result - 40 Science, new event "Agents of Death," removes other choices.
- Continue drilling. (4 Cycles)
- Result - 60 Science, new event "Agents of Death," removes other choices.
- Proceed through the reinforced tunnels. (2 Cycles)
- Result - 70 Science, new event "Agents of Death," removes other choices.
- Leave the ruins of the Etemenanki.
- Result - Disables other choices.
You should choose:
- Recover the floating Cryopods.
- Push deeper into the structure to reach the source of the unusual readings.
- Proceed through the reinforced tunnels.
In addition, the event "Agents of Death" will reveal that you've discovered technology to counter The Piranesi's Drones; you can now Research the "Drone Threat Analysis" upgrade on The Piranesi in the Tech Tree. Do so at your earliest leisure.
As for the remains of the Etemenanki's Docking Bay have two areas you can explore. Here are your choices:
- Investigate the Communications Area. (3 Cycles)
- Result - 20 Science
- Investigate the intact docking port. (2 Cycles)
- Result - 35 Science, new choices
- Leave the Wreckage.
- Result - Disables other choices.
Unfortunately, the docking port also has a nasty surprise -- an undetonated missile. You have several new choices available:
- Initiate a controlled detonation of the missile. (2 Cycles)
- Result - 30 Science
- Defuse the missile. (2 Cycles)
- Result - 14 Science, new event "I Missile You"
- Transport the missile. (2 Cycles)
- Result - Destruction of [Science Ship]
- Leave the Wreckage.
- Result - Disables other choices.
I think the best option here is "Defuse the Missile," in the hopes that you'll get some useful tech out of it later on down the line.
Make the following choices for this Point of Interest:
- Investigate the Communications Area.
- Investigate the intact docking port.
- Defuse the missile.
- Leave the Wreckage.
The event "I Missile You" will unlock the "Missile Threat Analysis" upgrade for The Piranesi Tech, another important Tech that you should Research as soon as you can.
Upon completing three of the four Points of Interest on the far side of Theta Crucis, the Space Weather will have advanced enough that you can once again reach CRUC-P-42!

Colonizing CRUC-P-42
We are once again going to experiment with colonization. This time, CRUC-P-42 gives us two options:
- Establish Basic Nyokond Colony Infrastructure. (45 Alloy, 60 Food, 60 Colonists, Cargo Ship, 3 Cycles).
- Establish Advanced Nyokond Colony Infrastructure. (90 ALloy, 90 Food, 90 Colonists, Cargo Ship, 4 Cycles).
- Leave the planet and return later.
Take the "Establish Advanced Nyokond Colony Infrastructure" option.
It's going to take some time for the colony to be set up and for the colonists to do their thing. A Science Ship and a Cargo Ship will be occupied while this is ongoing, too.
While that's going on, we're going to accomplish three objectives simultaneously:
- Explore the remaining planets
- Finish remodeling the Tiqqun
- Wake up more Crew until we hit 2,000 Cryonic Pods opened
Here are the details for each of the remaining planets; explore them one after another while you're working on Building the Tiqqun out further.
CRUC-P-51
CRUC-P-51 is a gas planet with a high concentration of gas, making it an "almost semi-liquid environment." This location gives us the opportunity to scare up some useful scientific data.
Here are our choices:
- Perform intrusive analysis. (1 Cycle)
- Result - Science Ship destroyed, 5 Crew lost, -5% Trust Penalty
- Set up a temporary study center. (30 Alloy, Cargo Ship, 3 Cycles.)
- Result - 20 Science, new choice
- Set up advanced analysis infrastructure. (50 Alloy, Cargo Ship, 4 Cycles.)
- Result - 40 Science, new choice
- Leave P-51.
- Result - Disables other choices.
If you choose "Set up a temporary study center," or "Set up advanced analysis infrastructure," you'll have a subsequent choice to make:
- Conduct further tests on the Meier Bacteria. (3 Cycles)
- Result - 45 Science, new choices.
- Leave P-51.
- Result - Disables other choices.
Choosing to conduct further tests will give you another pair of choices.
- Authorize transportation of the Meier Bacteria. (2 Cycles)
- Result - Science Ship destroyed, 5 Crew lost in action
- Leave P-51.
- Result - Disables other choices.
The only difference between setting up a temporary study center and advanced analysis infrastructure is an additional 20 Science at the cost of 20 Alloy. It's up to you to decide which of the two you would like to do and whether or not that's worth the cost.
In summary, your choices should be:
- Set up a temporary study center or set up advanced analysis infrastructure.
- Conduct further tests on the Meier Bacteria.
- Leave P-51.
CRUC-P-41
CRUC-P-41 has an unusual rock formation that's worth checking out. The simplicity of this planet is reflected in the simplicity of your choices, at least at first:
- Investigate the formation. (3 Cycles)
- Result - 60 Science, new choices.
- Leave the planet.
- Result - Disables other choices.
Once you investigate the formation, things start to get a bit wonky. It seems that one of the Crew has removed their helmet, believing the air to be breathable when it is not. You now have some new decisions to make:
- Naomi Protocol: Override security protocols for the [Science Ship] team. (2 Cycles)
- Result - 5 Crew dead, Science Ship destroyed
- Continue exploration of the formation, implementing strict psychological monitoring.
- Result - 40 Science
- Leave the planet.
- Disables other choices.
Seeing as you probably don't want to kill your Science Ship Crew, here is what you should do:
- Investigate the formation.
- Continue exploration of the formation, implementing strict psychological monitoring.
- Leave the planet.
CRUC-P-43
CRUC-P-43 has a highly corrosive atmosphere, limiting the amount of time you can safely spend on the planet. Your adventure on this hellish world starts with these choices:
- Use explosives to quickly clear a path. (2 Cycles)
- Result - New choices.
- Drill through the crust of P-43. (3 Cycles.)
- Result - 1 Crew Member killed, new choice
- Leave the planet.
- Result - Disables other choices
Selecting "Use explosives to quickly clear a path" reveals a mysterious sphere underground, and some new choices.
- Examine the sphere. (3 Cycles)
- Result - 50 Science, 1 Crew member lost upon leaving
- Analyze the crystal formations. (3 Cycles)
- Result - 30 Science
- Study the concentric circles. (3 Cycles)
- Result - 40 Science
- Leave the planet.
- Result - Disables other choices.
You can only pick two of these. Attempting to pick a third will cause you to run out of time and result in the deaths of the Crew and the loss of the Science Ship.
Furthermore, choosing "Examine the sphere" will result in the death of a Crew Member, so do not pick this choice.
If you instead choose "Drill through the crust of P-43," you'll lose a Crew Member immediately.
- Continue the expedition into the caves of P-43. (3 Cycles)
- Result - Reveals the sphere and its choices, with only 1 choice possible.
- Leave the planet.
- Result - Disables other choices.
Attempting to do a second choice after selecting "Drill through the crust of P-43" will result in the deaths of the remainder of the Crew and the loss of your Science Ship.
This is your best course of action for CRUC-P-43:
- Use explosives to quickly clear a path.
- Analyze the crystal formations.
- Study the concentric circles.
- Leave the planet.
CRUC-P-37
CRUC-P-37 is a radioactive world full of oddities and a massive crater. There are a lot of choices to pick from here:
- Perform intrusive analysis. (1 Cycle)
- Result - 20 Science
- Set up a temporary study center. (30 Alloy, Cargo Ship, 3 Cycles)
- Result - 40 Science
- Establish infrastructure to support advanced analysis. (50 Alloy, 4 Cycles)
- Result - 65 Science
- Analyze impact area. (2 Cycles)
- Result - 20 Science, new choices.
- Leave the planet.
- Result - Disables other choices.
Selecting "Analyze impact area," results in the discovery of a strange object and gives you three new choices:
- Authorize invasive recovery and analysis of the object. (2 Cycles)
- Result - 5 Crew Members killed, Science Ship destroyed
- Set up a drilling rig. (3 Cycles)
- Result - 5 Crew Members killed, Science Ship destroyed
- Excavate the object manually. (3 Cycles)
- Result - 40 Science, New Event "The Piranesi's Main Weapon," original choices restored
- Leave the planet.
- Result - Disables other choices.
It's clear that this device in the crater is some sort of weapon for The Piranesi. You can retrieve it, gain some Science, and then go back to the original choices, which trade off Alloy and time for Science. Here's what you should do:
- Analyze impact area.
- Excavate the object manually.
- Perform intrusive analysis, Set up a temporary study center, or Establish infrastructure to support advanced analysis (depending on how much Alloy you're willing to spend).
Bear in mind that at this point, we're bringing in a fair amount of Science with our maxed-out Tech Lab. It may no longer be worth it to invest finite resources like Alloy in this way.
The event "The Piranesi's Main Weapon" will give you an additional 30 Science.
Waking Up
Now that that information is out of the way, it's time to make room for new Crew! First, Research "Smart Homes" to get the maximum possible capacity out of Domotic Quarters. Once that's done, we're going to Build another seven Domotic Quarters in Sector 3:

Once a few of these have been built, start waking up Crew at the Cryonics Center in Sector 3 to progress our objective. Don't be afraid to turn it off for a little while if you need to catch up in other areas! On the other hand, it may be a good idea to temporarily build a second Cryonics Center in Sector 3 to speed up the thawing if you feel you can support it. Do what you think is best for your ship setup.
Make sure to research all of the upgrades for Mess Hall -- increasing the efficiency of our Food usage is cheaper (and better) than just trying to grow tons more Food.
Increasing Food Production
While the new Domotic Quarters are being built in Sector 3, it's time we head over to Sector 2 and finally get moving on some much-needed renovations. Here's what the first stage of renovations looks like:

We're adding a Storage - Large for Food and a Storage - Large for Ice, and a Storage - Medium for Trash. A Domotic Quarter has been tucked away behind the Alternative Life Center. The Workshop, Battery - Large, DLS Center, and Alternative Life Centers have been moved. Two Mushroom Walls have been added.
The older Storages we're not using at the moment have been removed, and the monuments have been temporarily removed.
Here's what the next step will look like:

The Genetic Conatus Memorial has been rebuilt. One of the Crop Farms has been removed and replaced with an Algae Farm. Two more Domotic Quarters have been built, and the Infirmary and Mess Hall have been moved.
The Battery - Tier 1 and three temporary Domotic Quarters to the left have been removed.
Believe it or not, this configuration is more than enough to feed 3,000 people -- it covers nearly 240% of my Food requirements with 1,200 out of 2,000 Cryonic Pods opened.

Wrapping Up Chapter 3
There's not much more to do in terms of Building just yet -- at least on the inside of the ship. We can build the Drone Jammer for 4 Electronics and 90 Polymer in "Engines and External Systems" in the Tiqqun Exterior View (F2). Let's get that done now.
Before you know it, you'll see that you're able to return to CRUC-P-42:

You can now bring the Colonists home, so get moving on that.
As you approach the 2,000 Cryonic Pods mark, you may start running out of space for Housing. There is some free space in Sector 4 where you can stick some additional housing, so go ahead and do that if you need to. Don't go too crazy -- you'll only need a few Domotic Quarters to cover everything.
Once you've opened 2,000 Cryonic Pods, you'll be able to VOHLE Jump to the next star system (and Chapter 4). Consider, though, that it may be a good idea to stick around and further improve the Tiqqun. There's no good reason not to get more resources if they're available!
< Ixion Chapter 2 Walkthrough | Ixion Chapter 3 Walkthrough
That's the end of our Ixion Chapter 3 Walkthrough Guide. Make sure to check out our other Ixion Guides below!
Have a tip, or want to point out something we missed? Leave a Comment or e-mail us at tips@techraptor.net
One of my earliest memories is playing Super Mario Bros. on the Nintendo Entertainment System. I've had a controller in my hand since I was 4 and I… More about Robert N