The Falconeer is almost out, a new indie title releasing on Xbox Series X|S, Xbox One, and PC via Steam and Windows Store. This unique twist on the aerial-combat genre has players piloting a bird above the flooded lands of the Ursee. There's a lot to know going into The Falconeer though, so we've collected together some of the best tips for not only navigating the skies, but what to be keeping an eye out for in shops.
How to Fly Fast in The Falconeer
Throughout The Falconeer you'll find yourself needing to travel long distances over vast bodies of water. More often than not there will be nothing but rolling waves, clouds, and the horizon in your sight. Because of this you'll want to master picking up as much speed as possible and how to maintain it. As you can expect, as you're flying towards the water you'll pick up all kinds of speed, but once you level out, you want to maintain it for as long as you can. The Falconeer also gives players a boost bar, you can use it whenever you want, but it only recharges as you're pointed down to gain speed. Alternatively as you fly up you'll begin draining your bar.

Using the above image you'll what whether you should be spending your boost, conserving it, or alternating
- In this area of the boost gauge, if you're up high in the sky then you can turn your nose down and begin building it up until you get into the range of 2. If you're at the water's level while sitting at this level of boost, then you'll want to hold onto it for when you spot an upcurrent on the water. If you head over to it, your falcon will get pushed into the air without the need to lose what precious boost you have left. This will not only put your bird higher in the sky, but also fill your boost gauge a bit, maintaining your velocity.
- You'll want to be boosting as much as possible. You can also slightly nudge your beak down to create a balance where you're expending boost constantly, but the slight downward direction is also charging your boost gauge giving you the maximum amount of unwasted speed. The better you are at finding that balance, the further you'll go.
- This space is very much like 2, but you'll never want to be at full boost gauge because then anything you'd normally do to gain boost gauge is a waste. Ideally, you'll want to stay out of this region of your boost bar when travelling long distances.
Through the above steps, you'll find yourself starting from a high location and slowly tipping down balancing your bar until you reach the water. Maintaining a little bit of boost you'll keep your eye out for an upward gust and use the last of your boost, even if it's slightly out of your way, to gain height and repeat the process.
Dodge and Weave in The Falconeer
In the heat of battle you need to make sure that you are not only dealing damage to enemy troops, but also doing what you can to protect yourself. The game already teaches you some maneuvers such as rolling to the left and right; not only will a roll help you avoid fire, but it also speeds up how quickly you turn around. This can be useful when you get locked in a spiral of movement with your opponent. The other tools you can use to help make tight movements is by slowing down and breaking every now and then.

Breaking can allow you to let your enemies get past you so you can take a better shot at them, give you a chance to faster pivot on the spot, and can also be used to dive down quickly helping you avoid fire. While you'll lose some momentum unlike doing a roll you won't lose any of your boost meter, this makes it a much more useful maneuver that can be pulled off at any time.
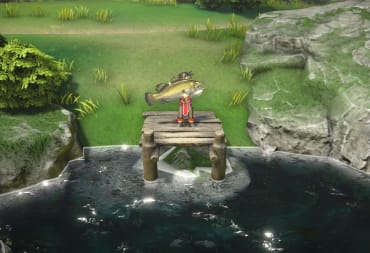
While you're taught that diving will allow you to pick up mines and other cargo from the water by repeatedly diving into the water, you'll waste your boost gauge but can use it to avoid some fire. There seems to be some invincibility when diving underwater that you can use for your advantage. Each bird has their own regeneration stat, even in the middle of battle, you'll be constantly slowly recovering health; if you're low on health and don't mind cheesing your way to a bit more, you can repeatedly dive into the water, maximizing the amount of time you're unable to be hit while you regenerate your health.
The Falconeer Needs Bigger Guns
While this one might seem obvious, with only a handful of guns in the game at all, you're going to want to quickly upgrade the one you start with. You'll be firing and missing a lot of shots, and while the weapons do have different damage ratings and rates of fire, it doesn't really matter to look at their stats. You just want to get the bigger and better gun. The second gun is available for 6,500 splinters, and the next weapon is a bit over 13k splinters.
There isn't a particular shop that you'll find the better guns in, and normally the next best one can be found in the shop of your base, so you at least don't need to go out of your way to find anything. Each mission you complete you'll be rewarded with 300 to 1,000 splinters on average, so it will be a bit of a grind but will completely pay off for you.
Items Can Give The Falconeer an Edge in Battle
If you find yourself hitting a wall with your latest mission, there's a number of things you can do, but the easiest is going to be buying an item that will either power up your bird or will give you a second chance.

At almost any store you can buy mutagens, which enhance your falcon's stats. You can get them to increase your agility, stamina, regeneration, and health. In a battle, your agility and speed isn't going to make too much of a difference, but increased health and regen will keep you in the battle for way longer. You can only purchase six mutagens for your bird at a time, but once purchased they're equipped until you choose to remove them yourself.
Another worthwhile item to get is the Healing Charm. This item will allow you to recover 50% health instead of dying once per takeoff. While you can only have one on you at a time and it's consumed after taking off, you can return to the Sacred Steps (in the north) or Red Mouth Forge (in the south) where they're guaranteed to be selling them. There's a more expensive version of the Healing Charm that will recover all of your health that you could also purchase. Health items like this are extra effective if the mutagens that you've purchased increase your maximum health, so keep that in mind!
Thin the Herd to Stay Safe
Going into a battle, it can be hard to decide what you'll be wanting to prioritize. Do you want to be taking out the large airships for fear they'll bomb you out of the sky? or is it worth your time taking on the more nimble bugs? The answer will always be take on things of your size or smaller, and then worry about anything larger in ascending scale.
While the bugs and other birds don't do too much damage on their own, if you leave 3-4 of them in the sky while you take on a tankier opponent, that small damage can escalate very quickly. I've failed far more missions from not paying attention to bugs as my health slowly slips away compared to being able to focus on taking out a last surviving dragon.

Pull Out Your Controllers If You're Playing on PC
The Falconer greets you on boot that it is "Optimized for Controller and Flightstick." While you can play the whole game using a keyboard and mouse, you won't be able to get as precise movements and motions using digital inputs such as the WASD keys. A workaround that has been implemented is that the mouse can control both your aiming reticle as well as the camera, but it quickly causes issues with the bird moving one way and your camera going another. It's highly recommended that you pair one of whatever controller you likely already have lying around your house to your computer to get the best experience playing The Falconeer.
What did you think of these tips? Is there anything you'd like to add for a new player trying out The Falconeer? Do you have a more efficient way of getting around the Ursee?
Have a tip, or want to point out something we missed? Leave a Comment or e-mail us at tips@techraptor.net

Andrew has written Video Game and Entertainment news, reviews, and guides for 10+ years. As Senior Content Manager, he assists in creating and editing… More about Andrew