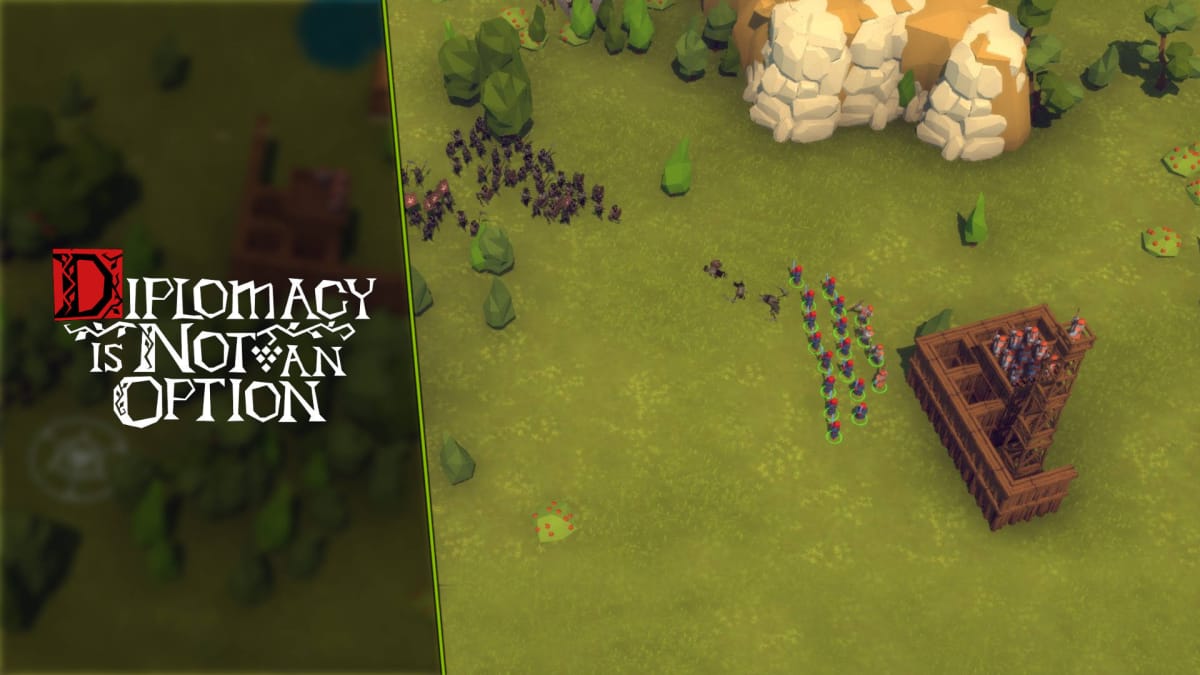
In this Diplomacy is Not an Option Guide for Beginners, I'll tell you what you need to know to get started with this Early Access PC RTS from Door 407.
What is Diplomacy is Not an Option?
Diplomacy is Not an Option is a real-time strategy game created by game developer Door 407. It's not your daddy's RTS game, though: battles can (and will) feature thousands of enemies attacking your town... and it's up to you to defend it.
As with most RTS games, Diplomacy is Not an Option challenges you to balance the needs of your economy against your military needs. Where this differs is in the predictability of enemy attacks -- while you might have to fend off hundreds of troops, you'll at least know where they're coming from and when. That makes this game (at least in the early portions) a little more oriented towards players with a defensive style.
How Hard is Diplomacy is Not an Option?
As far as RTS games go, Diplomacy is Not an Option is one of the more difficult ones out there. I've beaten Starcraft 2 on Brutal -- I'm certainly not one to shy away from a challenge -- but even the easiest difficulty will test you. Be prepared to lose again and again until you get a feel for the game!
Diplomacy is Not an Option Guide for Beginners - Basic Mechanics
Since this game isn't quite your typical RTS, I'm going to spend a bit of the Diplomacy is Not an Option Guide for Beginners explaining the mechanics. I won't be covering every single button on the UI, but I will give you a general idea of what you're looking at.
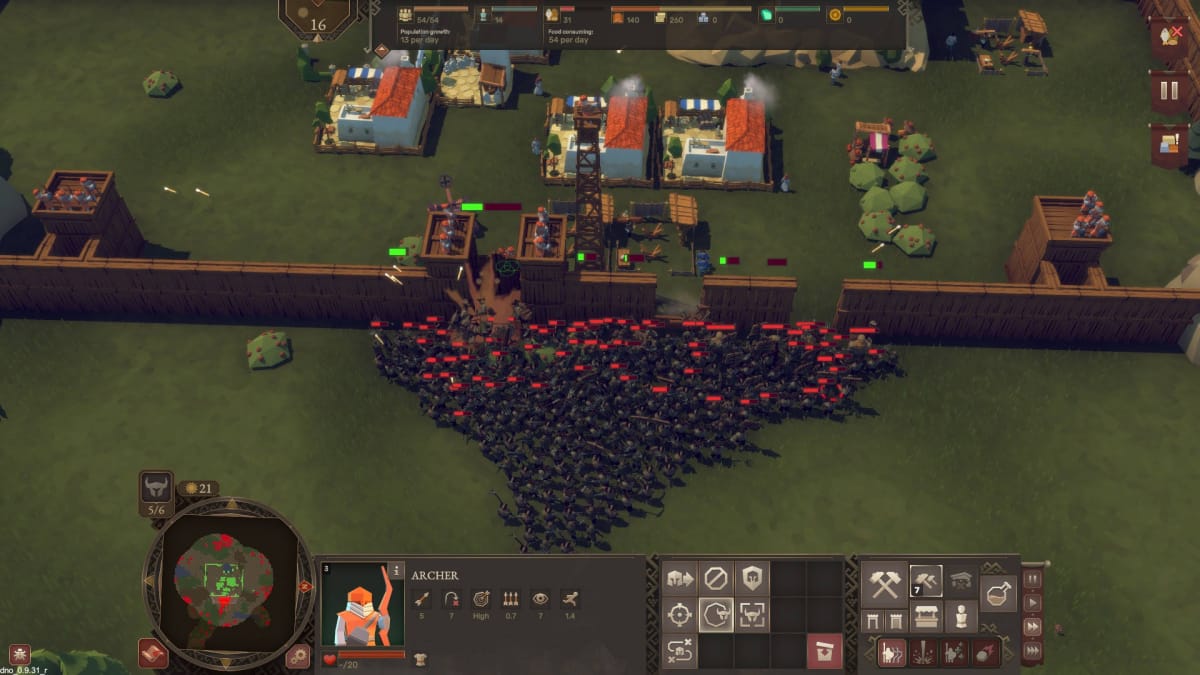
Before we get into specifics, take a look at the above screenshot. See those little banners on the top right? Those are your current notifications. In this case, it's warning me that I'm running low on food, the game is paused, and my buildings are under attack.
Notifications aside, there's a lot going on with the UI. Let's go over the more important bits!

1. Time & Day
The current Day is represented by the number in this area. The time is represented by a moving sun and moon in the background. In this image, it is Day 15 and it is almost midday.
Paying attention to the Day and Time is important. Waves of enemies will arrive on a specific Day, so you'll know exactly how long you have to prepare for battle.
2. Population, Population Growth, & Free Workers
As you might expect, your Population is the measure of how many people you have living in your Town and the maximum number of people that can live there. Population Growth is the number of people you can expect to arrive the following morning; this depends on what buildings you've built and whether or not you have any free space in your Houses.
The blue bar on the right is your Free Workers -- people who are not working at any particular job. You can't build buildings that require workers or train new military units unless you have free Population.
3. Food Consumption & Surplus
Your town's Food is represented by a very simple bar. You can store a total of 100 Food by default and that can be expanded by building granaries. A brown bar will show how much surplus food you have and the red bar shows how much will be consumed the next morning. If you don't see a brown bar, you might run out of food the next day.
Directly below the status bar is something that shows you how much food is consumed per day. Use this as a guide to ensure that you have enough food production facilities to support your population!
4. Storage
This is the part of the Diplomacy is Not an Option Guide for Beginners where we really start to stand out from a typical RTS -- you don't have unlimited storage. Your Town Hall can store only so much Wood, Stone, and Iron. These three items share storage space -- reach the limit, and you won't be able to gain any more resources.
Fortunately, you can increase your limits by building Storage buildings. These can be restricted to only allow Wood, Iron, or Stone based on your needs.
5. Soul Crystals and Gold
Soul Crystals are used to power your Magic. You can get Soul Crystals by destroying enemy buildings. Magic can easily turn the tide of a battle, so you should be using your troops to destroy the smaller enemy camps whenever you can.
Gold, on the other hand, is a little trickier to get. You'll first have to upgrade to a Town Hall II; then, you'll have to build a Market and sell excess goods there. Gold Coins are needed for some of the more powerful units and upgrades in the game.

6. Wave Number
This counter shows which Wave you're on during a Campaign mission. As you might expect, later Waves are more difficult.
7. Next Wave Countdown
This will show which Day a Wave is arriving on. When you're getting close to the Day, the counter will change to a countdown in minutes and seconds (as seen in the above image). When this clock runs out, the enemy will start moving towards your town!
8. Wave Spawn Point
The horned helmet symbol on the minimap shows you where the next enemy Wave will spawn. Later Waves can spawn at multiple points on the map.
9. Active Menu
This is the area of the UI that shows you options for your current menu. In the above image, it's showing the build menu. Selecting a unit will show various orders that you can give.
10. Menu
The core menu gives you several options, including:
- Build
- Repair
- Close All Gates
- Open All Gates
- Market
- Employment Statistics
- Research
11. Pause & Game Speed
This is where you can pause the game or change its speed. You can also pause the game by pressing Space, increase the game speed by pressing = on the number row, and decrease the game speed by pressing - on the number row.
12. Magic Spells
This is where you access your Magic. You have four options:
- Summon (2 Soul Crystals) - 5 controllable Dark Knights are summoned to fight for 120 seconds.
- Astral Ray (5 Soul Crystals) - A beam follows your cursor and does high damage over time to any enemies caught underneath it. You can accidentally damage your own units with it, so be careful!
- Mass Healing (2 Soul Crystals) - Heals all allies in the radius for 100 health.
- Meteor (10 Soul Crystals) - Drops a Meteor that does 500 damage to everything caught in its radius -- and yes, that counts your stuff, too.
You can only use Summon by default. Unlocking the other spells requires you to build and upgrade an Obelisk.

13. Berry Bush
Berry Bushes can supply you with food if you build a Berry Picker's House nearby. Berry Bushes can and do run out of food, so try not to build the Berry Picker's House near a group of bushes.
14. Fish
Harvesting Fish requires a Fisherman's Hut. As with Berries, these will eventually run out. When that happens, destroy your Fisherman's Hut and build another.
15. Trees
Wood fuels much of your early-game construction. Build a Lumbermill I near some trees to collect Wood.
16. Iron
Iron is only used once you've upgraded to a Town Hall II. It's used for a handful of building upgrades, but it's most often used to build medium-tier units like Spearmen and Crossbowmen.
17. Stone
Stone is used for a handful of early-game constructions and most mid-game buildings.

Enemy Camps
There are essentially two kinds of enemy camps in the game. You'll find lone cabins in the wilderness with a handful of guards; these can be easily destroyed to get Soul Crystals.
Larger enemy camps, on the other hand, are a nightmare. They'll have dozens (if not hundreds) of soldiers, and they may have siege weapons as well. Do not venture into them carelessly!

Corpses and Graveyards
Your dead units don't just disappear -- they leave a corpse behind, and corpses can spread disease. You'll need to build an Undertaker to deal with the corpses and a Graveyard to bury them in.
If a disease does manage to spread, your only hope will be the Hospital. You can't even build a Hospital without a Town Hall II and your resources can be used in better ways; make sure you have enough Undertakers and Graveyards to properly bury the dead so you can avoid this problem entirely.

Carts
Carts are items in the world that will give you a one-time boost of resources. They're highly useful for quickly expanding in the early game or dealing with a resource shortage later in the game.
There are three different types of Carts, each of which represents one of the core resources in the game:
- Wood Cart - Instantly gives you 40 Wood.
- Stone Cart - Instantly gives you 15 Stone.
- Food Cart - Instantly gives you 20 Food.

Diplomacy is Not an Option Beginner's Guide - Early Campaign Walkthrough
Now that you have an understanding of the basic mechanics, we're going to close out this Diplomacy is Not an Option Guide for Beginners with a walkthrough of the early Campaign.
We'll be doing this first campaign mission on "A Walk in the Park" difficulty. Higher difficulties will change how many units you get in the beginning and how tough the overall experience is, and you definitely don't want to attempt to play this game on a harder difficulty the first time around.
There's one final note before we proceed -- maps in this game are randomly generated. If you don't like the look of the land, restart the level and see if you get something more to your liking. With that said, let's get to it!
Wake-Up Call
- Repulse All Enemy Attacks (0/4)
- Kill All Rebels in the Valley
Once you're given the mission description, hit "OK" and immediately pause the game. Build the following buildings right away:
- Berry Picker's House
- Fisherman's Hut
- Lumbermill I
- Barracks
Next, move the one Catapult you start with near the castle and set it to "Hold" on the menu. Then, select all of your troops and start exploring the surrounding area. Destroy any enemy buildings you find and collect Soul Crystals, but do not advance into the larger enemy camps if you come across them -- you don't yet have the forces to take them on.
You will likely come across carts of Food, Wood, or Stone. Leave the Food carts alone for now, but collect any Wood or Stone carts. Pay attention to your Wood supply -- once you have at least 25 Wood, build your first House near your Townhall I.
When Day 2 begins, create 5 Swordsman and have them join your main group of soldiers. Build a second House. Continue to scout the map and take out any small camps of enemies.
On the beginning of Day 3, we're going to expand again slightly. Build a Cemetary and a Gravedigger's House near your Townhall I. Partway into Day 3, you're going to be warned about an incoming enemy attack. Build a Wooden Tower and Watchtower that will block the incoming enemy attack and surround these two structures with a wall on three sides.
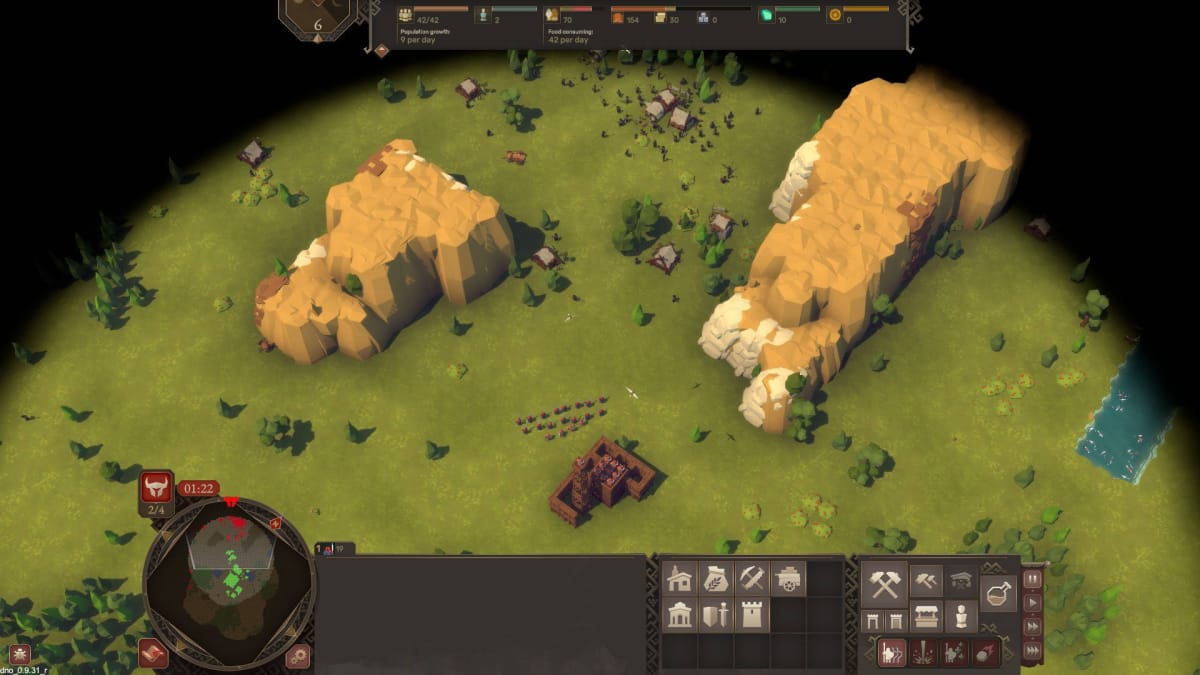
Put an Archer in the Watchtower and put all of your other surviving Archers into the Wooden Tower. Make more Archers until you have a total of 9 in the Wooden Tower, then position your Swordsman close to the tower. Let the enemy come to you -- most, if not all, of your Swordsmen will survive this initial attack.
Once the battle is won, it's time to expand again! Build a Stone Mine I and a third House. Once the Stone Mine I is built, collect 5 Stone and then lower the number of Workers to just 1 -- you're not going to need very much Stone for this first campaign mission.
Next, erect the following buildings, in order:
- Granary I
- Berry Picker's House.
- A fourth House
Continue to gather resources until the start of Day 6 -- you'll once again be warned about an incoming enemy attack, this time number 2/4. Create a total of 20 Swordsmen and prepare to intercept this attack with only melee units.
After fighting Battle 2/4, you should lose anywhere from 5-10 Swordsmen in total. Replenish their number back up to 20 at the Barracks I. Build a fifth House, and then focus on saving up at least 80-100 Wood.
You'll find out where the third attack is coming from on the Beginning of Day 9. Build another Wooden Tower and Watchtower to block the way. Make 4 Archers and 10 additional Swordsmen at the Barracks I. Remove 6 Archers from the first Wooden Tower you built earlier by right-clicking on their portraits. Then, take this group of 10 Archers and put them in your newly-build Wooden Tower and Watchtower. Line up your 30 Swordsmen in front of the towers and get ready to repel this attack -- and keep in mind that you might have to move your Swordsmen to prevent any enemies from running past.
Wave 3/4 will likely cost you anywhere from 10-15 Swordsmen after the battle. On the dawn of Day 11, build the following, in order:
- A second Lumbermill I
- A sixth House
- A seventh House
Remove all of your Archers from the Wooden Towers and have them gather near the Town Hall I; make sure to leave 1 Archer in each of the two Watchtowers you've built. This should make a group of 12 Archers.
On Day 11, you will see some intermittent enemy attacks; use your remaining Swordsmen to intercept them. Create 8 more Archers to bring your group of Archers near the Town Hall I to a total of 18.
When Day 12 arrives, you will be warned of two incoming enemy attacks. Don't worry about intercepting them with Wooden Towers you originally built -- they're going to be coming from every direction. Your main focus now is to protect your Town Hall I.
Build a Wooden Tower on each side of the Town Hall I and fill both towers with your 9 Archers each. If you can, build walls to protect the Wooden Towers -- and ideally, try to surround your entire Town Hall with Walls if you can. Then, start making as many Swordsmen as possible. Have all of your Swordsmen in one large group near the Town Hall I and be prepared to move them around to wherever you might need them most. Again, don't worry about any building other than the Town Hall I -- you will either win or lose this campaign mission depending on whether or not you can defend it.
When the attack begins, it's time to use all of those Soul Crystals you've gathered. Use the Summon spell to create a group of Dark Knights wherever a large group of enemies is not fighting your Swordsmen. Try to keep your melee units together as best you can and move them around to fight the largest group of enemies. However things play out, you will likely lose most (if not all) of your Swordsmen.
The Archers (and the Catapult you have parked near the Town Hall I) will continually fire on the attackers during combat. All of the troops you've gathered should be enough to win the day.
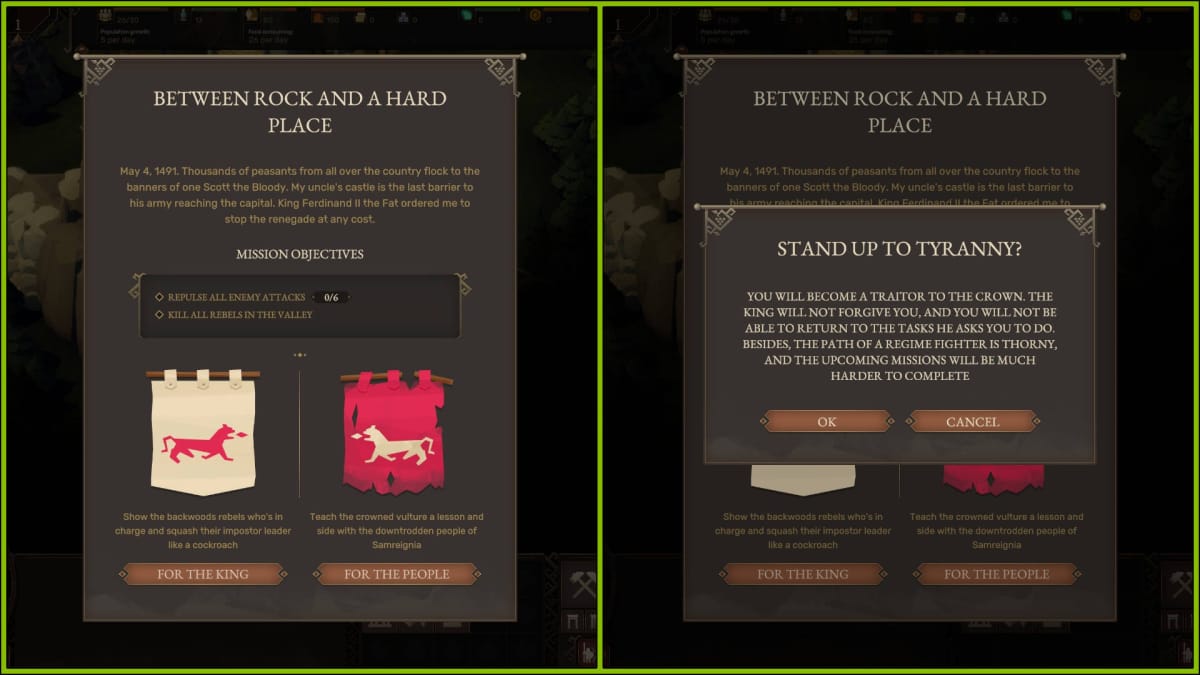
Continuing Your Adventure
And that's it for our Diplomacy is Not an Option Guide for Beginners! Unfortunately, the initial Early Access release only has two Campaign missions to go through.
My walkthrough of the first Campaign mission was deliberately designed to go at a more leisurely pace. Once you've beaten it, it may be worthwhile to experiment and try new strategies. You can certainly expand more aggressively and field stronger units against the oncoming attacks if you're ambitious (and fast enough to pull it off).
I'll leave it to you to figure out how to play the second mission, but take note of this side-by-side comparison -- this is my town before and after the final epic attack:
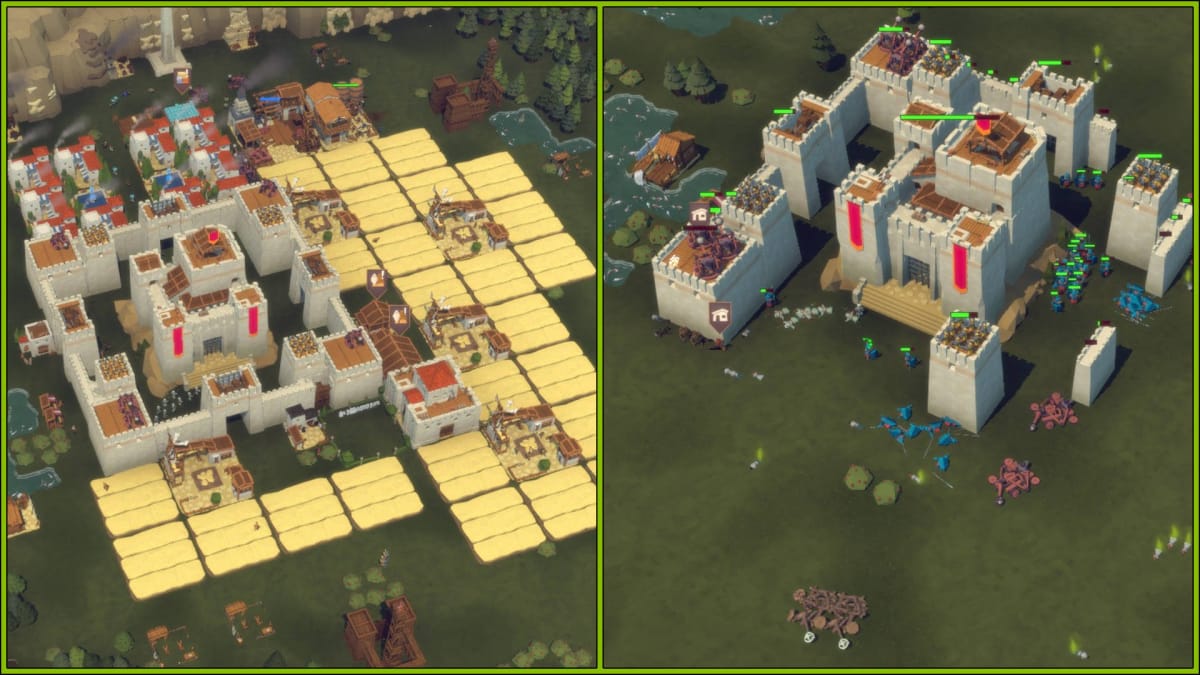
What I thought was a robust defense was barely enough to take on the oncoming enemy hordes -- and this was on "A Walk in the Park" difficulty! In total, I killed just over 4,000 enemy soldiers throughout this mission.
I made more than my fair share of mistakes, but I did come away with some lessons. Firstly, expand your food supply and army as rapidly as you can. Secondly, rely on walls and towers to defend your Town Center -- everything else is expendable in the final battle. Finally, deal with siege weapons right away, either by using your soldiers or magic -- those walls won't count for much if a Catapult gets too close!
Have a tip, or want to point out something we missed? Leave a Comment or e-mail us at tips@techraptor.net
